EPSON PowerLite Home 10 Projector
Follow these steps to replace the lamp:
1.Press the P Power button to turn the projector off, then wait for the P power light to stop flashing.
2.Unplug the power cord and disconnect any cables.
3.If the projector has been on, let it cool for at least one hour.
4.Turn the projector
7.Carefully insert the new lamp and tighten the retaining screws.
8.To replace the lamp cover, insert the tabs and then snap the cover into place.
5.Use a small screwdriver to loosen the two screws securing the lamp; you can’t remove the screws.
Note: Make sure the lamp cover is securely fastened. The ![]()
![]() warning light flashes and the projector lamp won’t turn on if the cover is open.
warning light flashes and the projector lamp won’t turn on if the cover is open.
After replacing the lamp, you need to reset the lamp timer, as described in the next section.
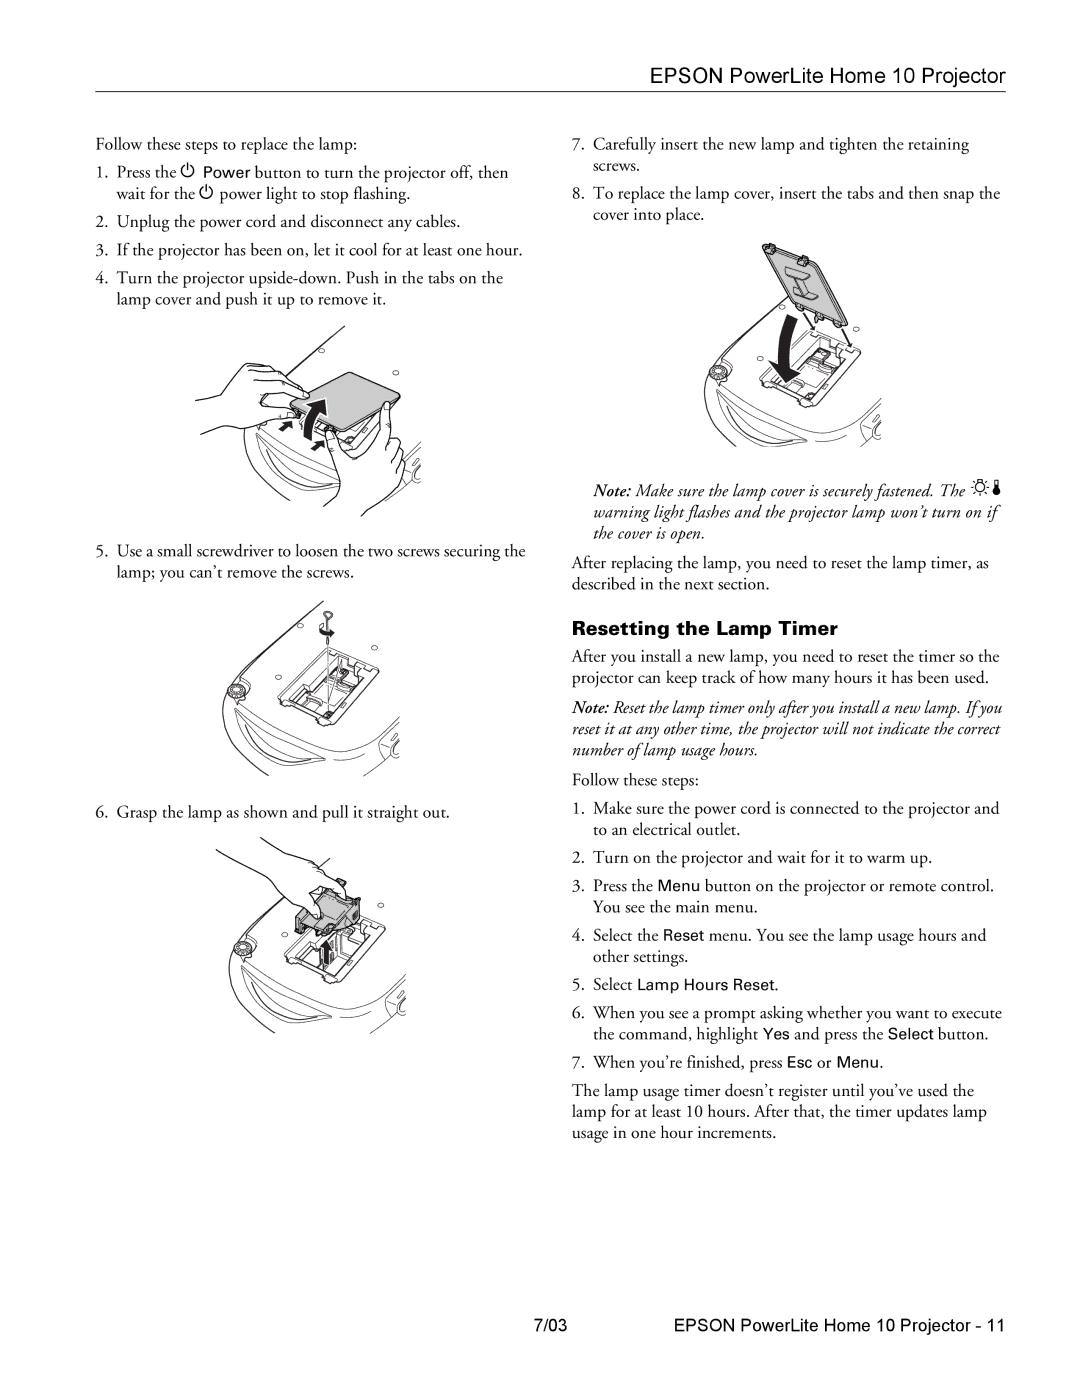
6. Grasp the lamp as shown and pull it straight out.
Resetting the Lamp Timer
After you install a new lamp, you need to reset the timer so the projector can keep track of how many hours it has been used.
Note: Reset the lamp timer only after you install a new lamp. If you reset it at any other time, the projector will not indicate the correct number of lamp usage hours.
Follow these steps:
1.Make sure the power cord is connected to the projector and to an electrical outlet.
2.Turn on the projector and wait for it to warm up.
3.Press the Menu button on the projector or remote control. You see the main menu.
4.Select the Reset menu. You see the lamp usage hours and other settings.
5.Select Lamp Hours Reset.
6.When you see a prompt asking whether you want to execute the command, highlight Yes and press the Select button.
7.When you’re finished, press Esc or Menu.
The lamp usage timer doesn’t register until you’ve used the lamp for at least 10 hours. After that, the timer updates lamp usage in one hour increments.
7/03 | EPSON PowerLite Home 10 Projector - 11 |
