B
CA
Fig. 15
A
Fig. 16
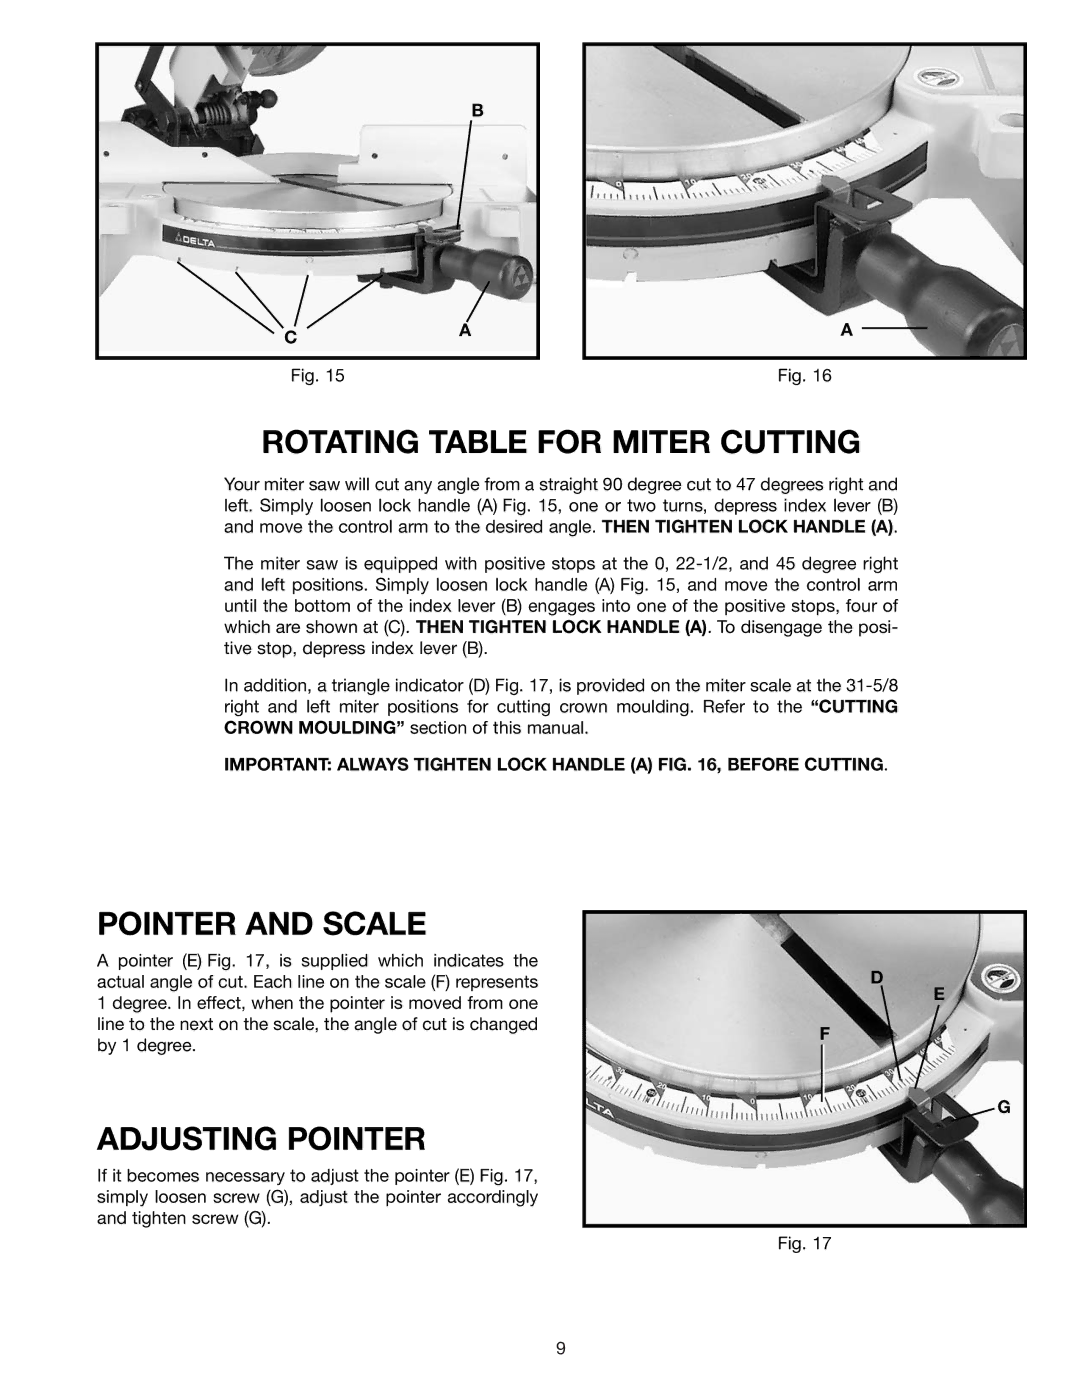
ROTATING TABLE FOR MITER CUTTING
Your miter saw will cut any angle from a straight 90 degree cut to 47 degrees right and left. Simply loosen lock handle (A) Fig. 15, one or two turns, depress index lever (B) and move the control arm to the desired angle. THEN TIGHTEN LOCK HANDLE (A).
The miter saw is equipped with positive stops at the 0,
In addition, a triangle indicator (D) Fig. 17, is provided on the miter scale at the
IMPORTANT: ALWAYS TIGHTEN LOCK HANDLE (A) FIG. 16, BEFORE CUTTING.
POINTER AND SCALE
A pointer (E) Fig. 17, is supplied which indicates the actual angle of cut. Each line on the scale (F) represents 1 degree. In effect, when the pointer is moved from one line to the next on the scale, the angle of cut is changed by 1 degree.
ADJUSTING POINTER
If it becomes necessary to adjust the pointer (E) Fig. 17, simply loosen screw (G), adjust the pointer accordingly and tighten screw (G).
D
E
F
G
Fig. 17
9