Bracket. Do not separate the Hook and Loop, Keep them together just like they were when delivered. Remove the adhesive backing from the Hook portion of the Velcro. Keep it attached to the Loop portion. Carefully install the Bridge Bracket in its proper location at the left edge of the housing, as shown above. Keep it straight and press down firmly all along the edges. When you lift up the Bridge Bracket, after pressing it down, the Hook Velcro will remain in place on the printer.
Keep the Bridge Bracket off for now.
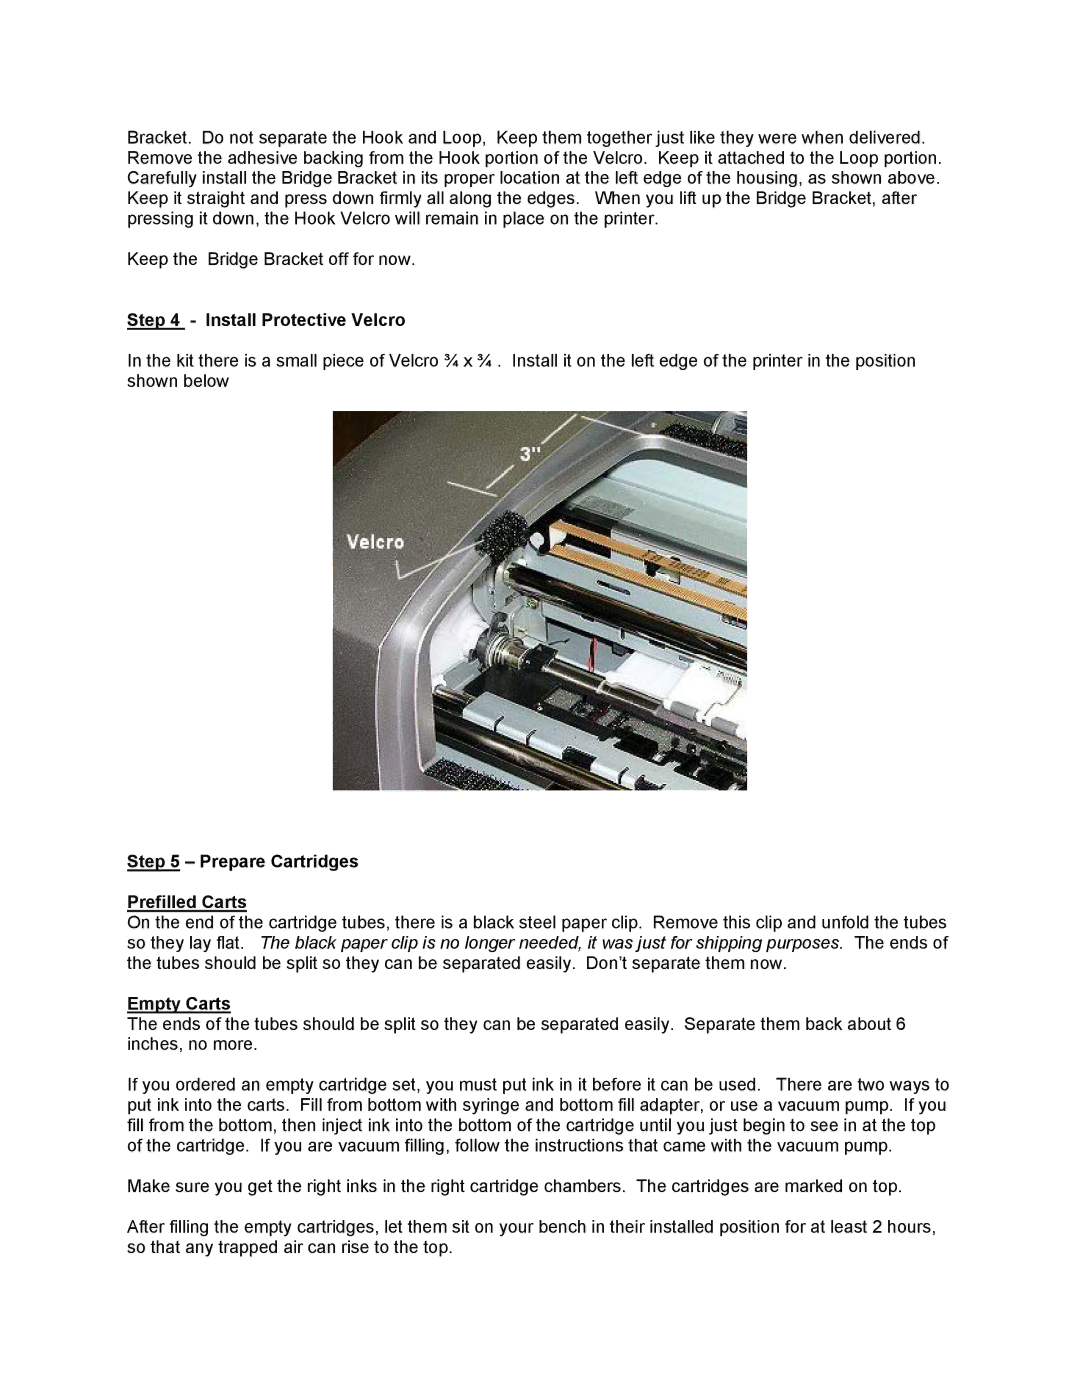
Step 4 - Install Protective Velcro
In the kit there is a small piece of Velcro ¾ x ¾ . Install it on the left edge of the printer in the position shown below
Step 5 – Prepare Cartridges
Prefilled Carts
On the end of the cartridge tubes, there is a black steel paper clip. Remove this clip and unfold the tubes so they lay flat. The black paper clip is no longer needed, it was just for shipping purposes. The ends of the tubes should be split so they can be separated easily. Don’t separate them now.
Empty Carts
The ends of the tubes should be split so they can be separated easily. Separate them back about 6 inches, no more.
If you ordered an empty cartridge set, you must put ink in it before it can be used. There are two ways to put ink into the carts. Fill from bottom with syringe and bottom fill adapter, or use a vacuum pump. If you fill from the bottom, then inject ink into the bottom of the cartridge until you just begin to see in at the top of the cartridge. If you are vacuum filling, follow the instructions that came with the vacuum pump.
Make sure you get the right inks in the right cartridge chambers. The cartridges are marked on top.
After filling the empty cartridges, let them sit on your bench in their installed position for at least 2 hours, so that any trapped air can rise to the top.