Step 6 – Install Cartridges
Use a flat blade screwdriver and remove the Epson cartridge hold down clamps, black and color. Insert the screwdriver blade at the hinge point and twist. The clamps will come right off, without any damage. Keep these in a safe place, you may need them in the future.
Remove the original Epson cartridges from the printer (power is disconnected). Set them aside on some paper towel. Do not throw away, you may need them someday. Wrap in a
Put the MIS CFS cartridges into the printer. Carefully align them and make sure they go down all the way. They should fit tight. Once you put them in and they are down all the way, DO NOT LIFT UP AGAIN.
Push the cartridges to the far right side of the printer. Put some alcohol on the tubes so they will fit into the Tube Support Bracket. Adjust the tubing so that all excess slack is taken up, but not to the point that it starts to pull the cartridges away from the far right hand position.
After the tubing is in place in the Tube Support Bracket, move the carts by hand from left to right. You should be able to get to the far right and far left positions without any restrictions.
For extra security, you can install the tie wraps to hold the cartridges in place. Long term this is a good way to prevent the carts from rising up and giving you red light problems.
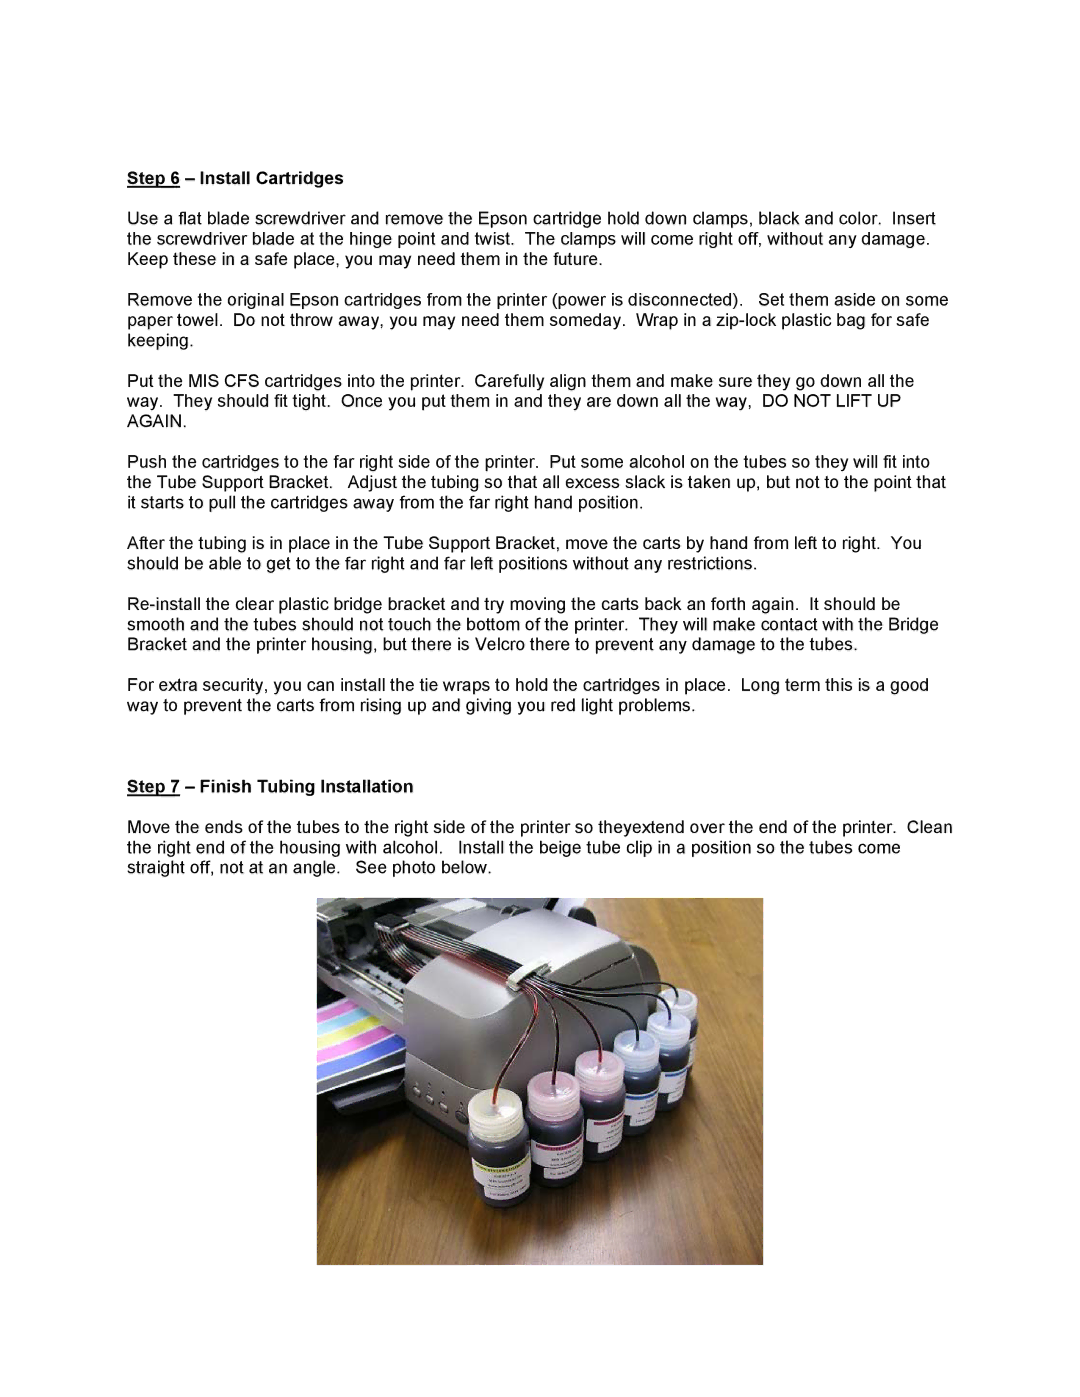
Step 7 – Finish Tubing Installation
Move the ends of the tubes to the right side of the printer so theyextend over the end of the printer. Clean the right end of the housing with alcohol. Install the beige tube clip in a position so the tubes come straight off, not at an angle. See photo below.