4.3) Printer Self Test
This is to test whether the printer is working properly or not and also checks the printing quality, firmware version, and DIP switch settings
1.Hold the ONLINE (*) button first and then turn on the power at the same time, release the button after around 1 second.
2.If the printer is working properly, it should then automatically print the self- testing result that indicating the firmware version number, printer connection type, English alphanumeric characters, and few Taiwan fonts.
3.The test print will be ended with the following message:
*** COMPLETED ***
Note: (*) For
4.4) Driver Installation
1.To install the
2.In the
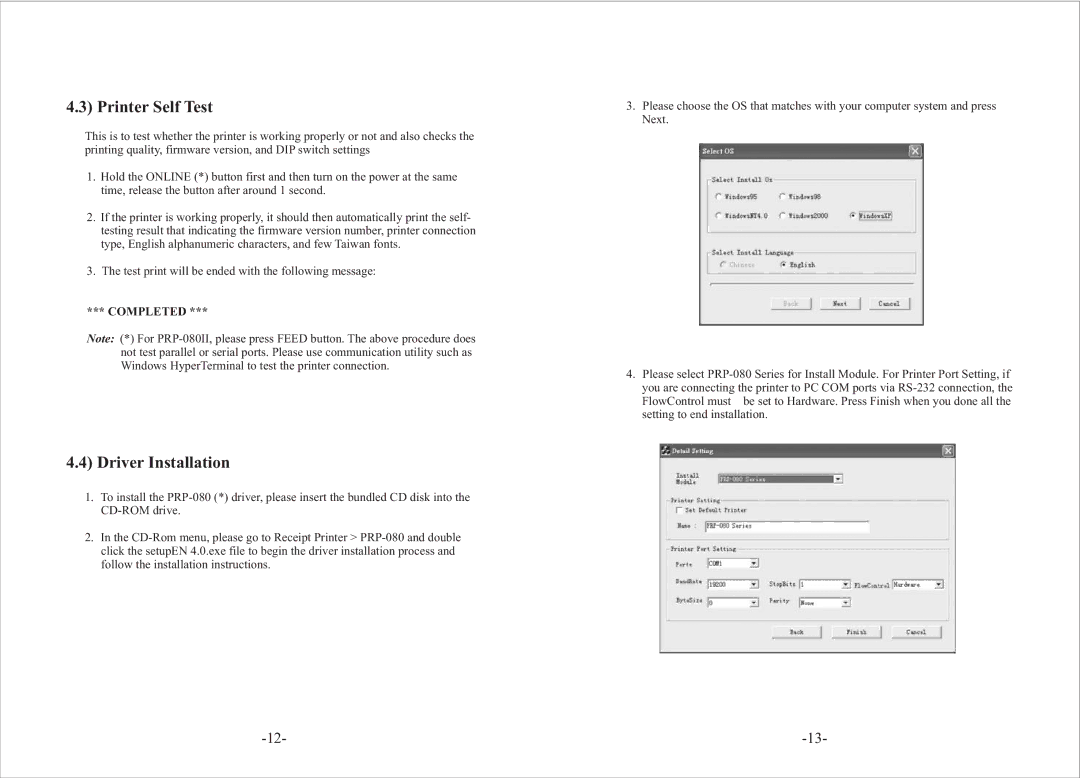
3.Please choose the OS that matches with your computer system and press Next.
4.Please select
FlowControl must be set to Hardware. Press Finish when you done all the setting to end installation.