English
Installing a Ribbon
Use the EPSON
1.Turn the printer on using the power switch on the left side.
2.Press the RELEASE button (the RELEASE LED lights). This puts the printer in the paper release mode.
3.Turn the printer off.
![]() CAUTION:
CAUTION:
Perform the steps above to make sure the printer is in the paper release mode before you install or remove a ribbon cassette.
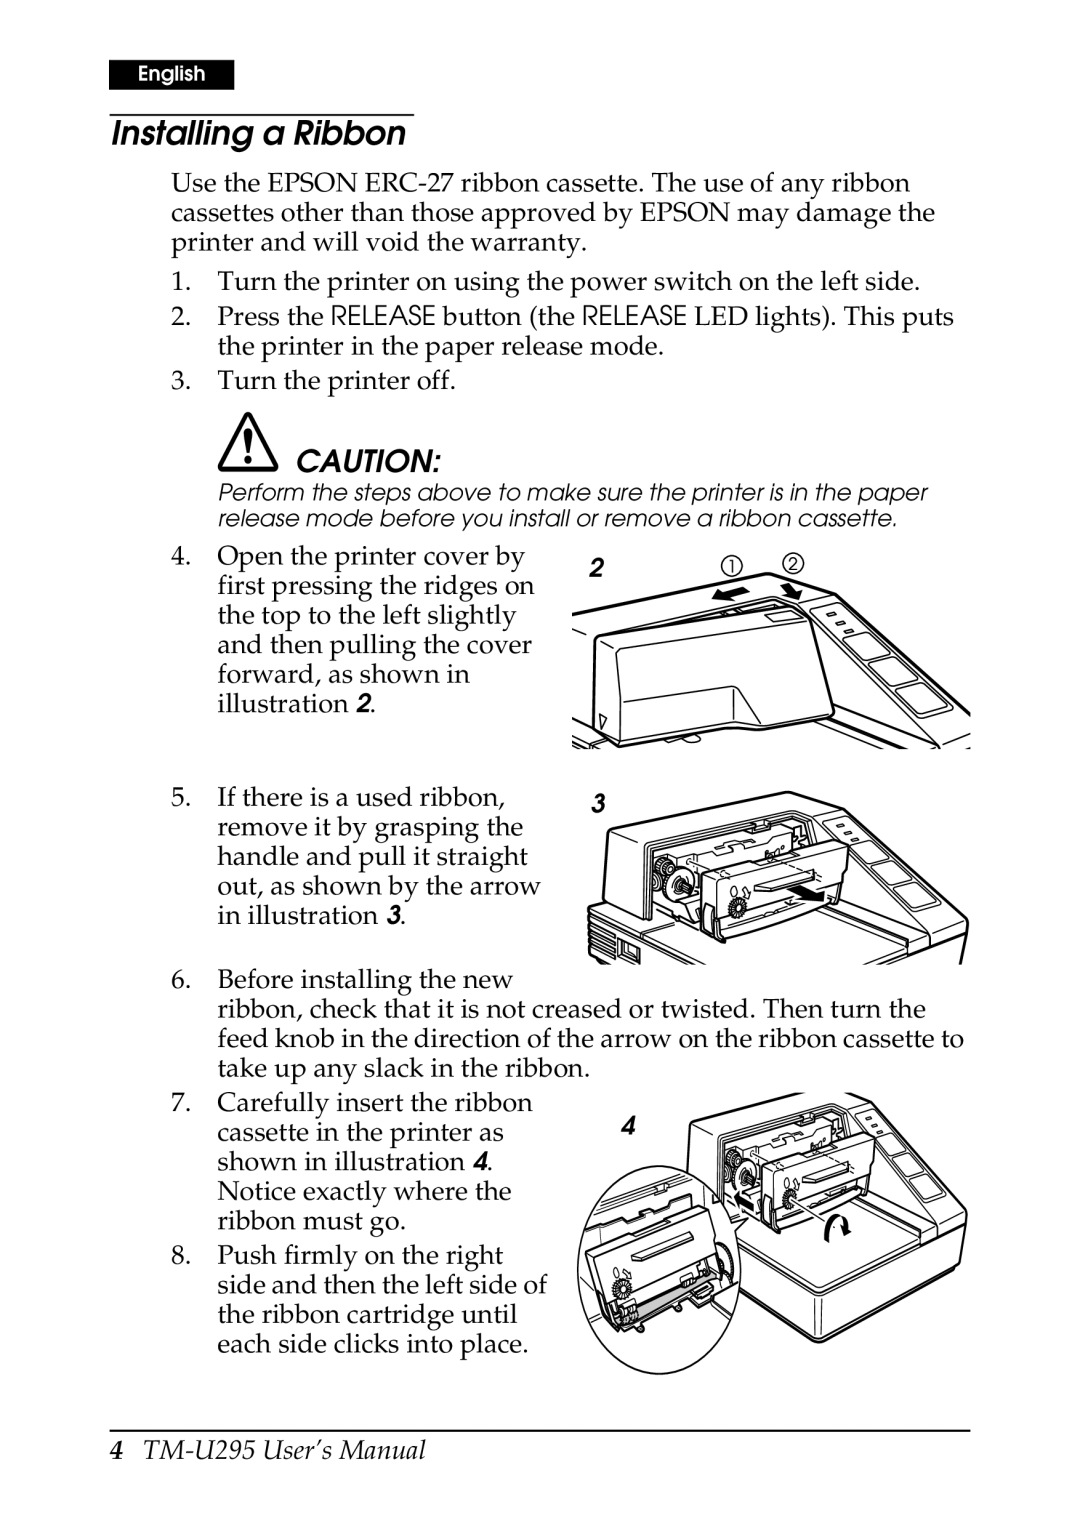
4. | Open the printer cover by | 2 |
| first pressing the ridges on | |
|
| |
| the top to the left slightly |
|
| and then pulling the cover |
|
| forward, as shown in |
|
| illustration 2. |
|
5. | If there is a used ribbon, | 3 |
| remove it by grasping the |
|
handle and pull it straight out, as shown by the arrow in illustration 3.
6.Before installing the new
ribbon, check that it is not creased or twisted. Then turn the feed knob in the direction of the arrow on the ribbon cassette to take up any slack in the ribbon.
7.Carefully insert the ribbon
cassette in the printer as | 4 |
shown in illustration 4. Notice exactly where the ribbon must go.
8. Push firmly on the right side and then the left side of the ribbon cartridge until each side clicks into place.