English |
Start Here
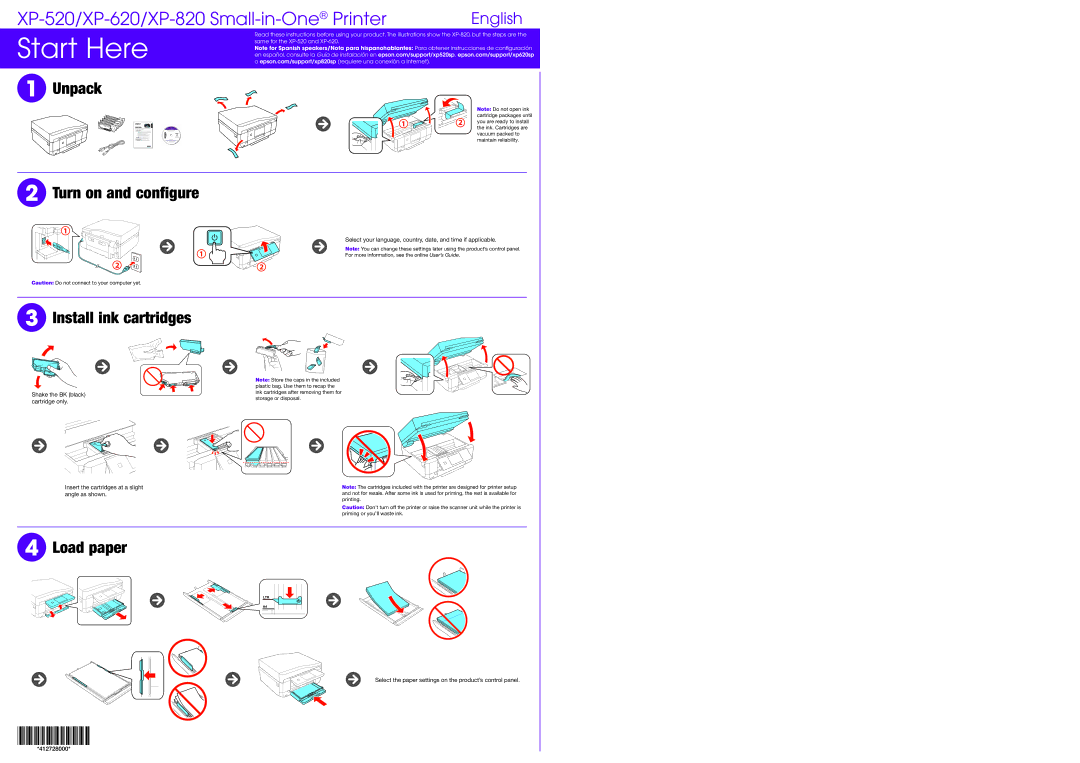
1 Unpack
Read these instructions before using your product. The illustrations show the
Note for Spanish speakers/Nota para hispanohablantes: Para obtener instrucciones de configuración en español, consulte la Guía de instalación en epson.com/support/xp520sp, epson.com/support/xp620sp o epson.com/support/xp820sp (requiere una conexión a Internet).
|
| Note: Do not open ink | |
1 | 2 | cartridge packages until | |
you are ready to install | |||
|
|
the ink. Cartridges are vacuum packed to maintain reliability.
2 Turn on and configure
1
1
2 | 2 |
Caution: Do not connect to your computer yet.
Select your language, country, date, and time if applicable.
Note: You can change these settings later using the product’s control panel. For more information, see the online User’s Guide.
3 Install ink cartridges
Shake the BK (black) cartridge only.
Insert the cartridges at a slight angle as shown.
Note: Store the caps in the included plastic bag. Use them to recap the ink cartridges after removing them for storage or disposal.
Note: The cartridges included with the printer are designed for printer setup and not for resale. After some ink is used for priming, the rest is available for printing.
Caution: Don’t turn off the printer or raise the scanner unit while the printer is priming or you’ll waste ink.
4 Load paper
Select the paper settings on the product’s control panel.
