GROUNDING
This appliance must be grounded. In the event of malfunction or breakdown, grounding will reduce the risk of electric shock by providing a path of least resistance for electric current. This appliance is equipped with a power cord having an
WARNINGS
-Improper connection of the
-Do not modify the plug provided with the appliance: if it will not fit the outlet, have a proper outlet installed by a qualified electrician.
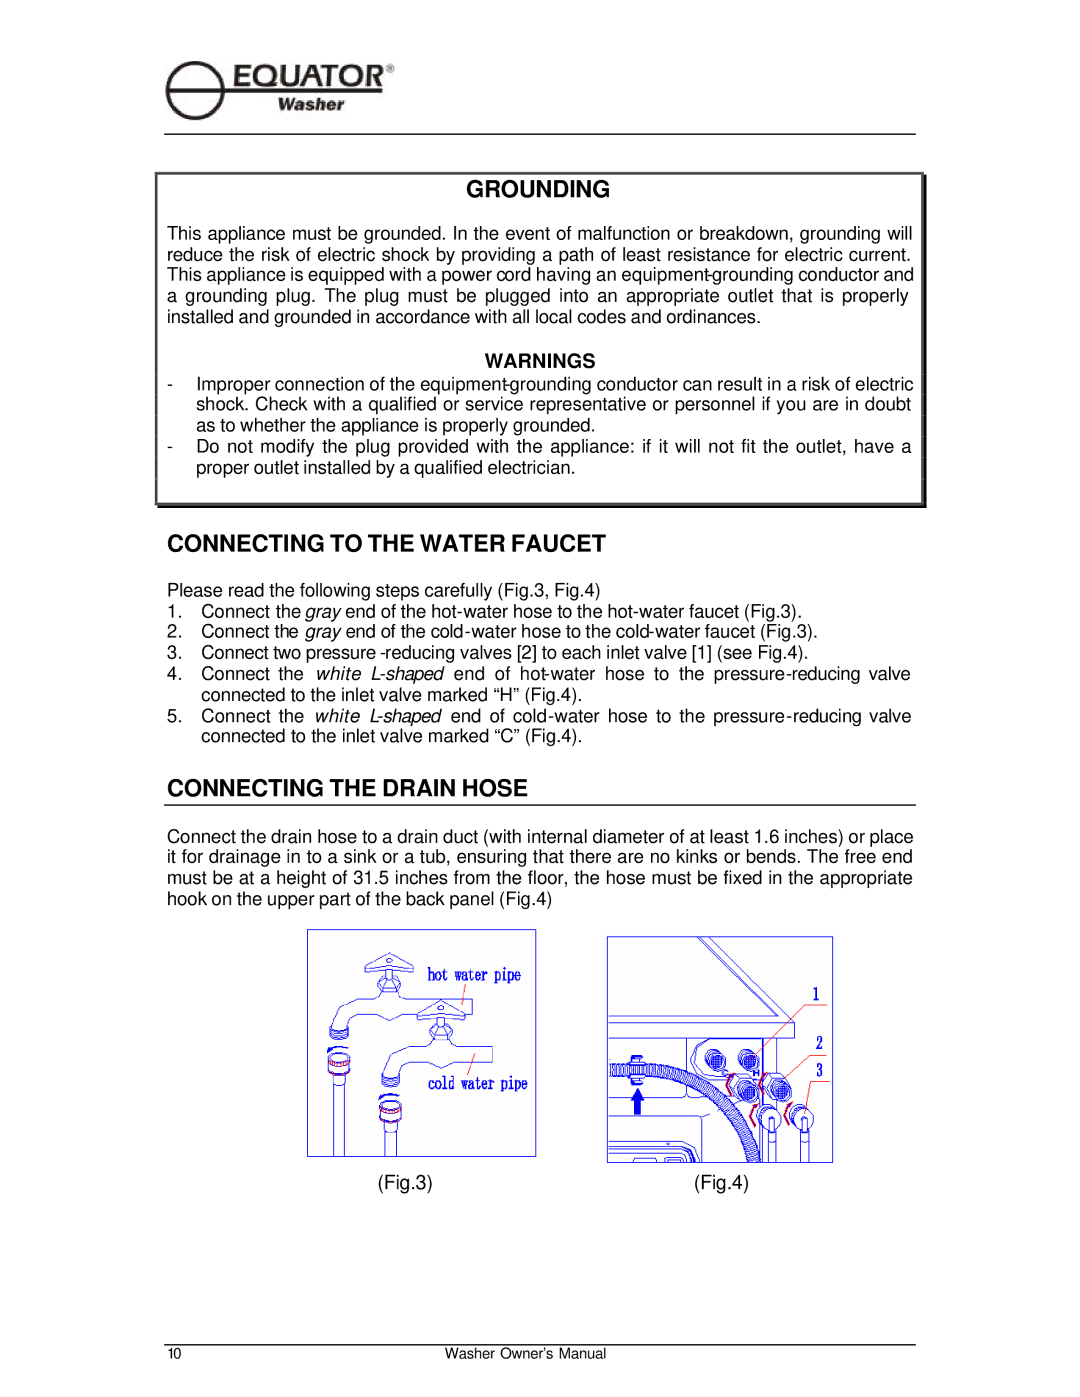
CONNECTING TO THE WATER FAUCET
Please read the following steps carefully (Fig.3, Fig.4)
1.Connect the gray end of the
2.Connect the gray end of the
3.Connect two pressure
4.Connect the white
5.Connect the white
CONNECTING THE DRAIN HOSE
Connect the drain hose to a drain duct (with internal diameter of at least 1.6 inches) or place it for drainage in to a sink or a tub, ensuring that there are no kinks or bends. The free end must be at a height of 31.5 inches from the floor, the hose must be fixed in the appropriate hook on the upper part of the back panel (Fig.4)
(Fig.3) | (Fig.4) |
10 | Washer Owner’s Manual |