Understanding the remote control unit
A | L |
B |
|
| M |
| N |
C D | O |
| P |
E | Q |
F | R |
G |
|
H |
|
I |
|
J |
|
K | S |
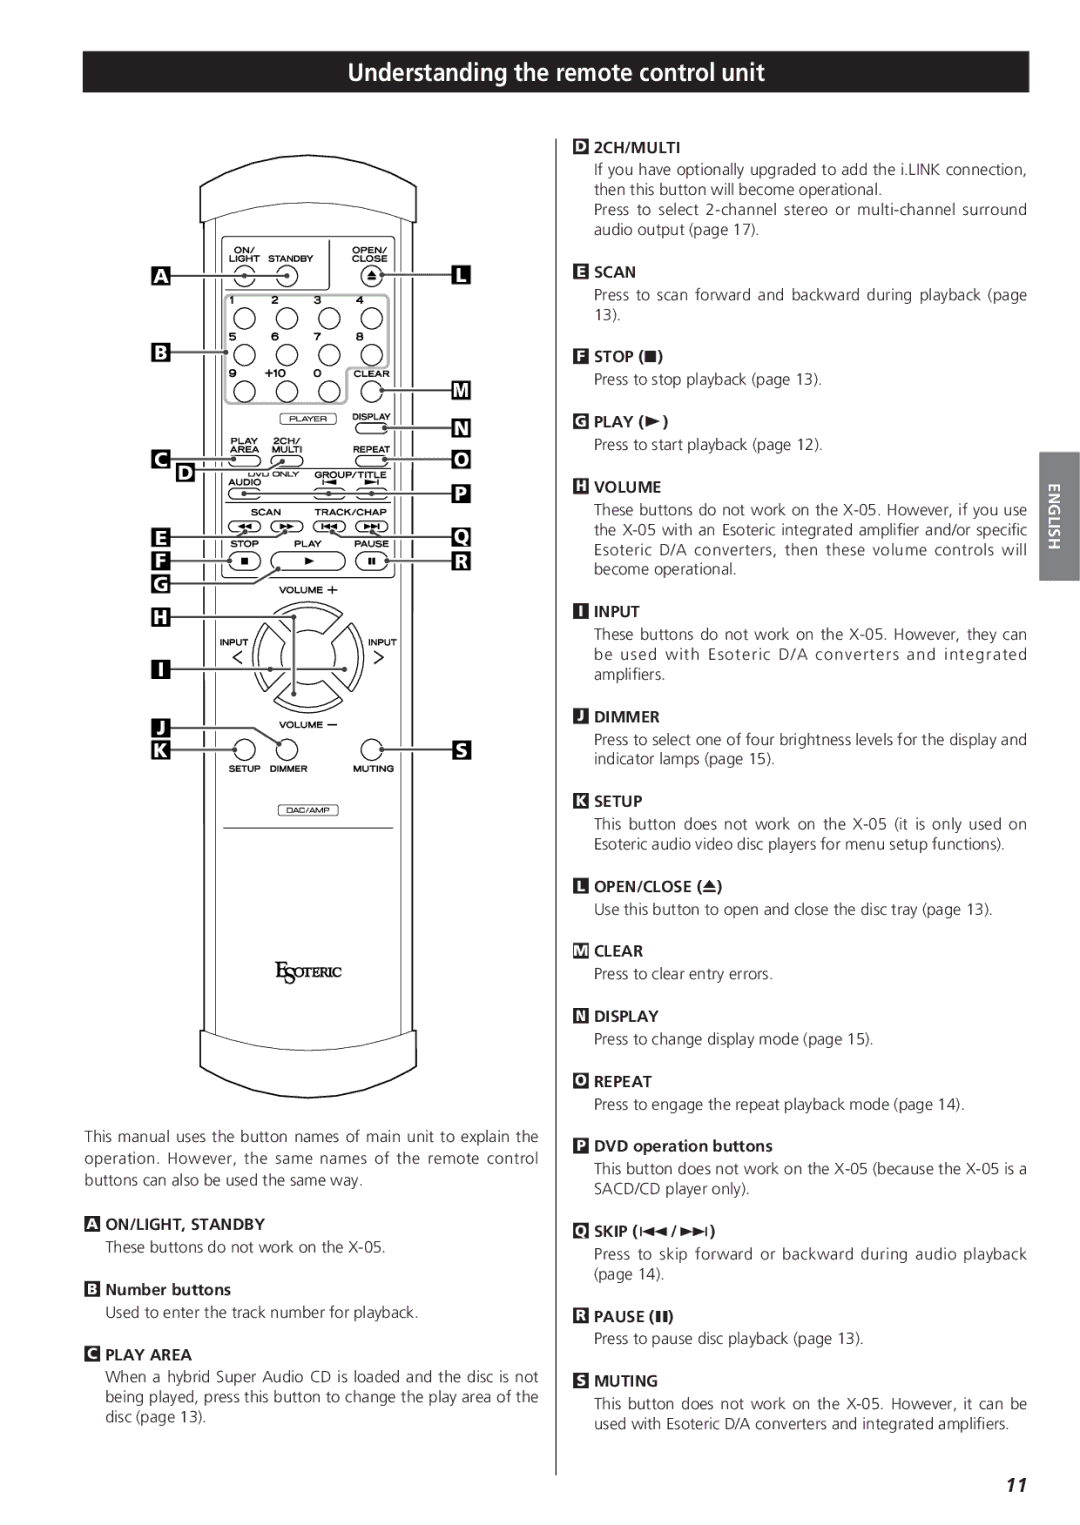
This manual uses the button names of main unit to explain the operation. However, the same names of the remote control buttons can also be used the same way.
AON/LIGHT, STANDBY
These buttons do not work on the
BNumber buttons
Used to enter the track number for playback.
CPLAY AREA
When a hybrid Super Audio CD is loaded and the disc is not being played, press this button to change the play area of the disc (page 13).
D2CH/MULTI
If you have optionally upgraded to add the i.LINK connection, then this button will become operational.
Press to select
ESCAN
Press to scan forward and backward during playback (page 13).
FSTOP (H)
Press to stop playback (page 13).
GPLAY (y)
Press to start playback (page 12).
HVOLUME
These buttons do not work on the
IINPUT
These buttons do not work on the
JDIMMER
Press to select one of four brightness levels for the display and indicator lamps (page 15).
KSETUP
This button does not work on the
LOPEN/CLOSE (L)
Use this button to open and close the disc tray (page 13).
MCLEAR
Press to clear entry errors.
NDISPLAY
Press to change display mode (page 15).
OREPEAT
Press to engage the repeat playback mode (page 14).
PDVD operation buttons
This button does not work on the
QSKIP (.//)
Press to skip forward or backward during audio playback (page 14).
RPAUSE (J)
Press to pause disc playback (page 13).
SMUTING
This button does not work on the
ENGLISH
11
