tf your dryer Is gas and has a full front panel, remove front panel as follows
1. Unplug the power supply cord or turn off the | |
electrical | power. |
2. Open lint screen lid. Remove two screws | |
from lint | screen area. |
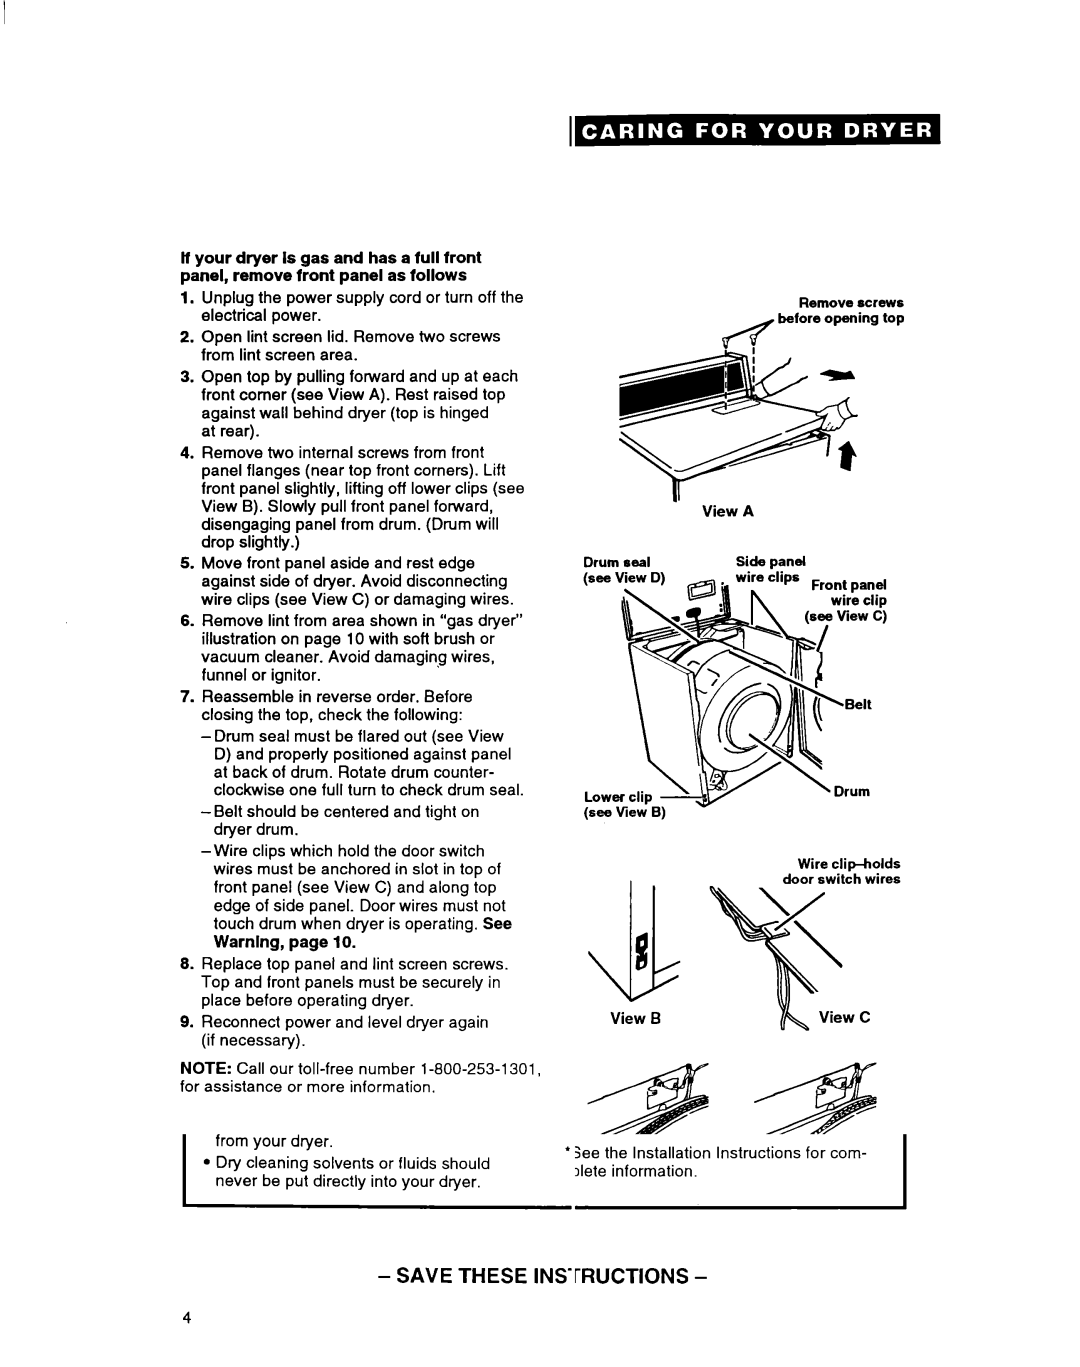
3. Open top by pulling forward and up at each | |
front comer (see View A). Rest raised top | |
against wall behind dryer (top is hinged | |
at rear). |
|
4. Remove two internal screws from front | |
panel flanges (near top front corners). Lift | |
front panel slightly, lifting off lower clips (see | |
View B). Slowly pull front panel forward, | |
da
Remove screw6 before opening top
disengaging | panel from drum. (Drum will | |
drop | slightly.) |
|
5. Move front panel aside and rest edge | ||
against side of dryer. Avoid disconnecting | ||
wire clips (see View C) or damaging wires. | ||
6. Remove lint from area shown in “gas dryer” | ||
illustration on page 10 with soft brush or | ||
vacuum cleaner. Avoid damaging wires, | ||
funnel | or ignitor. | |
7. Reassemble | in reverse order. Before | |
closing the top, check the following: | ||
D) and properly positioned against panel | ||
at back of drum. Rotate drum counter- | ||
clockwise one full turn to check drum seal. | ||
Warnlng, page 10.
8.Replace top panel and lint screen screws. Top and front panels must be securely in place before operating dryer.
9.Reconnect power and level dryer again (if necessary).
NOTE: Call our
View | A |
|
|
Drum seal | Side panel |
|
|
| sire clips | Front panel | |
|
| ||
|
| wire | clip |
|
| (see View | C) |
\\‘ri\Belt
Wire
\
View B | View C |
11