Bag and Filter Instructions
WARNING: TO REDUCE THE RISK OF ELECTRIC SHOCK, THE POWER CORD MUST BE DISCONNECTED BEFORE REMOVING THE DUST BAG, THE
WARNING: NEVER OPERATE THE VACUUM WITHOUT THE VACUUM BAG AND ALL THE FILTERS IN PLACE
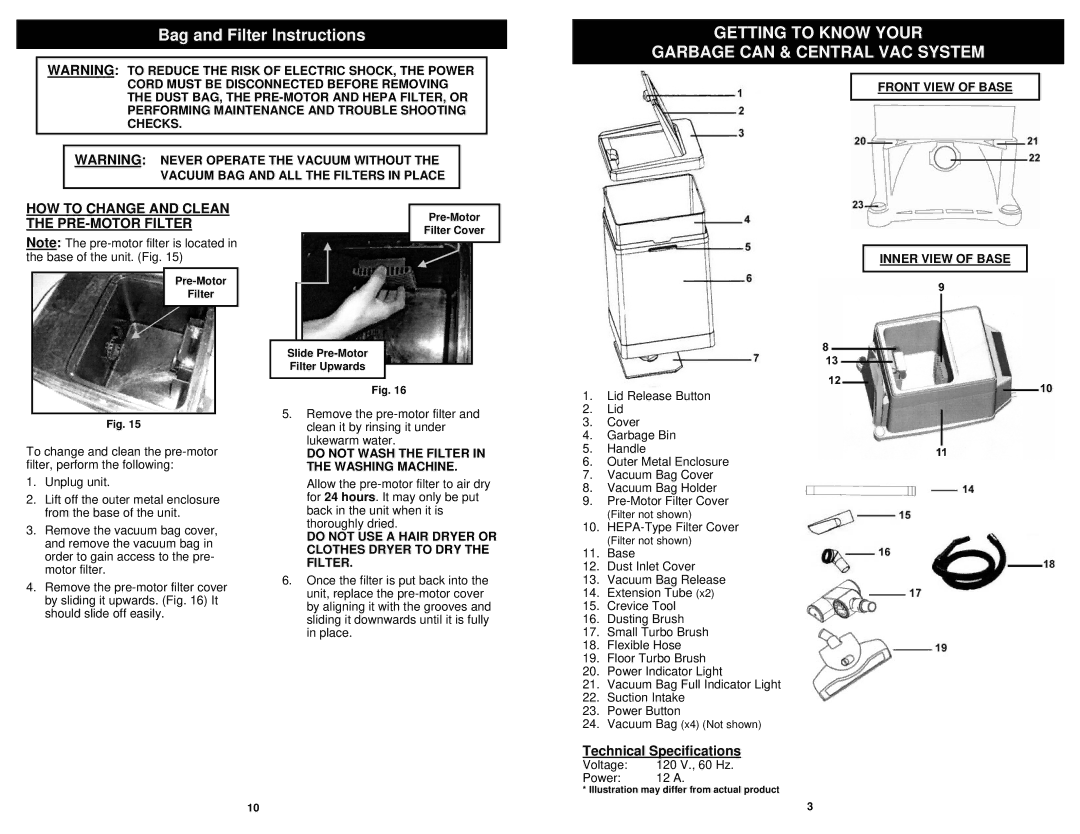
GETTING TO KNOW YOUR
GARBAGE CAN & CENTRAL VAC SYSTEM
FRONT VIEW OF BASE
HOW TO CHANGE AND CLEAN THE PRE-MOTOR FILTER
Note: The
Filter |
Fig. 15
To change and clean the
1.Unplug unit.
2.Lift off the outer metal enclosure from the base of the unit.
3.Remove the vacuum bag cover, and remove the vacuum bag in order to gain access to the pre- motor filter.
4.Remove the
Filter Cover
Slide
Filter Upwards
Fig. 16
5.Remove the
DO NOT WASH THE FILTER IN THE WASHING MACHINE.
Allow the
DO NOT USE A HAIR DRYER OR CLOTHES DRYER TO DRY THE FILTER.
6.Once the filter is put back into the unit, replace the
INNER VIEW OF BASE
1.Lid Release Button
2.Lid
3.Cover
4.Garbage Bin
5.Handle
6.Outer Metal Enclosure
7.Vacuum Bag Cover
8.Vacuum Bag Holder
9.
(Filter not shown)
10.
(Filter not shown)
11.Base
12.Dust Inlet Cover
13.Vacuum Bag Release
14.Extension Tube (x2)
15.Crevice Tool
16.Dusting Brush
17.Small Turbo Brush
18.Flexible Hose
19.Floor Turbo Brush
20.Power Indicator Light
21.Vacuum Bag Full Indicator Light
22.Suction Intake
23.Power Button
24.Vacuum Bag (x4) (Not shown)
Technical Specifications
Voltage: | 120 V., 60 Hz. |
Power: | 12 A. |
* Illustration may differ from actual product
10 | 3 |
