OPERATING INSTRUCTIONS
OPERATING INSTRUCTIONS
4. Place the iron on its heel on a stable, |
protected surface and allow the iron |
to heat for approximately two (2) |
minutes or until the temperature |
settings on the right side of the LED |
display panel have stopped flashing. |
5. Turn the variable steam control dial |
to the right to increase the amount of |
steam. When using extra steam, the |
iron uses more water and it may be |
necessary to fill the water tank more |
often. (Fig. 2) |
Fig. 3
ATOMIZER SPRAY NOZZLE |
| |
The atomizer spray nozzle is useful on |
| |
fabrics with stubborn wrinkles. Press the |
| |
spray button and a jet of water will spray |
| |
onto the fabric being ironed. (Fig. 5) The | Temp. | |
water spray can be used with dry or | ||
settings | ||
steam ironing as desired. | ||
|
Fig. 2
BURST OF
The burst of steam position is useful when ironing denim, cotton, and linens. It provides quick bursts of steam which aid in removing stubborn wrinkles.
The burst of steam feature can be used with Dry or Steam ironing as desired.
1.Make sure the water tank is at least 1/2 filled with water.
2.Select the desired fabric and temperature setting. Place the iron on its heel (on a stable, protected surface) and allow it to heat for approximately 2 minutes.
3.Turn the steam button to the left to the burst of steam position. (Fig. 3)
4.With the iron in a horizontal position, press the steam button several times to prime the pump.
NOTE: If the tank runs dry, remove the plug from wall outlet. Then, fill the iron with water and
To use the
1.Set the variable steam control dial to the desired steam setting.
2.Press the electronic temperature control button until you get to the desired fabric setting.
3.Turn the steam button clockwise to the
4.To maintain a constant flow of steam, make sure that the water tank is at least half full.
![]()
Steam Burst
Fig. 4
Fig. 5
SELECTING IRON TEMPERATURES
Always read garment labels and follow the manufacturer’s ironing instructions. Refer to the “Ironing Chart” on page 9 for temperature recommendations:
•Use low settings for nylon and other synthetics.
••Use moderate settings for wool, silks, and blends.
•••Use high settings for cottons and linens.
1.Stand the iron upright on its heel.
2.Plug the cord into a polarized, 120V AC electrical outlet.
3.Press the electronic temperature control until you get the desired fabric/temperature setting.
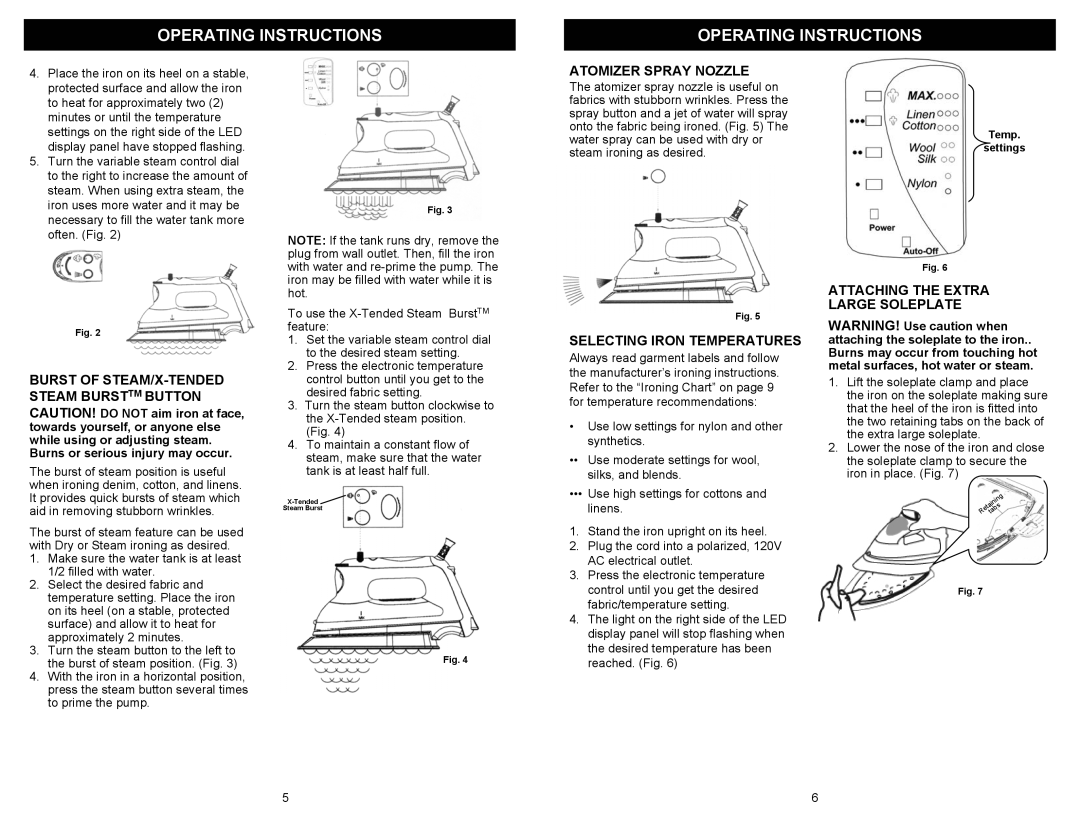
4.The light on the right side of the LED display panel will stop flashing when the desired temperature has been reached. (Fig. 6)
Fig. 6
ATTACHING THE EXTRA
LARGE SOLEPLATE
WARNING! Use caution when attaching the soleplate to the iron.. Burns may occur from touching hot metal surfaces, hot water or steam.
1.Lift the soleplate clamp and place the iron on the soleplate making sure that the heel of the iron is fitted into the two retaining tabs on the back of the extra large soleplate.
2.Lower the nose of the iron and close the soleplate clamp to secure the iron in place. (Fig. 7)
g in in ta s e b R ta
Fig. 7
5
6