OPERATING INSTRUCTIONS (CONT.)
OPERATING INSTRUCTIONS
Ironing With Steam
Always read garment labels and follow the manufacturer’s ironing instructions. Refer to the “Ironing Chart” on page 6 for temperature recommendations:
•Use low settings for synthetics and silks.
••Use moderate settings for wool and blends.
•••Use high settings for cottons and linens.
•Make sure that the steam station is plugged into the electrical outlet.
•Set the temperature dial to the desired temperature. (Fig. 4)
•Fill the water tank with water, following the instructions on page 5 for filling the water tank.
•Make sure that the iron is resting on top of the rubber mat on the water tank/stand.
•When steam is desired, simply push the steam button.
Important: Do NOT remove rubber mat from water tank and place on a table or any other surface which may be damaged by heat.
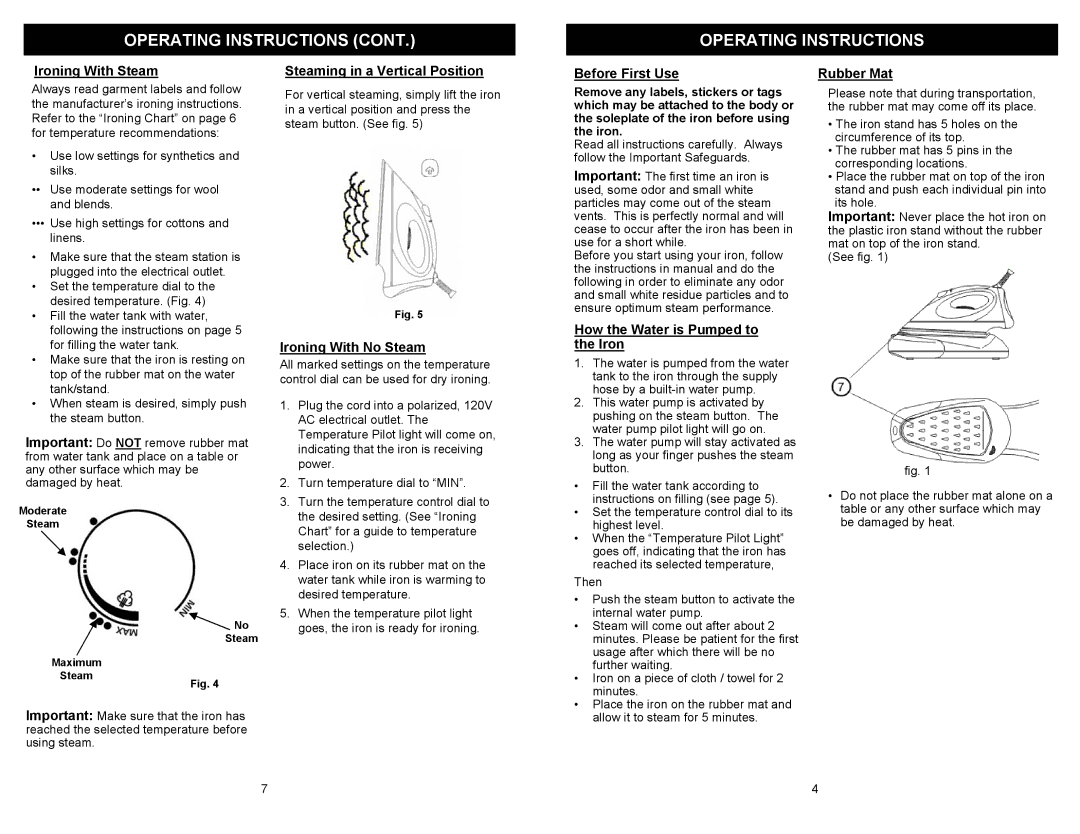
Moderate
Steam
![]() No
No
Steam
Maximum
Steam
Fig. 4
Important: Make sure that the iron has reached the selected temperature before using steam.
Steaming in a Vertical Position
For vertical steaming, simply lift the iron in a vertical position and press the steam button. (See fig. 5)
Fig. 5
Ironing With No Steam
All marked settings on the temperature control dial can be used for dry ironing.
1.Plug the cord into a polarized, 120V AC electrical outlet. The Temperature Pilot light will come on, indicating that the iron is receiving power.
2.Turn temperature dial to “MIN”.
3.Turn the temperature control dial to the desired setting. (See “Ironing Chart” for a guide to temperature selection.)
4.Place iron on its rubber mat on the water tank while iron is warming to desired temperature.
5.When the temperature pilot light goes, the iron is ready for ironing.
Before First Use
Remove any labels, stickers or tags which may be attached to the body or the soleplate of the iron before using the iron.
Read all instructions carefully. Always follow the Important Safeguards.
Important: The first time an iron is used, some odor and small white particles may come out of the steam vents. This is perfectly normal and will cease to occur after the iron has been in use for a short while.
Before you start using your iron, follow the instructions in manual and do the following in order to eliminate any odor and small white residue particles and to ensure optimum steam performance.
How the Water is Pumped to the Iron
1.The water is pumped from the water tank to the iron through the supply hose by a
2.This water pump is activated by pushing on the steam button. The water pump pilot light will go on.
3.The water pump will stay activated as long as your finger pushes the steam button.
•Fill the water tank according to instructions on filling (see page 5).
•Set the temperature control dial to its highest level.
•When the “Temperature Pilot Light” goes off, indicating that the iron has reached its selected temperature,
Then
•Push the steam button to activate the internal water pump.
•Steam will come out after about 2 minutes. Please be patient for the first usage after which there will be no further waiting.
•Iron on a piece of cloth / towel for 2 minutes.
•Place the iron on the rubber mat and allow it to steam for 5 minutes.
Rubber Mat
Please note that during transportation, the rubber mat may come off its place.
•The iron stand has 5 holes on the circumference of its top.
•The rubber mat has 5 pins in the corresponding locations.
•Place the rubber mat on top of the iron stand and push each individual pin into its hole.
Important: Never place the hot iron on the plastic iron stand without the rubber mat on top of the iron stand.
(See fig. 1)
fig. 1
•Do not place the rubber mat alone on a table or any other surface which may be damaged by heat.
7
4