ECOR264-16X1, ECOR264-9X1, ECOR264-4X1 specifications
EverFocus has established itself as a prominent player in the surveillance technology arena, and its ECOR264 series—comprised of the ECOR264-4X1, ECOR264-9X1, and ECOR264-16X1 models—demonstrates the company’s commitment to innovative design and cutting-edge technology. These Digital Video Recorders (DVRs) cater to a wide array of security needs, making them ideal for various applications including residential, commercial, and institutional surveillance.One of the hallmark features of the ECOR264 series is its support for H.264 compression technology. This advanced codec provides superior video quality while optimizing bandwidth use, allowing users to store more video data without compromising on clarity. The ECOR264 DVRs ensure that even during peak usage times, video playback remains seamless and high definition.
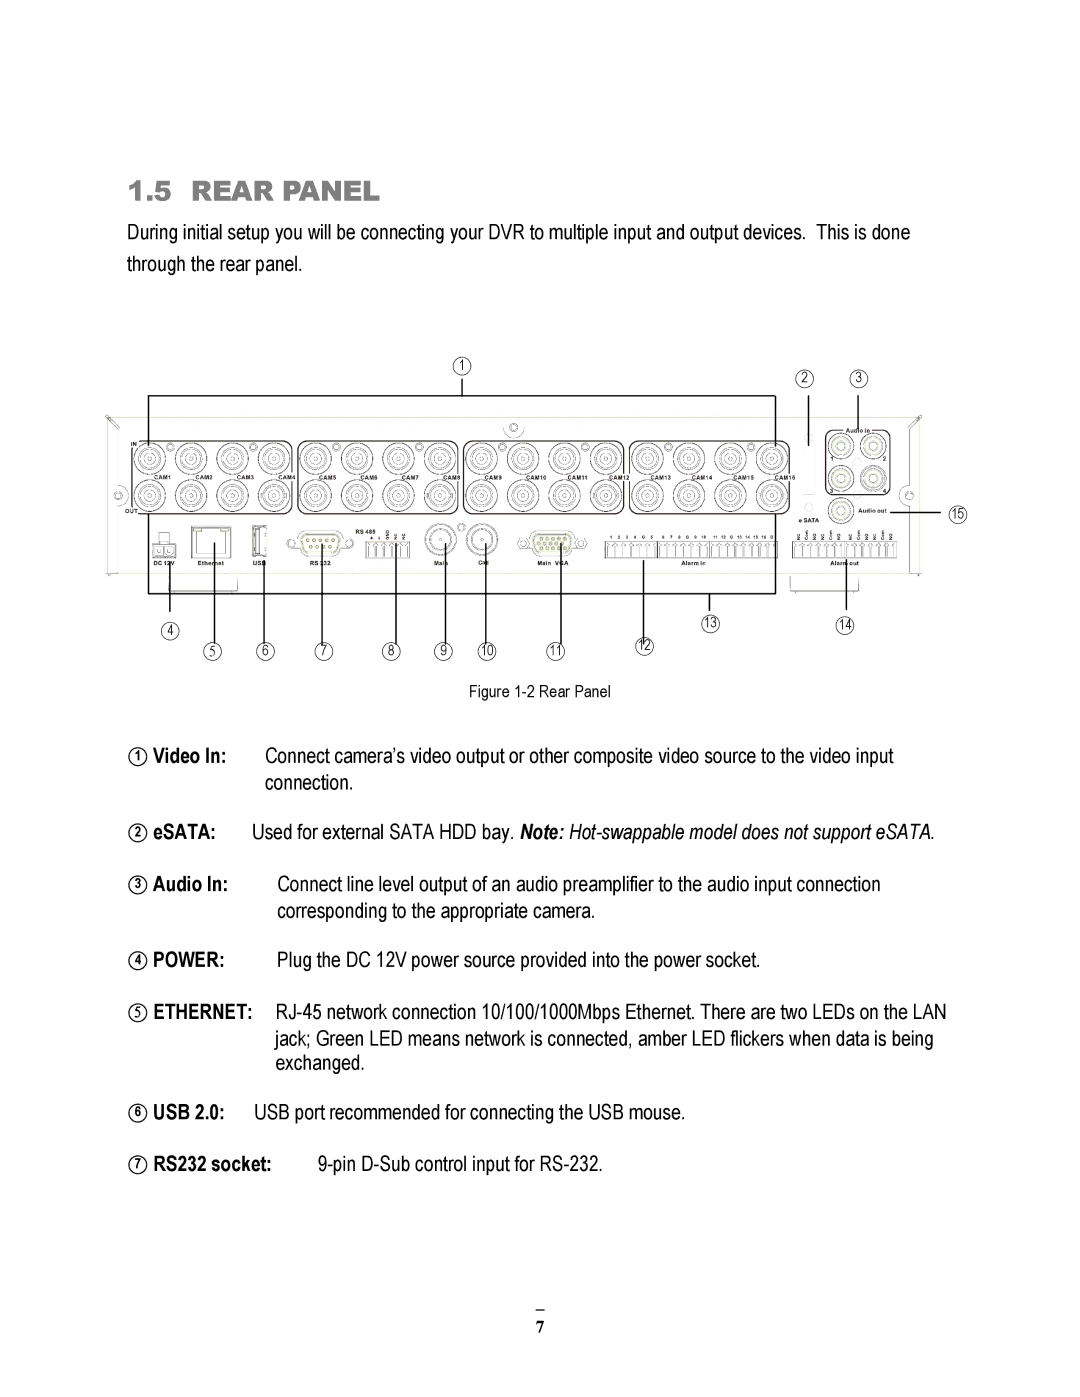
Each model in the ECOR264 lineup offers different channel configurations to accommodate diverse surveillance setups. The ECOR264-4X1 supports up to four camera inputs, making it an excellent choice for smaller installations. Meanwhile, the ECOR264-9X1 provides support for nine channels, striking a balance between capacity and versatility. For larger surveillance needs, the ECOR264-16X1 model boasts support for up to sixteen channels, making it suitable for expansive environments requiring comprehensive monitoring.
These DVRs come equipped with user-friendly features such as remote access capabilities, allowing users to monitor live feeds and recorded footage from anywhere via smart devices. The intuitive interface simplifies system navigation, making it easy for users to review recordings, adjust settings, and manage connected cameras.
In terms of performance, the ECOR264 series provides real-time recording at up to 30 frames per second per channel, ensuring smooth playback and minimal motion blur. Furthermore, the models support multiple recording modes, including continuous, scheduled, and motion-detected recording, providing flexibility to meet specific security requirements.
Storage is another critical aspect, and EverFocus has equipped these devices with the ability to connect to multiple hard drives. This scalability allows users to select larger capacities as their data storage needs grow. Additionally, the ECOR264 series is compatible with various IP cameras, enhancing its functionality and adaptability for diverse scenarios.
In summary, the EverFocus ECOR264 series of DVRs stands out for its robust features, advanced H.264 compression technology, user-friendly interface, and flexible storage options. Whether it’s for a small business or a large facility, these models provide powerful and reliable video surveillance solutions tailored to meet modern security challenges.

