6.(Optional) Pass the power/video wire under the base plate and up through the center hole.
7.Position the power/video wire so that it does not interfere with the camera module and carefully attach the connector to the camera board, being sure to position the connector so it fit properly onto the tiny pins within. Failure to properly align this connector may permanently damage the camera.
General Connection and Setup
1.Connect the power cord to DC 12V power supply (observe polarity for power – connecting reverse polarity will damage the camera and void the warranty).
2.Connect the camera to a monitor with 75ohm type coaxial cable.
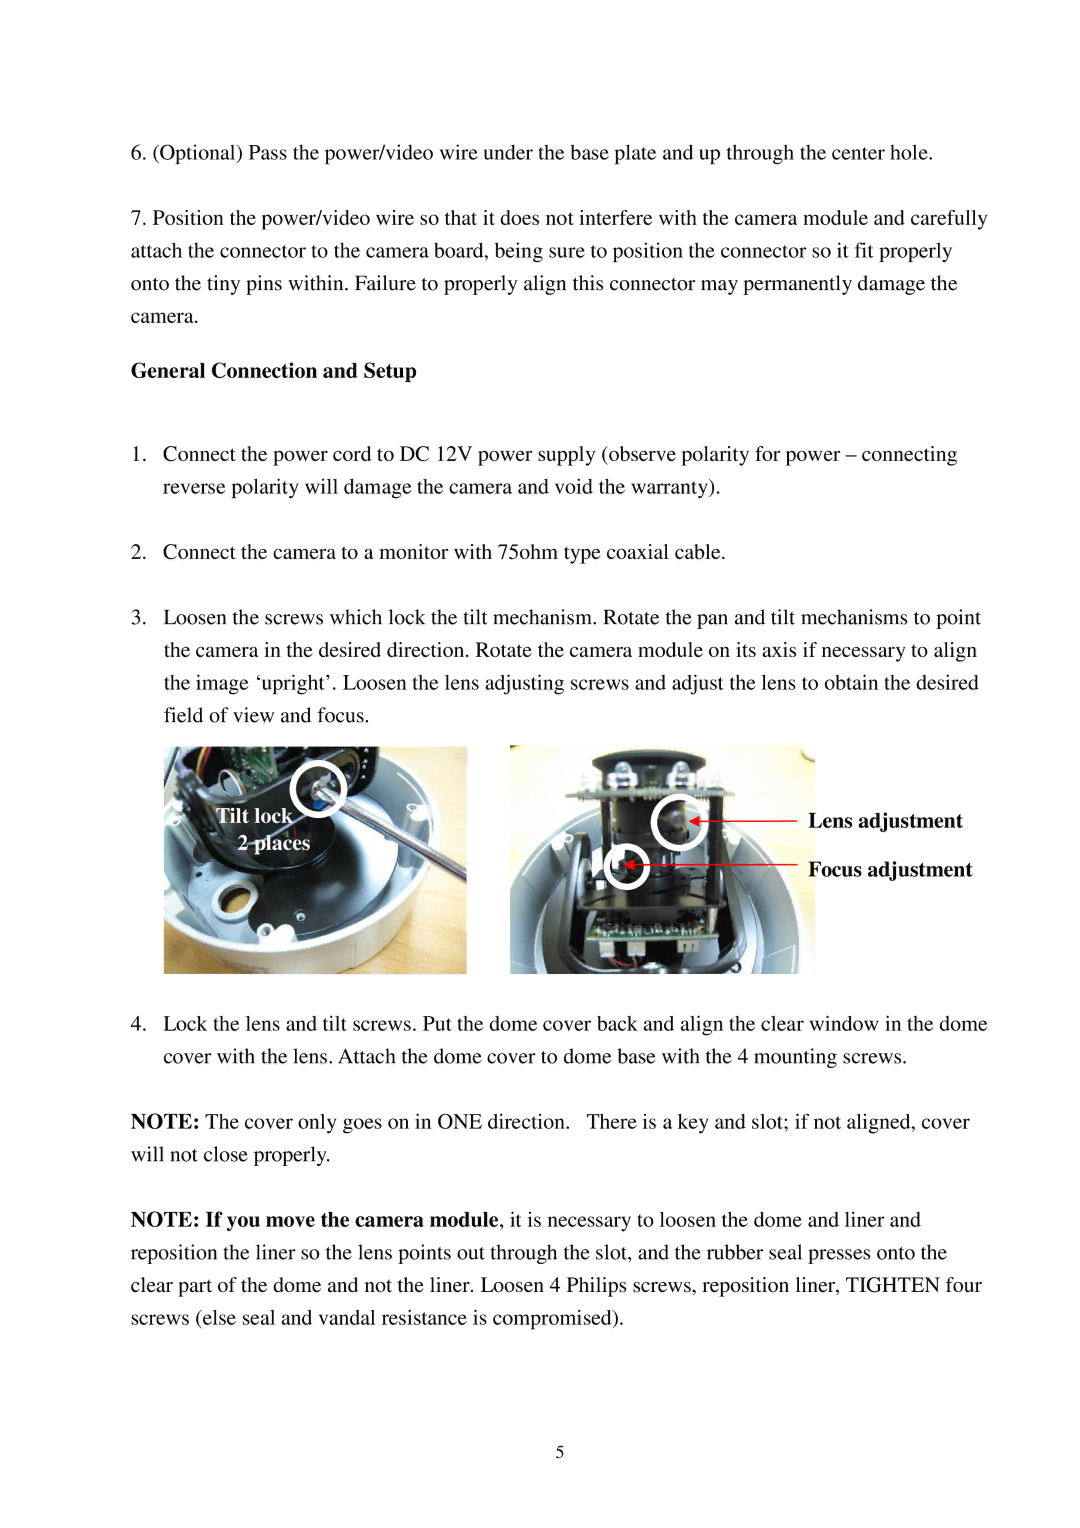
3.Loosen the screws which lock the tilt mechanism. Rotate the pan and tilt mechanisms to point the camera in the desired direction. Rotate the camera module on its axis if necessary to align the image ‘upright’. Loosen the lens adjusting screws and adjust the lens to obtain the desired field of view and focus.
Tilt lock | Lens adjustment |
2 places
 Focus adjustment
4.Lock the lens and tilt screws. Put the dome cover back and align the clear window in the dome cover with the lens. Attach the dome cover to dome base with the 4 mounting screws.
NOTE: The cover only goes on in ONE direction. There is a key and slot; if not aligned, cover will not close properly.
NOTE: If you move the camera module, it is necessary to loosen the dome and liner and reposition the liner so the lens points out through the slot, and the rubber seal presses onto the clear part of the dome and not the liner. Loosen 4 Philips screws, reposition liner, TIGHTEN four screws (else seal and vandal resistance is compromised).
5