This section covers simple steps and detail installation. Please follow instruction for preventing any unnecessary damage.
Simple Steps:
1.Connect to 26mm/1.06” EMT Conduit Pipe and lock it with Hex Wrench
2.Open camera bubble cover
3.Connect to testing monitor(optional accessories)
4.Adjust lens, camera position
5.Optional adjust camera setting on Dip Switch
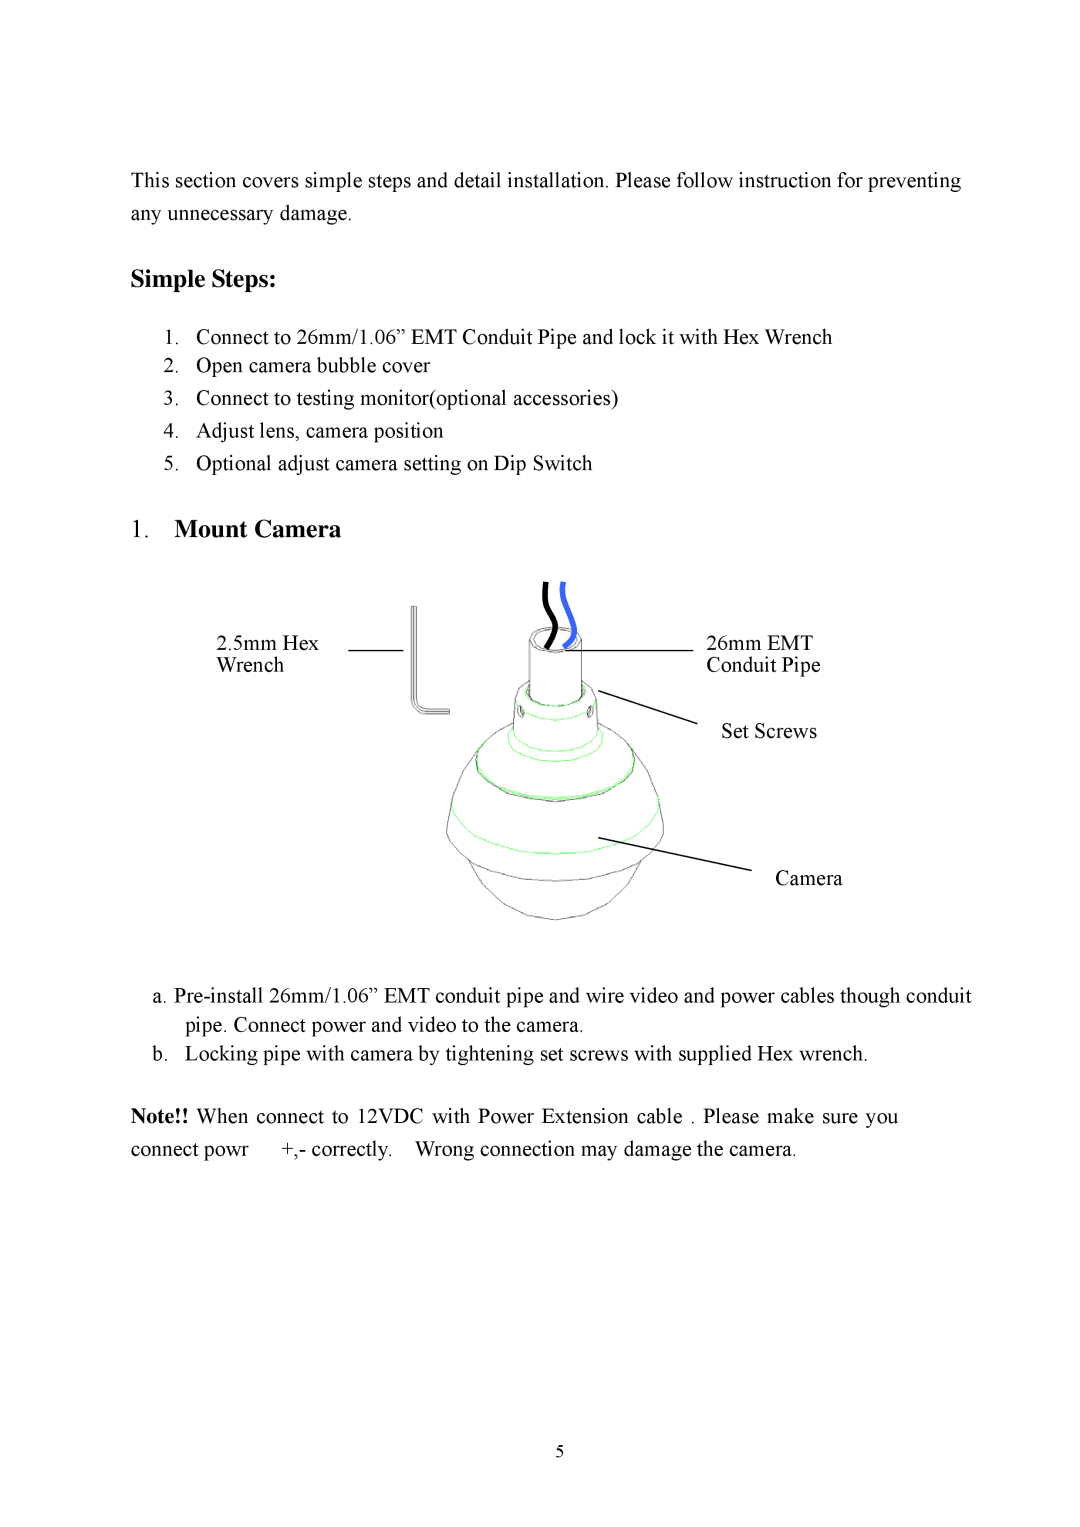
1.Mount Camera
2.5mm Hex |
|
| 26mm EMT | |
Wrench |
|
|
| Conduit Pipe |
|
|
|
|
|
|
|
|
| Set Screws |
Camera
a.
b.Locking pipe with camera by tightening set screws with supplied Hex wrench.
Note!! When connect to 12VDC with Power Extension cable . Please make sure you connect powr +,- correctly. Wrong connection may damage the camera.
5