Installing the Handle
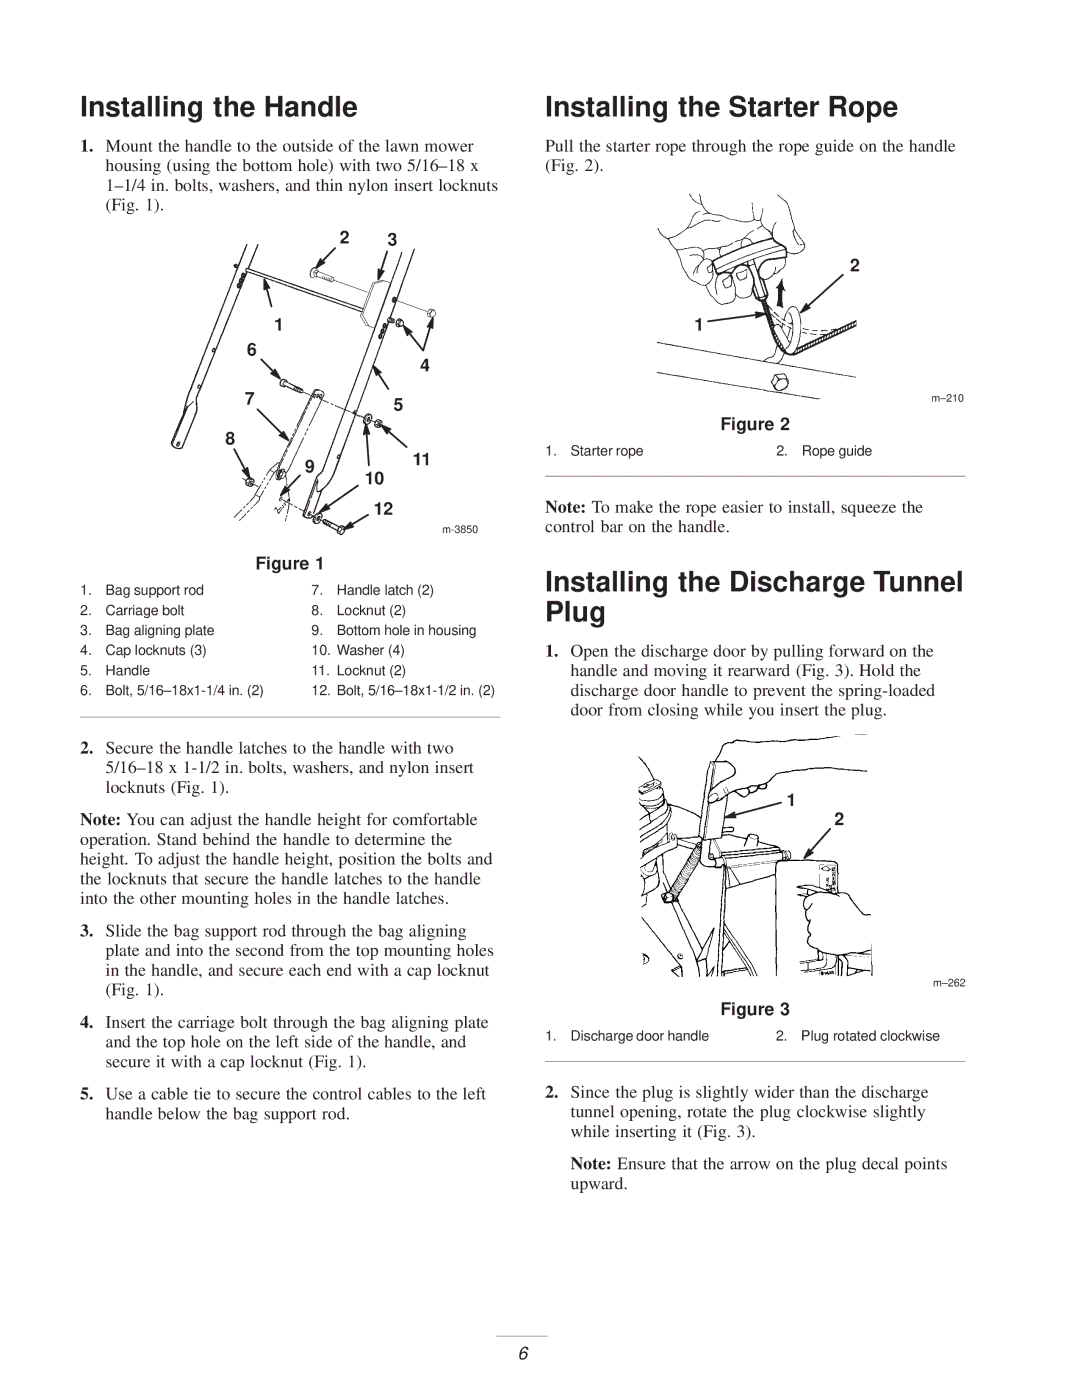
1.Mount the handle to the outside of the lawn mower housing (using the bottom hole) with two 5/16±18 x 1±1/4 in. bolts, washers, and thin nylon insert locknuts (Fig. 1).
2 3
1
6
|
|
| 4 |
| 7 |
| 5 |
|
|
| |
| 8 |
| 11 |
|
| 9 | |
|
| 10 | |
|
|
| |
|
|
| 12 |
|
|
| |
| Figure 1 |
| |
1. | Bag support rod | 7. | Handle latch (2) |
2. | Carriage bolt | 8. | Locknut (2) |
3. | Bag aligning plate | 9. | Bottom hole in housing |
4. | Cap locknuts (3) | 10. | Washer (4) |
5. | Handle | 11. | Locknut (2) |
6. | Bolt, | 12. | Bolt, |
|
|
|
|
2.Secure the handle latches to the handle with two 5/16±18 x
Note: You can adjust the handle height for comfortable operation. Stand behind the handle to determine the height. To adjust the handle height, position the bolts and the locknuts that secure the handle latches to the handle into the other mounting holes in the handle latches.
3.Slide the bag support rod through the bag aligning plate and into the second from the top mounting holes in the handle, and secure each end with a cap locknut (Fig. 1).
4.Insert the carriage bolt through the bag aligning plate and the top hole on the left side of the handle, and secure it with a cap locknut (Fig. 1).
5.Use a cable tie to secure the control cables to the left handle below the bag support rod.
Installing the Starter Rope
Pull the starter rope through the rope guide on the handle (Fig. 2).
2
1
m±210
Figure 2
1. Starter rope | 2. Rope guide |
|
|
Note: To make the rope easier to install, squeeze the control bar on the handle.
Installing the Discharge Tunnel Plug
1.Open the discharge door by pulling forward on the handle and moving it rearward (Fig. 3). Hold the discharge door handle to prevent the
1
2
m±262
Figure 3
1. Discharge door handle | 2. Plug rotated clockwise |
|
|
2.Since the plug is slightly wider than the discharge tunnel opening, rotate the plug clockwise slightly while inserting it (Fig. 3).
Note: Ensure that the arrow on the plug decal points upward.
6