
TT23KAE, TT20KCE specifications
Exmark, a leading manufacturer in commercial mowers and outdoor power equipment, has introduced robust models such as the TT23KAE and TT20KCE. Designed with professional landscapers in mind, these mowers are engineered to deliver exceptional performance, durability, and ease of use.The Exmark TT23KAE is powered by a 23-horsepower Kohler engine, providing the muscle necessary for tackling even the toughest mowing jobs. This model features a 52-inch mowing deck, ensuring a wide cutting path and increased productivity. The innovative Triton™ mower deck technology allows for superior grass cutting performance. It’s designed for optimum airflow, which enhances the quality of cut and grass dispersal. The adjustable cutting heights offer versatility, allowing users to customize the mowing experience according to their specific needs.
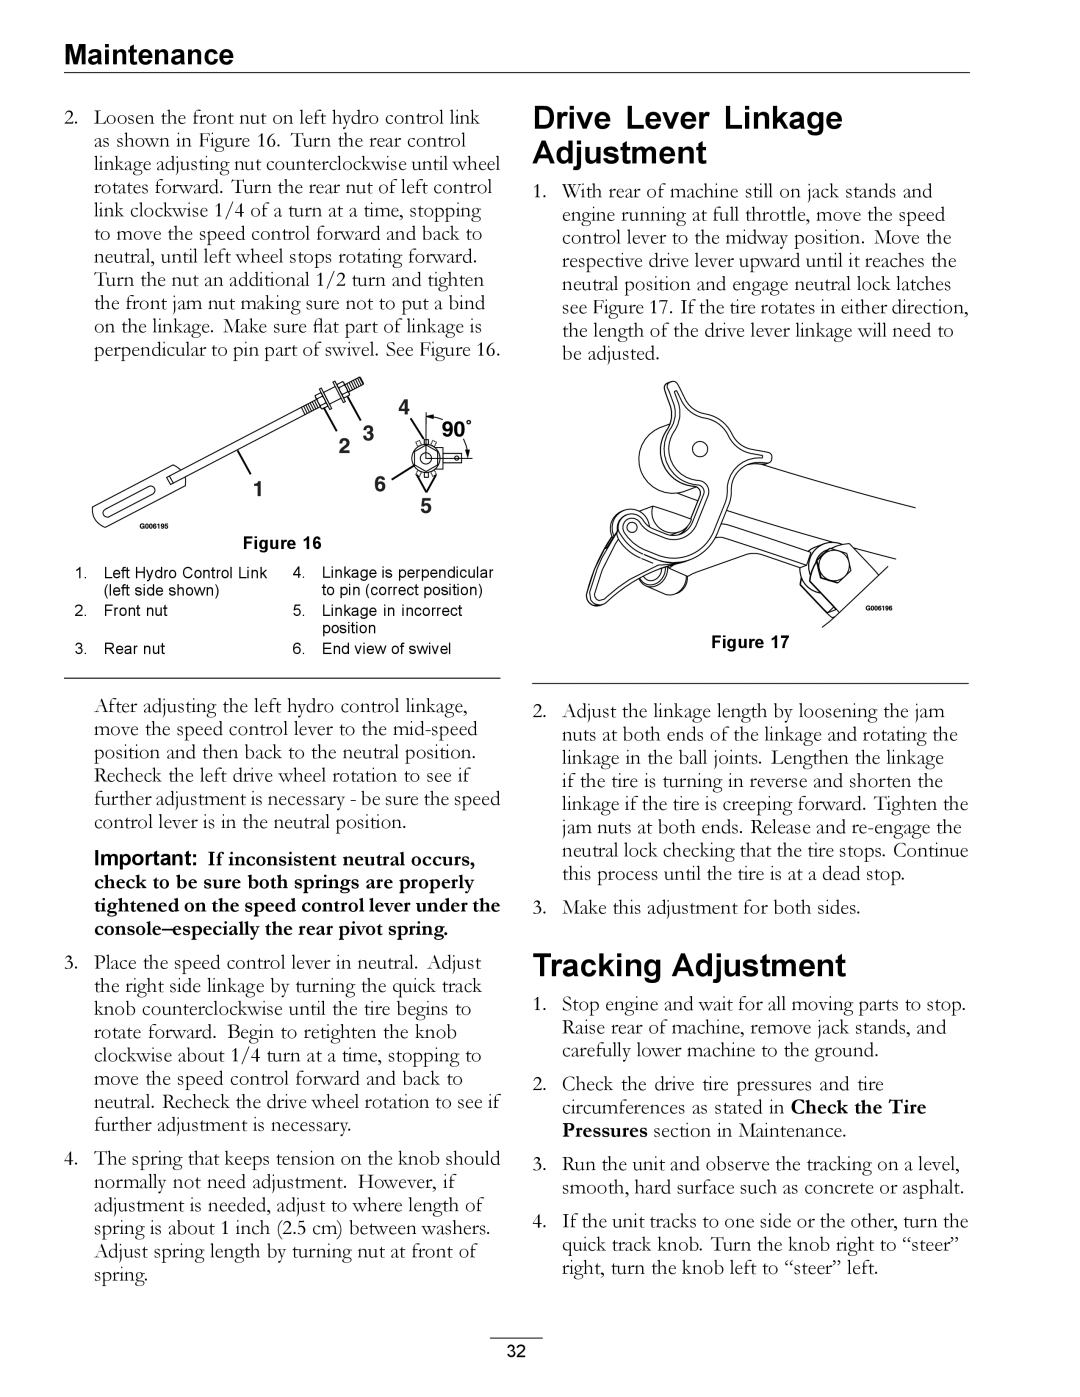
On the other hand, the Exmark TT20KCE offers a slightly smaller yet equally efficient option, powered by a 20-horsepower Kohler engine. This model has a 48-inch mowing deck, making it an excellent choice for tighter spaces while maintaining a high level of efficiency. Like its counterpart, the TT20KCE features the Triton mower deck technology, ensuring clean cuts and excellent grass management.
Both models utilize Exmark’s patented, heavy-duty frame and durable construction, ensuring longevity even in the most demanding conditions. They come equipped with a user-friendly control system, allowing for precise maneuverability and ease of operation. The ergonomic design of the operator’s platform reduces fatigue during extended use, making these mowers comfortable for daily handling.
Incorporating advanced technology, both models boast a safety system that prevents accidental starts, enhancing user safety. Additionally, the intuitive design of the maintenance points simplifies routine checks and service, allowing operators to spend more time mowing and less time on upkeep.
Furthermore, both mowers offer impressive fuel economy, reducing operational costs for landscaping businesses. Their compact design allows for easy transport and storage, making them ideal for a range of job sites.
The Exmark TT23KAE and TT20KCE have carved out their niche in the commercial mowing sector by blending power, technology, and user-friendly design. Whether tackling large lawns or navigating tight residential spaces, these mowers deliver unmatched performance and reliability, making them essential tools for landscape professionals.