Low Profile VESA Mount Kit User Guide
Overview
The Extron® Low Profile VESA® Mount Kit
CAUTION: The maximum loads for the
VESA B — 4.4 pounds (2 kg)
VESA D — 30.8 pounds (14 kg) if the
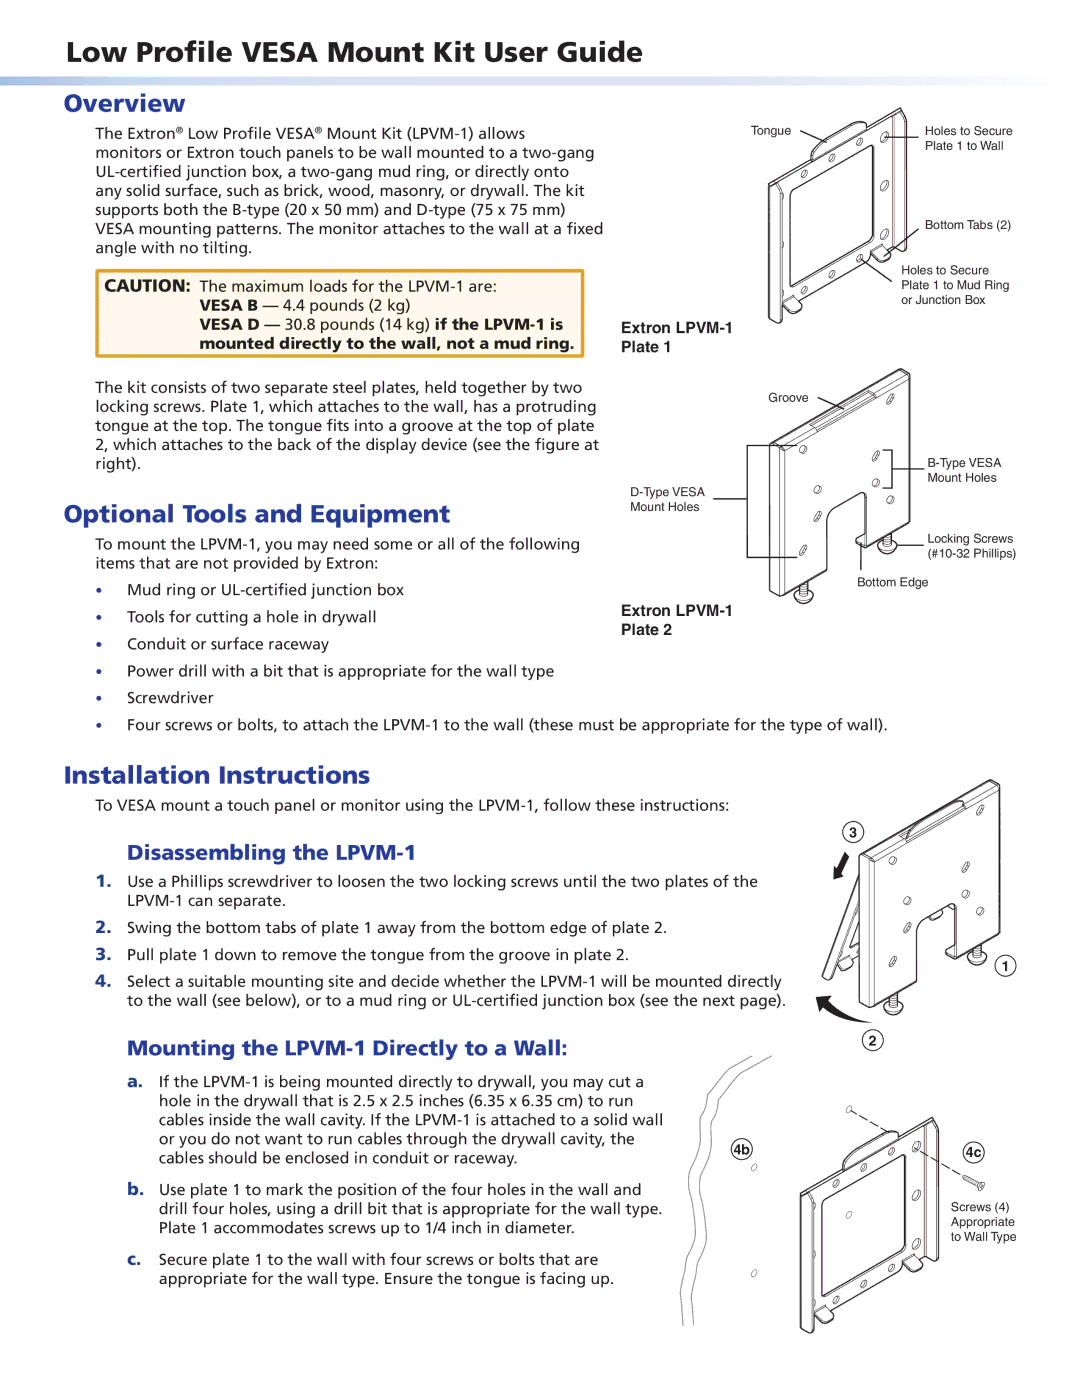
The kit consists of two separate steel plates, held together by two locking screws. Plate 1, which attaches to the wall, has a protruding tongue at the top. The tongue fits into a groove at the top of plate 2, which attaches to the back of the display device (see the figure at right).
Optional Tools and Equipment
To mount the
Tongue
Extron LPVM-1
Plate 1
Groove
Mount Holes
Holes to Secure Plate 1 to Wall
Bottom Tabs (2)
Holes to Secure Plate 1 to Mud Ring or Junction Box
Mount Holes
Locking Screws
• Mud ring or | Bottom Edge | |
| ||
• Tools for cutting a hole in drywall | Extron | |
Plate 2 | ||
• Conduit or surface raceway | ||
|
• Power drill with a bit that is appropriate for the wall type
• Screwdriver
• Four screws or bolts, to attach the
Installation Instructions
To VESA mount a touch panel or monitor using the
Disassembling the LPVM-1
1.Use a Phillips screwdriver to loosen the two locking screws until the two plates of the
2.Swing the bottom tabs of plate 1 away from the bottom edge of plate 2.
3.Pull plate 1 down to remove the tongue from the groove in plate 2.
4.Select a suitable mounting site and decide whether the
Mounting the LPVM-1 Directly to a Wall:
a.If the
or you do not want to run cables through the drywall cavity, the | 4b | |
cables should be enclosed in conduit or raceway. | ||
|
b.Use plate 1 to mark the position of the four holes in the wall and drill four holes, using a drill bit that is appropriate for the wall type. Plate 1 accommodates screws up to 1/4 inch in diameter.
c.Secure plate 1 to the wall with four screws or bolts that are
appropriate for the wall type. Ensure the tongue is facing up.
3
1
2
![]()
![]()
![]() 4c
4c
Screws (4) Appropriate to Wall Type
