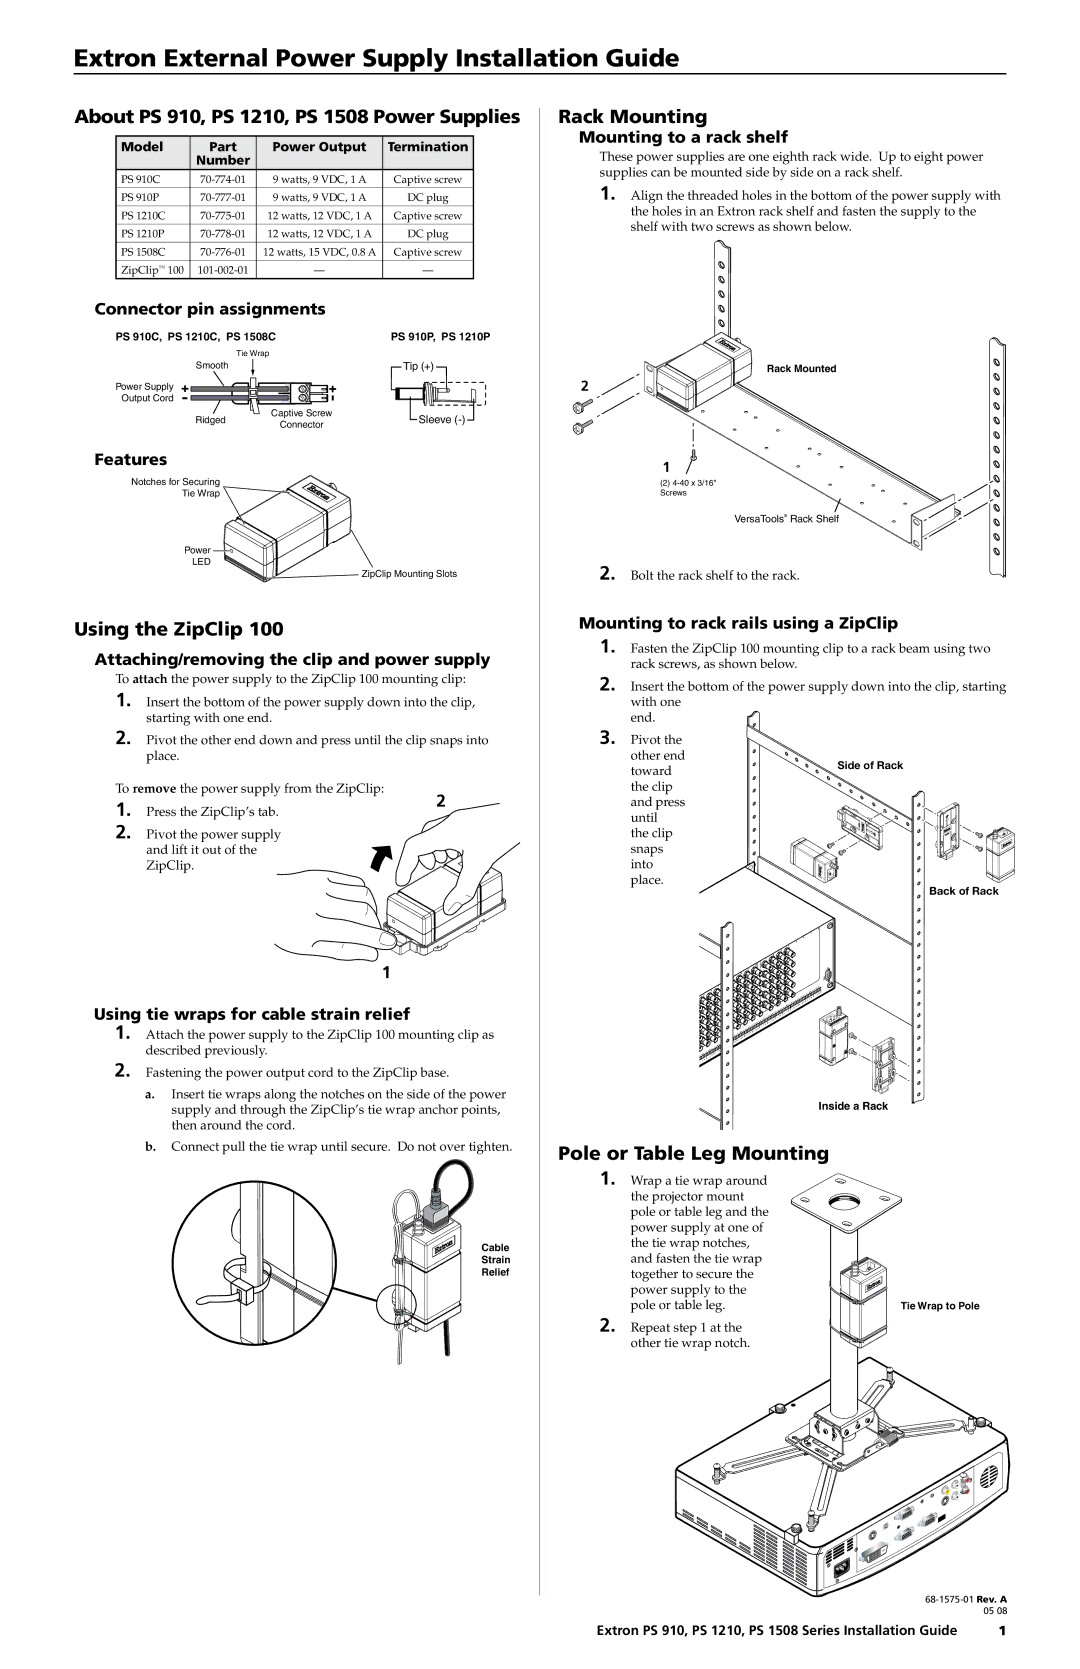
PS 1210, PS 1508, PS 910 specifications
Extron Electronics is renowned for its high-quality audiovisual solutions, and the PS series of power supplies is no exception. The PS 910, PS 1508, PS 1210, PS 1508C, and PS 1210P are specifically designed to provide reliable, robust, and efficient power for a range of A/V components, ensuring optimal performance and longevity.The PS 910 is a versatile power supply that is known for its compact design and high performance. It delivers a comprehensive output of 9 watts with a regulated voltage, which is essential for sensitive electronic devices. With its sleek and lightweight design, the PS 910 is easy to mount in constrained spaces without compromising on power quality.
The PS 1508 stands out due to its high-efficiency output and unique eight-port distribution system. This power supply features multiple outputs, allowing it to power several devices simultaneously. The built-in surge protection ensures that connected devices are safeguarded against spikes and fluctuations in power, a crucial characteristic for the longevity of A/V equipment.
The PS 1210 offers a balanced approach with a power output of 12 watts. This model is especially beneficial for applications that require consistent and reliable power, such as professional A/V installations. The PS 1210 also incorporates Extron's attention to detail with features like LED indicators that provide status updates, making it user-friendly and efficient in monitoring power supply status.
For environments requiring enhanced protection and versatility, the PS 1508C is ideal. In addition to eight output ports, this model incorporates a metal enclosure, providing additional durability for more demanding settings. It ensures that AV components are not only powered efficiently but also protected from physical damage.
The PS 1210P is designed for professional use, delivering a consistent 12 watts of power with high reliability. Its features include a universal input voltage range, making it adaptable to different power settings worldwide. This makes it an ideal choice for global A/V projects where power configurations may vary.
Overall, the Extron PS series provides a robust solution for powering A/V equipment. With their efficient power distribution, protective features, and user-friendly designs, these power supplies fulfill the needs of various installation environments while promoting the longevity of connected devices. Whether used in commercial installations or educational settings, the PS series stands as a testament to Extron's commitment to quality and innovation in the field of audiovisual technology.

