Initial Configuration

Before use, configure the touchpanel, using the on-screen menus.

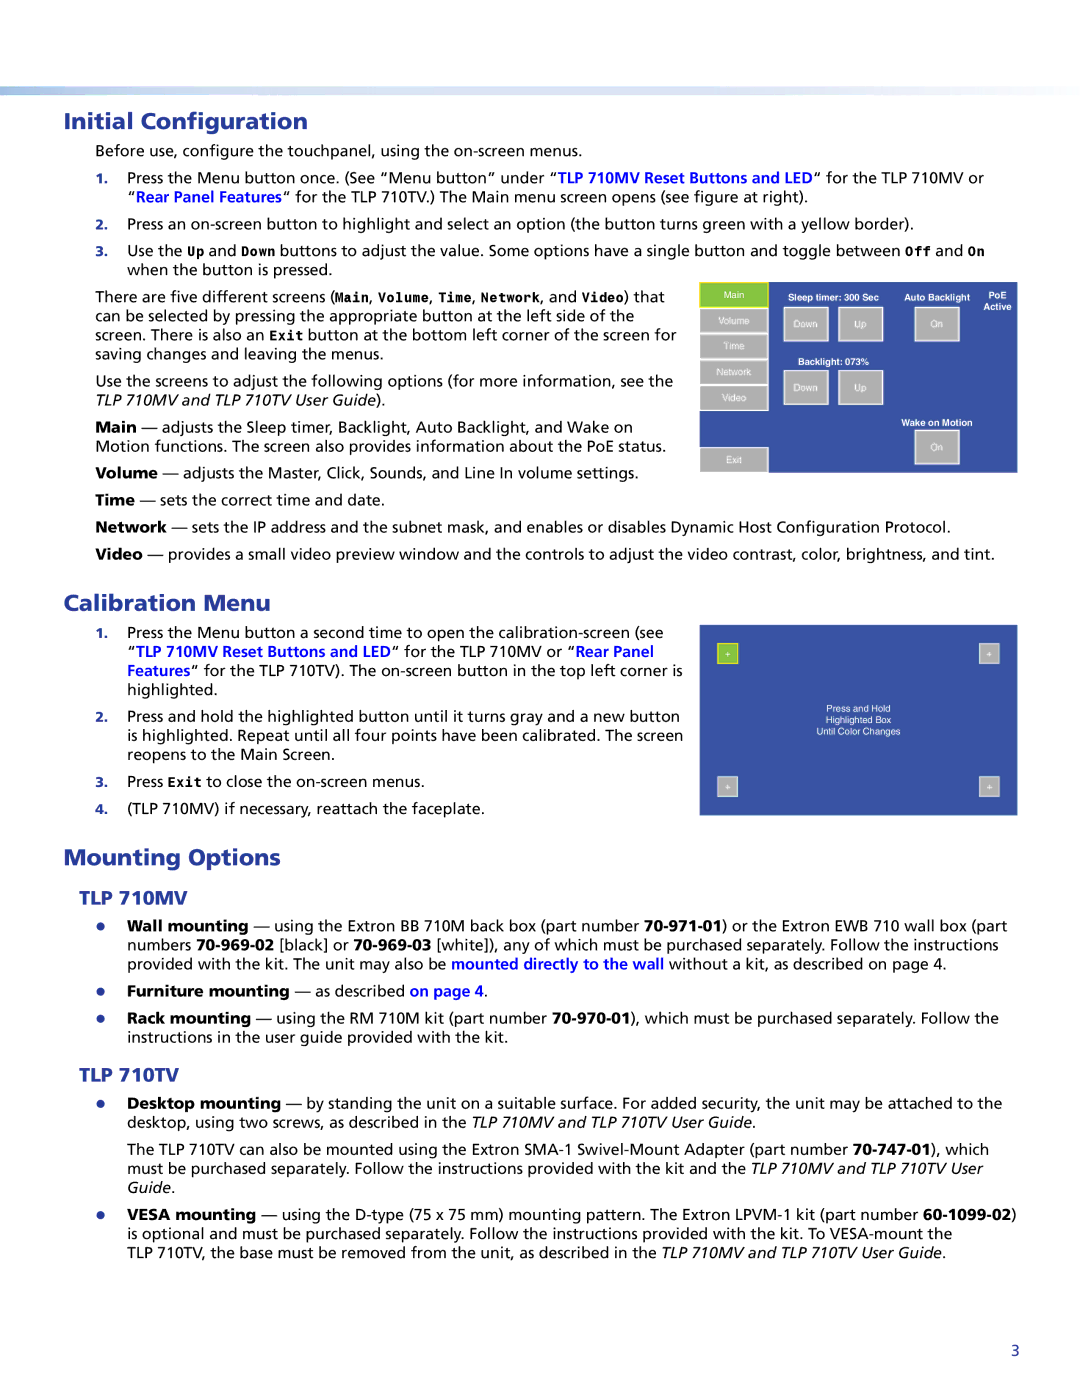
1.Press the Menu button once. (See “Menu button” under “TLP 710MV Reset Buttons and LED“ for the TLP 710MV or “Rear Panel Features“ for the TLP 710TV.) The Main menu screen opens (see figure at right).

2.Press an on-screen button to highlight and select an option (the button turns green with a yellow border).

3.Use the Up and Down buttons to adjust the value. Some options have a single button and toggle between Off and On when the button is pressed.

There are five different screens (Main, Volume, Time, Network, and Video) that can be selected by pressing the appropriate button at the left side of the screen. There is also an Exit button at the bottom left corner of the screen for saving changes and leaving the menus.

Use the screens to adjust the following options (for more information, see the TLP 710MV and TLP 710TV User Guide).

Main

Volume

Time

Network

Video

Sleep timer: 300 Sec

Auto Backlight

PoE


Active

Down

Up

On


Backlight: 073%


Down

Up


Main — adjusts the Sleep timer, Backlight, Auto Backlight, and Wake on


Wake on Motion


Motion functions. The screen also provides information about the PoE status.


On

Exit

Volume — adjusts the Master, Click, Sounds, and Line In volume settings.


Time — sets the correct time and date.


Network — sets the IP address and the subnet mask, and enables or disables Dynamic Host Configuration Protocol. Video — provides a small video preview window and the controls to adjust the video contrast, color, brightness, and tint.

Calibration Menu

1.Press the Menu button a second time to open the calibration-screen (see “TLP 710MV Reset Buttons and LED“ for the TLP 710MV or “Rear Panel Features“ for the TLP 710TV). The on-screen button in the top left corner is highlighted.

2.Press and hold the highlighted button until it turns gray and a new button is highlighted. Repeat until all four points have been calibrated. The screen reopens to the Main Screen.

3.Press Exit to close the on-screen menus.

4.(TLP 710MV) if necessary, reattach the faceplate.

+

+

Press and Hold

Highlighted Box

Until Color Changes

+

+

Mounting Options

TLP 710MV

zz Wall mounting — using the Extron BB 710M back box (part number 70-971-01) or the Extron EWB 710 wall box (part numbers 70-969-02[black] or 70-969-03[white]), any of which must be purchased separately. Follow the instructions provided with the kit. The unit may also be mounted directly to the wall without a kit, as described on page 4.

zz Furniture mounting — as described on page 4.

zz Rack mounting — using the RM 710M kit (part number 70-970-01), which must be purchased separately. Follow the instructions in the user guide provided with the kit.

TLP 710TV

zz Desktop mounting — by standing the unit on a suitable surface. For added security, the unit may be attached to the desktop, using two screws, as described in the TLP 710MV and TLP 710TV User Guide.

The TLP 710TV can also be mounted using the Extron SMA-1 Swivel-Mount Adapter (part number 70-747-01), which must be purchased separately. Follow the instructions provided with the kit and the TLP 710MV and TLP 710TV User Guide.

zz VESA mounting — using the D-type (75 x 75 mm) mounting pattern. The Extron LPVM-1 kit (part number 60109902) is optional and must be purchased separately. Follow the instructions provided with the kit. To VESA-mount the

TLP 710TV, the base must be removed from the unit, as described in the TLP 710MV and TLP 710TV User Guide.

3

Page 3
Image 3
Extron electronic TLP 710TV, TLP 710MV setup guide Initial Configuration, Calibration Menu, Mounting Options

TLP 710TV, TLP 710MV specifications

Extron's TLP 710MV and TLP 710TV are cutting-edge touch panel controllers designed for modern AV environments. These models serve as intuitive interfaces that facilitate seamless control of various AV electronics, providing users with an efficient means to manage presentations, lectures, and meetings.

The TLP 710MV features a 10.1-inch touchscreen display, offering a crisp and vibrant resolution that enhances user experience. Its sleek design incorporates a high-quality capacitive touchscreen, ensuring responsive operation and ease of use. Users can effortlessly navigate through menus, adjust settings, and interact with connected devices, streamlining the process of controlling complex AV setups.

On the other hand, the TLP 710TV caters to specific applications with similar functionalities but distinct features. It provides a robust platform for AV control while integrating with various Extron systems and devices, enabling a unified user experience across the board. Both models support Extron’s Global Configurator Plus software, allowing users to easily create customized interface layouts tailored to specific environments.

One of the standout features of both TLP 710MV and TLP 710TV is their PoE (Power over Ethernet) capability. This technology allows the touch panels to receive power and data through a single Ethernet cable, simplifying installation and reducing cable clutter. This is particularly advantageous in environments where space is limited or aesthetics are a concern.

Moreover, the TLP 710MV and TLP 710TV incorporate advanced technologies such as Extron's SimpleConnect and Room Scheduling capabilities. SimpleConnect allows users to wirelessly share content from laptops and mobile devices, making it easier for presenters to connect without the hassle of cables. Room Scheduling provides an overview of room availability, helping users efficiently manage bookings and optimize space usage.

Both models also include customizable buttons and layouts, empowering users to design their control interfaces according to specific requirements. With multimedia control options, users can operate projectors, displays, and audio systems seamlessly through the intuitive touch interface.

In summary, Extron's TLP 710MV and TLP 710TV touch panels are versatile AV control solutions that blend functionality with user-friendly design. With their advanced features and technologies, these models are ideal for educational institutions, corporate environments, and event spaces, ensuring that users have comprehensive control over their AV equipment with ease and efficiency.