TOOLS NEEDED FOR INSTALLATION | OPTIONAL ACCESSORIES AVAILABLE |
• Saber Saw or Jig Saw | • *Charcoal Filter |
• Drill | * it is highly recommended that professional style cooking always |
• 1 1/4" Wood Drill Bit | be vented to the outside; for recirculating installations only, some |
• Pliers | ductwork is required to exhaust the unit out of the cabinet. |
• Phillips Screwdriver | part # 6093034 |
• Wire Stripper or Utility Knife |
|
• Metal Snips | • Liners |
• Measuring Tape or Ruler | Create a |
• Level | Inca Pro 30. Depth adjustable from 21” - 25”. |
• Pencil | ProLiner 36 Stainless - part # 620000301 |
• Caulking Gun |
|
• Duct Tape |
|
PARTS SUPPLIED FOR INSTALLATION
•1 Backdraft Damper
•1 Literature Package
PARTS NEEDED FOR INSTALLATION
•2 Conduit Connectors
•Power Supply Cable
•Screws to Reinforce Atttachment
•Scews for Field Wiring Box
•1 Wall or Roof Cap
•All Metal Ductwork
!WARNING
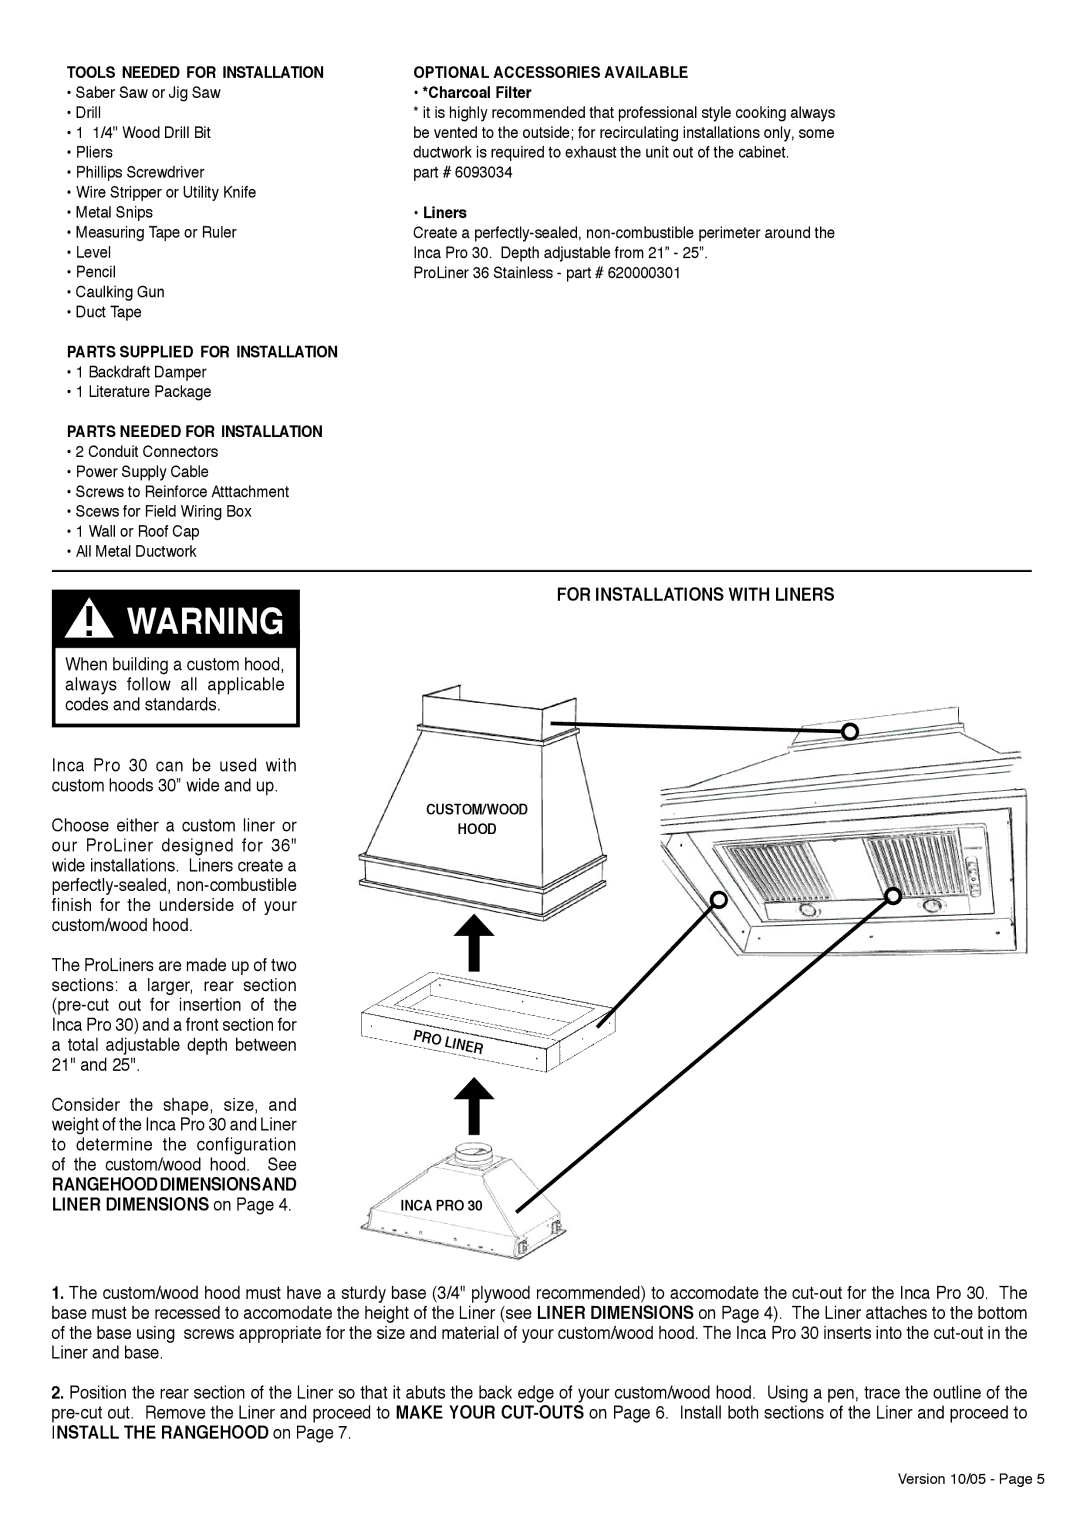
FOR INSTALLATIONS WITH LINERS
When building a custom hood, always follow all applicable codes and standards.
Inca Pro 30 can be used with custom hoods 30” wide and up.
Choose either a custom liner or our ProLiner designed for 36" wide installations. Liners create a
The ProLiners are made up of two sections: a larger, rear section
Consider the shape, size, and weight of the Inca Pro 30 and Liner to determine the configuration of the custom/wood hood. See
RANGEHOODDIMENSIONSAND LINER DIMENSIONS on Page 4.
CUSTOM/WOOD
HOOD
INCA PRO 30
1.The custom/wood hood must have a sturdy base (3/4" plywood recommended) to accomodate the
2.Position the rear section of the Liner so that it abuts the back edge of your custom/wood hood. Using a pen, trace the outline of the
Version 10/05 - Page 5
