TOOLS NEEDED FOR INSTALLATION | OPTIONAL ACCESSORIES AVAILABLE |
• Saber Saw or Jig Saw | • Duct Transition Kit |
• Drill | optional kit, transitions two 6" round openings to one 10" round |
• 1 1/4" Wood Drill Bit | opening |
• Pliers | part # 620000087 |
• Phillips Screwdriver | • *Charcoal Filters (Order 2 Kits) |
• Wire Stripper or Utility Knife | |
• Metal Snips | * it is highly recommended that professional style cooking always |
• Measuring Tape or Ruler | be vented to the outside; for recirculating installations only, some |
• Level | ductwork is required to exhaust the unit out of the cabinet. |
• Pencil | part # 6093034 |
• Caulking Gun | YOU MUST ORDER TWO OF PART #6093034 (ONE KIT FOR |
• Duct Tape | EACH OF THE TWO INCA PRO MOTORS) |
PARTS SUPPLIED FOR INSTALLATION | • Liners |
• 2 Backdraft Dampers | Create a |
• 1 Literature Package | Inca Pro 38. Depth adjustable from 21” - 25”. |
PARTS NEEDED FOR INSTALLATION | ProLiner 42 Stainless - part # 620000302 |
ProLiner 48 Stainless - part # 620000303 | |
• 2 Conduit Connectors |
|
• Power Supply Cable |
|
• Screws to Reinforce Atttachment |
|
• Scews for Field Wiring Box |
|
• 1 or 2 Wall or Roof Caps |
|
• All Metal Ductwork |
|
!WARNING
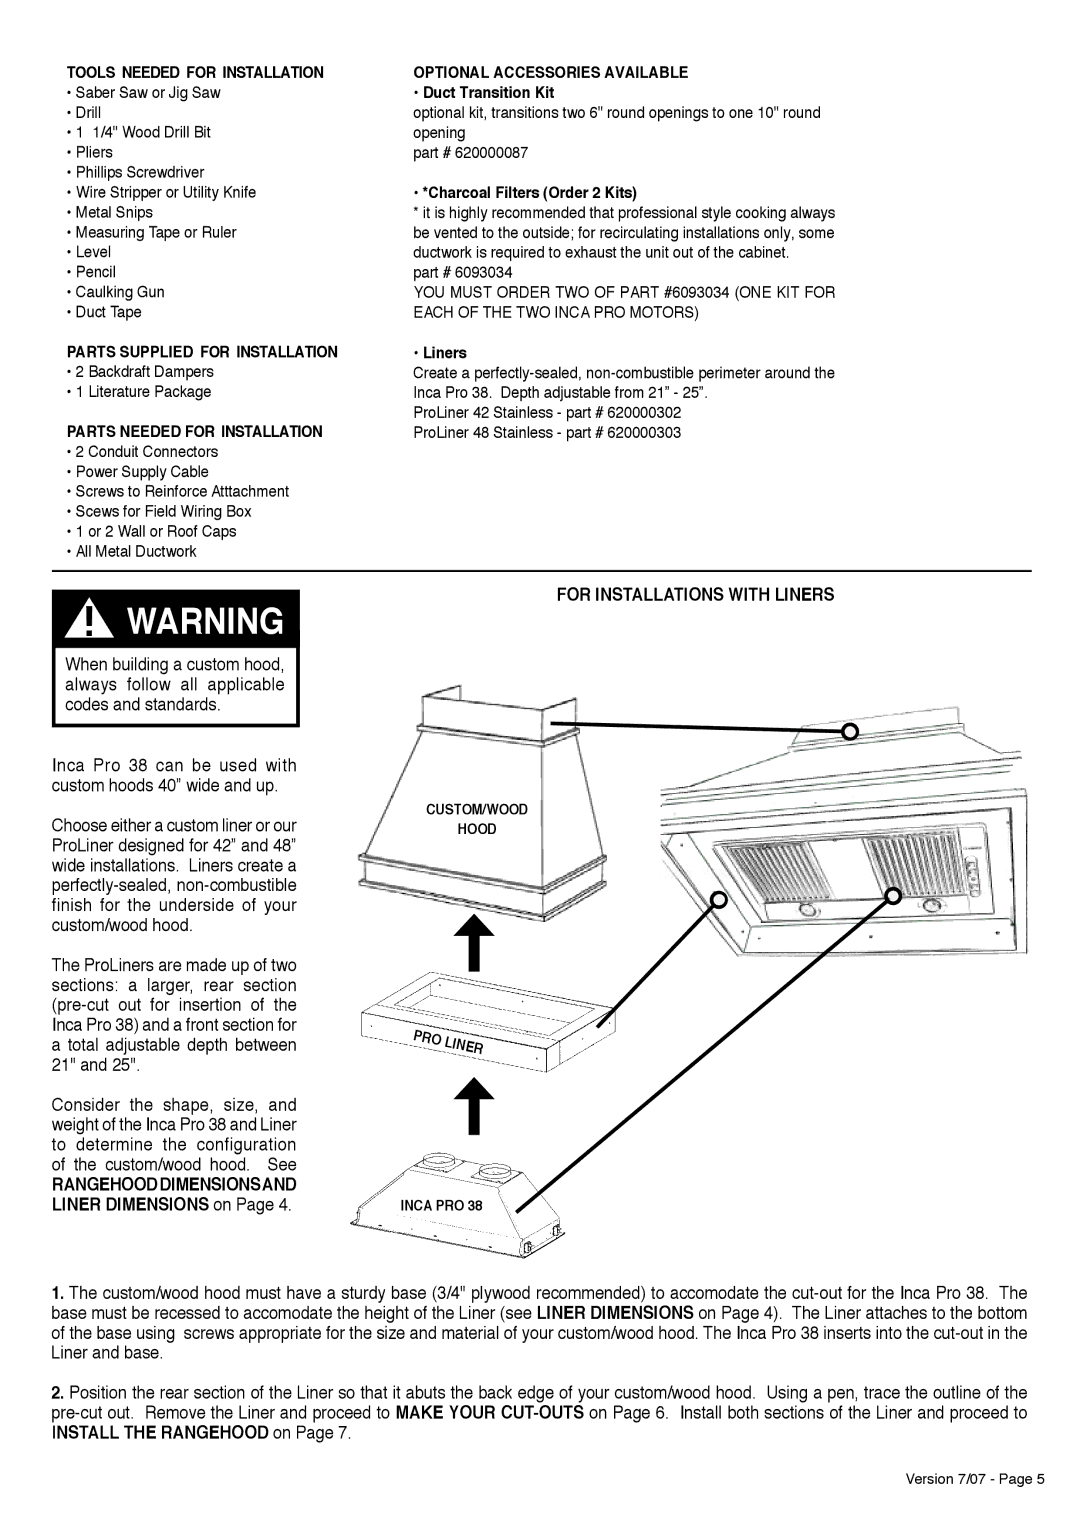
FOR INSTALLATIONS WITH LINERS
When building a custom hood, always follow all applicable codes and standards.
Inca Pro 38 can be used with custom hoods 40” wide and up.
Choose either a custom liner or our ProLiner designed for 42” and 48” wide installations. Liners create a
The ProLiners are made up of two sections: a larger, rear section
Consider the shape, size, and weight of the Inca Pro 38 and Liner to determine the configuration of the custom/wood hood. See
RANGEHOODDIMENSIONSAND LINER DIMENSIONS on Page 4.
CUSTOM/WOOD
HOOD
INCA PRO 38
1.The custom/wood hood must have a sturdy base (3/4" plywood recommended) to accomodate the
2.Position the rear section of the Liner so that it abuts the back edge of your custom/wood hood. Using a pen, trace the outline of the
Version 7/07 - Page 5