–Secure the tape measure clamp towards the end of the tape measure by tightening the rotary knob (7.4).
2.6Support plate
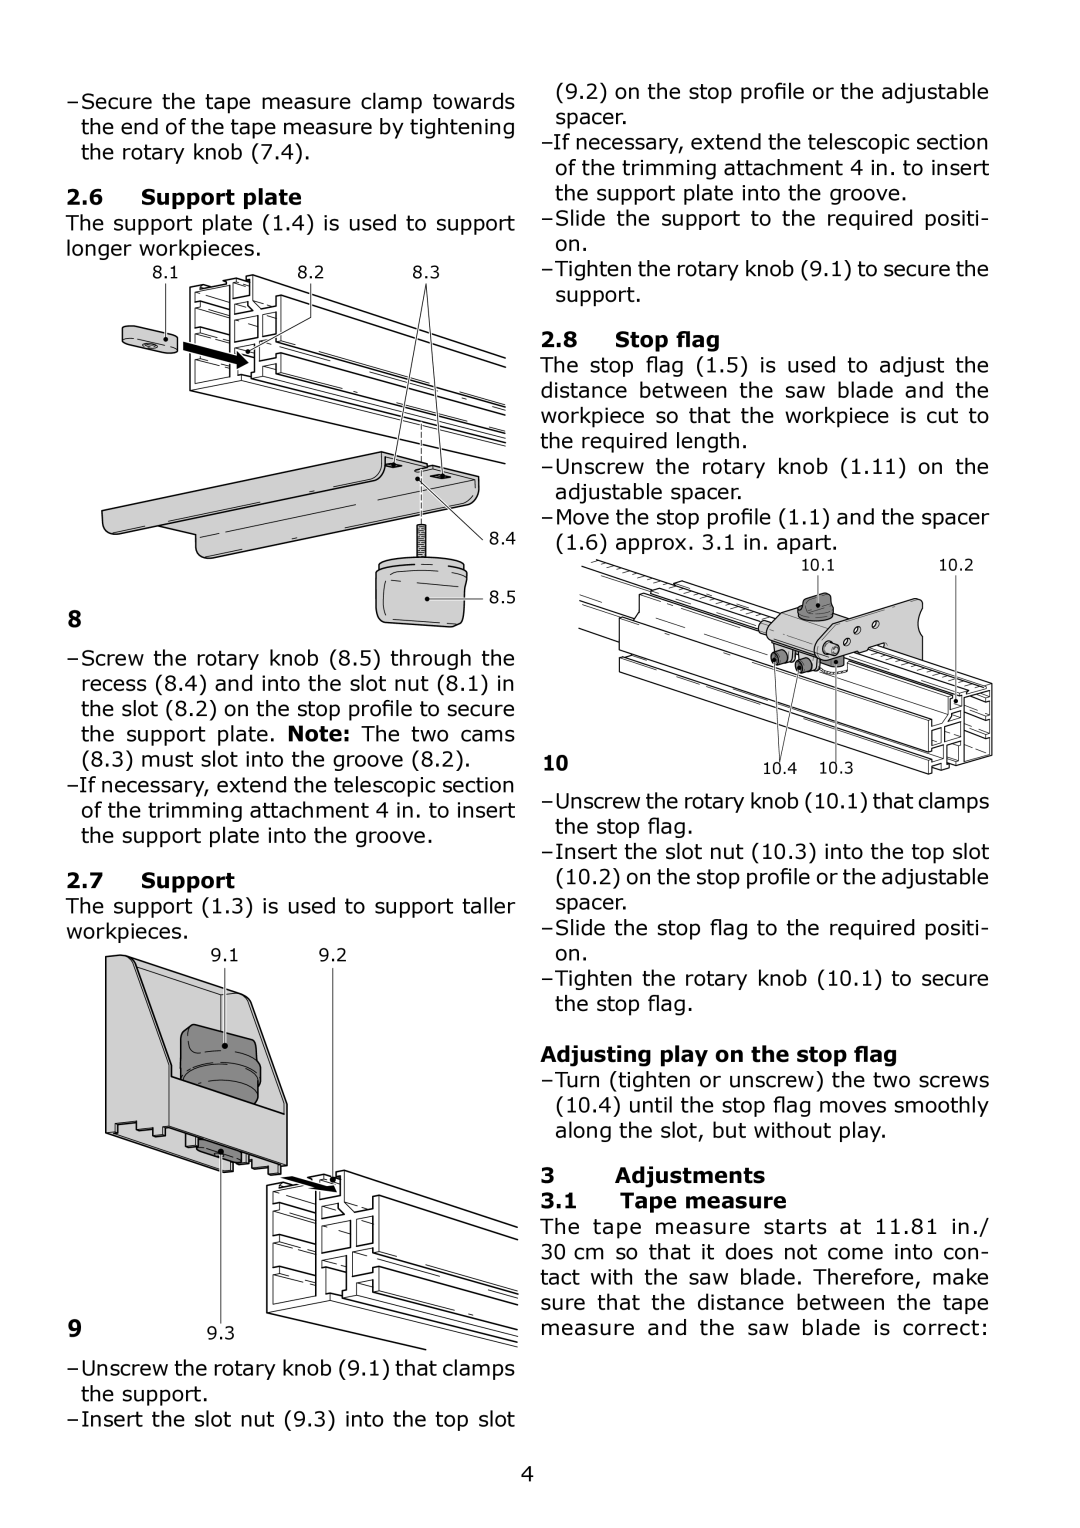
The support plate (1.4) is used to support longer workpieces.
8.1 | 8.2 | 8.3 |
(9.2) on the stop profile or the adjustable spacer.
–Slide the support to the required positi- on.
–Tighten the rotary knob (9.1) to secure the support.
2.8 Stop flag
The stop flag (1.5) is used to adjust the distance between the saw blade and the workpiece so that the workpiece is cut to the required length.
8.4(1.6) approx. 3.1 in. apart.
10.110.2
8.5
8
–Screw the rotary knob (8.5) through the recess (8.4) and into the slot nut (8.1) in the slot (8.2) on the stop profile to secure
the support plate. Note: The two cams (8.3) must slot into the groove (8.2).
2.7Support
The support (1.3) is used to support taller workpieces.
9.19.2
9 9.3
10 | 10.4 | 10.3 |
–Unscrew the rotary knob (10.1) that clamps the stop flag.
–Insert the slot nut (10.3) into the top slot (10.2) on the stop profile or the adjustable spacer.
–Slide the stop flag to the required positi- on.
–Tighten the rotary knob (10.1) to secure the stop flag.
Adjusting play on the stop flag
–Turn (tighten or unscrew) the two screws (10.4) until the stop flag moves smoothly along the slot, but without play.
3 Adjustments
3.1Tape measure
The tape measure starts at 11.81 in./ 30 cm so that it does not come into con- tact with the saw blade. Therefore, make sure that the distance between the tape measure and the saw blade is correct:
–Unscrew the rotary knob (9.1) that clamps the support.
–Insert the slot nut (9.3) into the top slot
4
