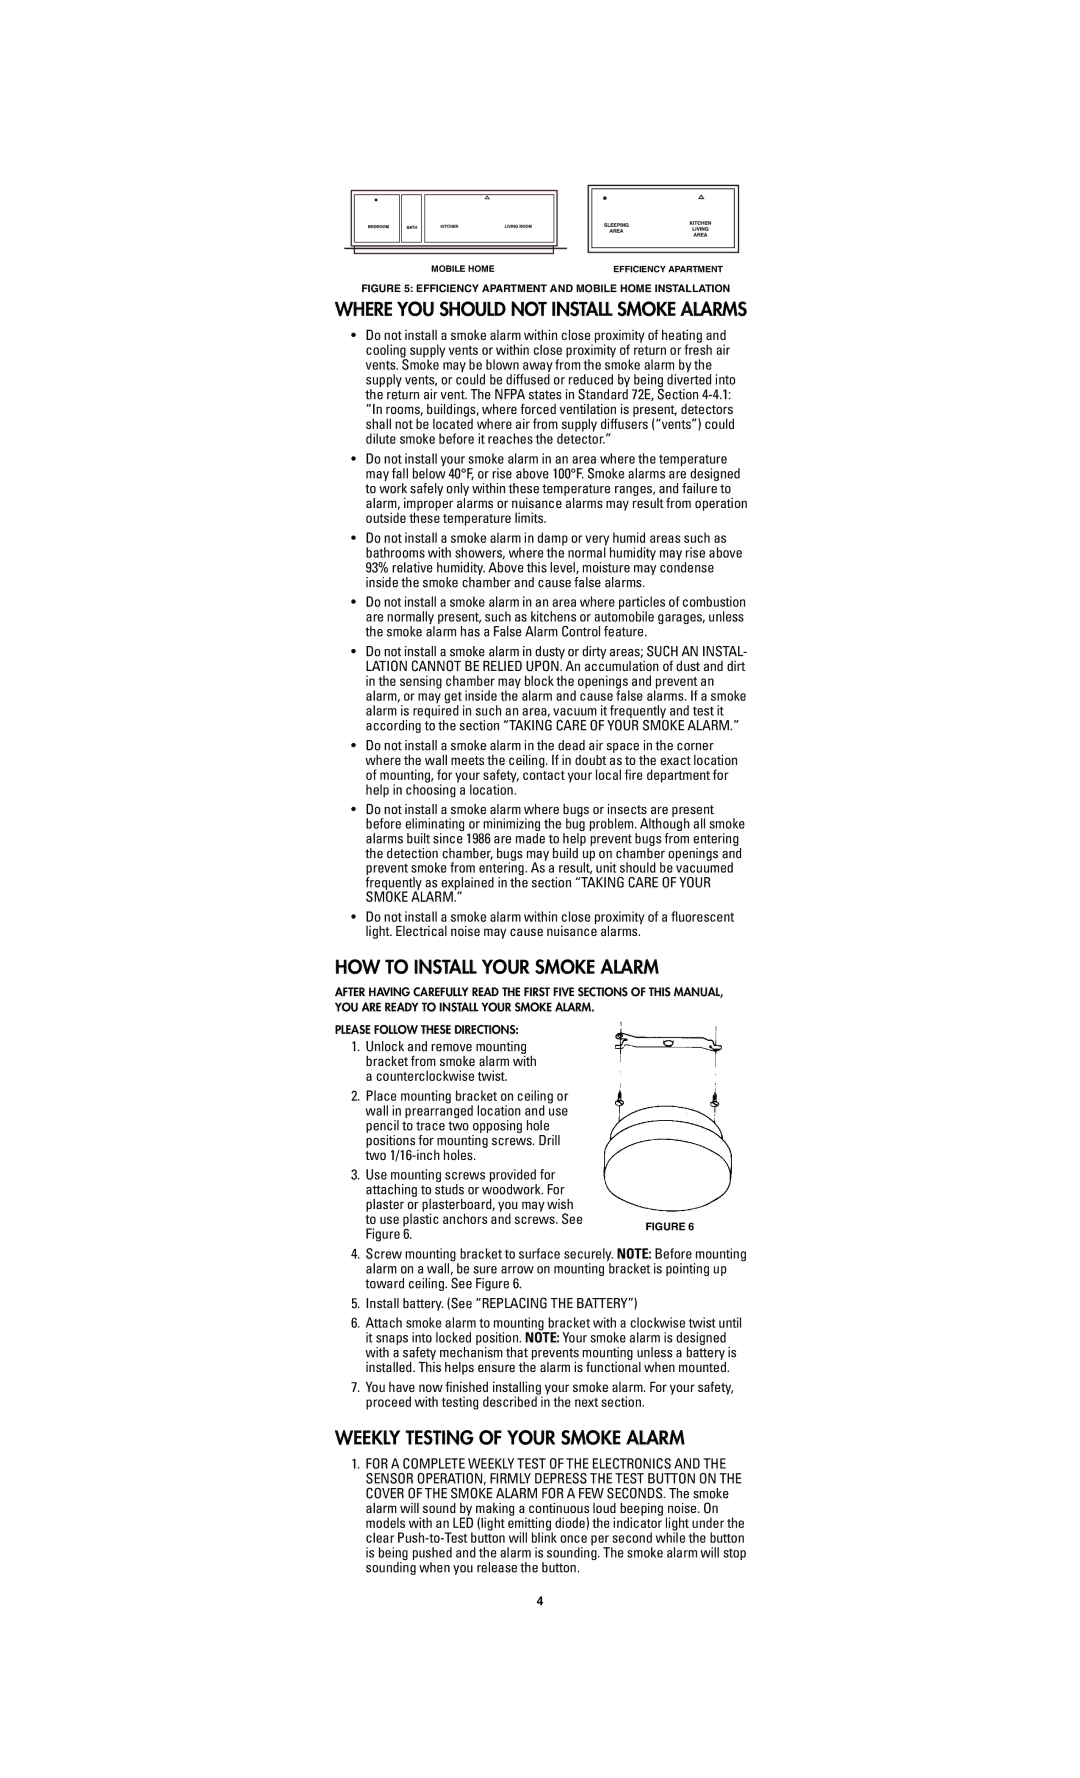
MOBILE HOME

EFFICIENCY APARTMENT

FIGURE 5: EFFICIENCY APARTMENT AND MOBILE HOME INSTALLATION

WHERE YOU SHOULD NOT INSTALL SMOKE ALARMS

Do not install a smoke alarm within close proximity of heating and cooling supply vents or within close proximity of return or fresh air vents. Smoke may be blown away from the smoke alarm by the supply vents, or could be diffused or reduced by being diverted into the return air vent. The NFPA states in Standard 72E, Section 4-4.1: “In rooms, buildings, where forced ventilation is present, detectors shall not be located where air from supply diffusers (“vents”) could dilute smoke before it reaches the detector.”

Do not install your smoke alarm in an area where the temperature may fall below 40°F, or rise above 100°F. Smoke alarms are designed to work safely only within these temperature ranges, and failure to alarm, improper alarms or nuisance alarms may result from operation outside these temperature limits.

Do not install a smoke alarm in damp or very humid areas such as bathrooms with showers, where the normal humidity may rise above 93% relative humidity. Above this level, moisture may condense inside the smoke chamber and cause false alarms.

Do not install a smoke alarm in an area where particles of combustion are normally present, such as kitchens or automobile garages, unless the smoke alarm has a False Alarm Control feature.

Do not install a smoke alarm in dusty or dirty areas; SUCH AN INSTAL- LATION CANNOT BE RELIED UPON. An accumulation of dust and dirt in the sensing chamber may block the openings and prevent an alarm, or may get inside the alarm and cause false alarms. If a smoke alarm is required in such an area, vacuum it frequently and test it according to the section “TAKING CARE OF YOUR SMOKE ALARM.”

Do not install a smoke alarm in the dead air space in the corner where the wall meets the ceiling. If in doubt as to the exact location of mounting, for your safety, contact your local fire department for help in choosing a location.

Do not install a smoke alarm where bugs or insects are present before eliminating or minimizing the bug problem. Although all smoke alarms built since 1986 are made to help prevent bugs from entering the detection chamber, bugs may build up on chamber openings and prevent smoke from entering. As a result, unit should be vacuumed frequently as explained in the section “TAKING CARE OF YOUR SMOKE ALARM.”

Do not install a smoke alarm within close proximity of a fluorescent light. Electrical noise may cause nuisance alarms.

HOW TO INSTALL YOUR SMOKE ALARM

AFTER HAVING CAREFULLY READ THE FIRST FIVE SECTIONS OF THIS MANUAL, YOU ARE READY TO INSTALL YOUR SMOKE ALARM.

PLEASE FOLLOW THESE DIRECTIONS:

1. Unlock and remove mounting bracket from smoke alarm with a counterclockwise twist.

2. Place mounting bracket on ceiling or wall in prearranged location and use pencil to trace two opposing hole positions for mounting screws. Drill two 1/16-inch holes.

3. Use mounting screws provided for attaching to studs or woodwork. For plaster or plasterboard, you may wish to use plastic anchors and screws. See

Figure 6.

FIGURE 6

4.Screw mounting bracket to surface securely. NOTE: Before mounting alarm on a wall, be sure arrow on mounting bracket is pointing up toward ceiling. See Figure 6.

5.Install battery. (See “REPLACING THE BATTERY”)

6.Attach smoke alarm to mounting bracket with a clockwise twist until it snaps into locked position. NOTE: Your smoke alarm is designed with a safety mechanism that prevents mounting unless a battery is installed. This helps ensure the alarm is functional when mounted.

7.You have now finished installing your smoke alarm. For your safety, proceed with testing described in the next section.

WEEKLY TESTING OF YOUR SMOKE ALARM

1.FOR A COMPLETE WEEKLY TEST OF THE ELECTRONICS AND THE SENSOR OPERATION, FIRMLY DEPRESS THE TEST BUTTON ON THE COVER OF THE SMOKE ALARM FOR A FEW SECONDS. The smoke alarm will sound by making a continuous loud beeping noise. On models with an LED (light emitting diode) the indicator light under the clear Push-to-Test button will blink once per second while the button is being pushed and the alarm is sounding. The smoke alarm will stop sounding when you release the button.

4

Page 4
Image 4
Firex E and PB, C owner manual HOW to Install Your Smoke Alarm, Weekly Testing of Your Smoke Alarm

B, E and PB, C specifications

Firex is a well-known brand in the area of fire safety, and its product line includes fire extinguishers classified as B, C, E, and PB types. These extinguishers are designed to combat specific classes of fires, and understanding their features, technologies, and characteristics is vital for effective fire safety management.

Fire extinguishers classified as B are intended for use on flammable liquids such as oils, gasoline, and other solvents. They typically utilize foam, dry chemical, or carbon dioxide (CO2) agents to smother the flames, creating a barrier between the fuel and the oxygen. The foam works to create a blanket over the burning liquid, while dry chemicals interrupt the chemical reaction. This makes B-class extinguishers essential in environments like workshops, garages, and kitchens where flammable liquids are commonly present.

C-class extinguishers are specifically designed for electrical fires. As these fires involve energized electrical equipment, using water or other conductive agents can pose a severe risk of electrocution. C-class extinguishers typically contain non-conductive agents, such as CO2 or dry chemical agents, which can put out the fire without conducting electricity. They are crucial for protecting technology-heavy environments like data centers, server rooms, and industrial applications.

E-class extinguishers are intended for use on fires ignited by combustible metals, such as magnesium, sodium, and potassium. These fires behave differently from typical fires and require specialized extinguishing agents like dry powder that can effectively smother the flames. E-class extinguishers are often found in chemical plants and metal manufacturing facilities, offering vital protection for highly reactive materials.

PB extinguishers, or portable extinguishers, encompass a variety of designs that ensure ease of access and usability. These extinguishers are lightweight and compact, making them ideal for residential, commercial, and industrial settings. The key features of PB extinguishers include ergonomic handles for easy operation, simple instructions for use, and portable sizes that allow for quick deployment during emergencies.

Overall, Firex B, C, E, and PB extinguishers play critical roles in fire safety. Their specialized designs cater to specific fire types, ensuring that appropriate measures can be taken swiftly when needed. Understanding these different classes allows individuals and organizations to make informed decisions about fire safety equipment, empowering them to protect lives and property effectively. Investing in the right type of Firex extinguisher enhances readiness against potential fire hazards wherever they may occur.