FIRE SAFETY TIPS
Follow safety rules and prevent hazardous situations: 1) Use smoking materials properly. Never smoke in bed. 2) Keep matches or lighters away from children; 3) Store flammable materials in proper containers;
4)Keep electrical appliances in good condition and don’t overload electrical circuits; 5) Keep stoves, barbecue grills, fireplaces and chimneys grease- and
Keep alarms clean, and test them weekly. Replace alarms immediately if they are not working properly. Smoke Alarms that do not work cannot alert you to a fire. Keep at least one working fire extinguisher on every floor, and an additional one in the kitchen. Have fire escape ladders or other reliable means of escape from an upper floor in case stairs are blocked.
BASIC SAFETY INFORMATION
•Dangers, Warnings, and Cautions alert you to important operating instructions or to potentially hazardous situations. Pay special attention to these items.
•This Smoke/CO Alarm is approved for use in
•This combination Smoke/Carbon Monoxide Alarm has two separate alarms. The CO Alarm is not designed to detect fire or any other gas. It will only indicate the presence of carbon monoxide gas at the sensor. Carbon monoxide gas may be present in other areas. The Smoke Alarm will only indicate the presence of smoke that reaches the sensor. The Smoke Alarm is not designed to sense gas, heat or flames.
•This Smoke/CO Alarm cannot operate without working batteries. Removing the batteries for any reason, or failing to replace the batteries at the end of their service life, removes your protection.
•NEVER ignore any alarm. See “If Your Smoke/CO Alarm Sounds” for more information on how to respond to an alarm. Failure to respond can result in injury or death.
•The Silence Features are for your convenience only and will not correct a problem. See "Using the Silence Features" for details. Always check your home for a potential problem after any alarm. Failure to do so can result in injury or death.
•Test this Smoke/CO Alarm once a week. If the Alarm ever fails to test correctly, have it replaced immediately! If the Alarm is not working properly, it cannot alert you to a problem.
•This product is intended for use in ordinary indoor locations of family living units. It is not designed to measure CO levels in compliance with Occupational Safety and Health Administration (OSHA) commercial or industrial standards. Individuals with medical conditions that may make them more sensitive to carbon monoxide may consider using warning devices which provide audible and visual signals for carbon monoxide concentrations under 30 ppm. For additional information on carbon monoxide and your medical condition contact your physician.
STEP BY STEP GUIDE TO PROGRAMMING THIS ALARM
FOR FIRST TIME AND WHEN CHANGING BATTERIES
|
|
|
|
Action: | Alarm Will Say: |
| |
1. Insert batteries (2, AA batteries). | “Welcome, First Alert Smoke and | ||
|
| Carbon Monoxide Alarm.” | |
|
| “No location programmed” if first | |
|
| time or “[Location, example: | |
|
| “Basement”] location programmed” | |
|
| when changing batteries. | |
|
| “To select location, press and hold | |
|
| test button now.” | |
2. Press & Hold Test Button if | “To save location, press and hold | ||
| you would like to program the | test button after location is heard.” | |
| location or change the location | Alarm will speak list of locations | |
| of the Alarm. Release button | (see below). | |
| after Alarm responds. |
|
|
|
|
|
|
3. After you hear the location of | “[Location, example: “Basement”] | ||
| where you are placing the Alarm, | location saved.” | |
| Press & Hold the Test Button. | If no location is chosen: | |
|
| “No location saved.” | |
Your Alarm has now been programmed for the location of your choice. Available locations:
Basement | Kitchen | Child’s Bedroom |
Living Room | Dining Room | Master Bedroom |
Family Room | No Location | Guest Bedroom |
Office | Hallway | Utility Room |
ADDING AND LINKING ADDITIONAL ONELINK® ALARMS
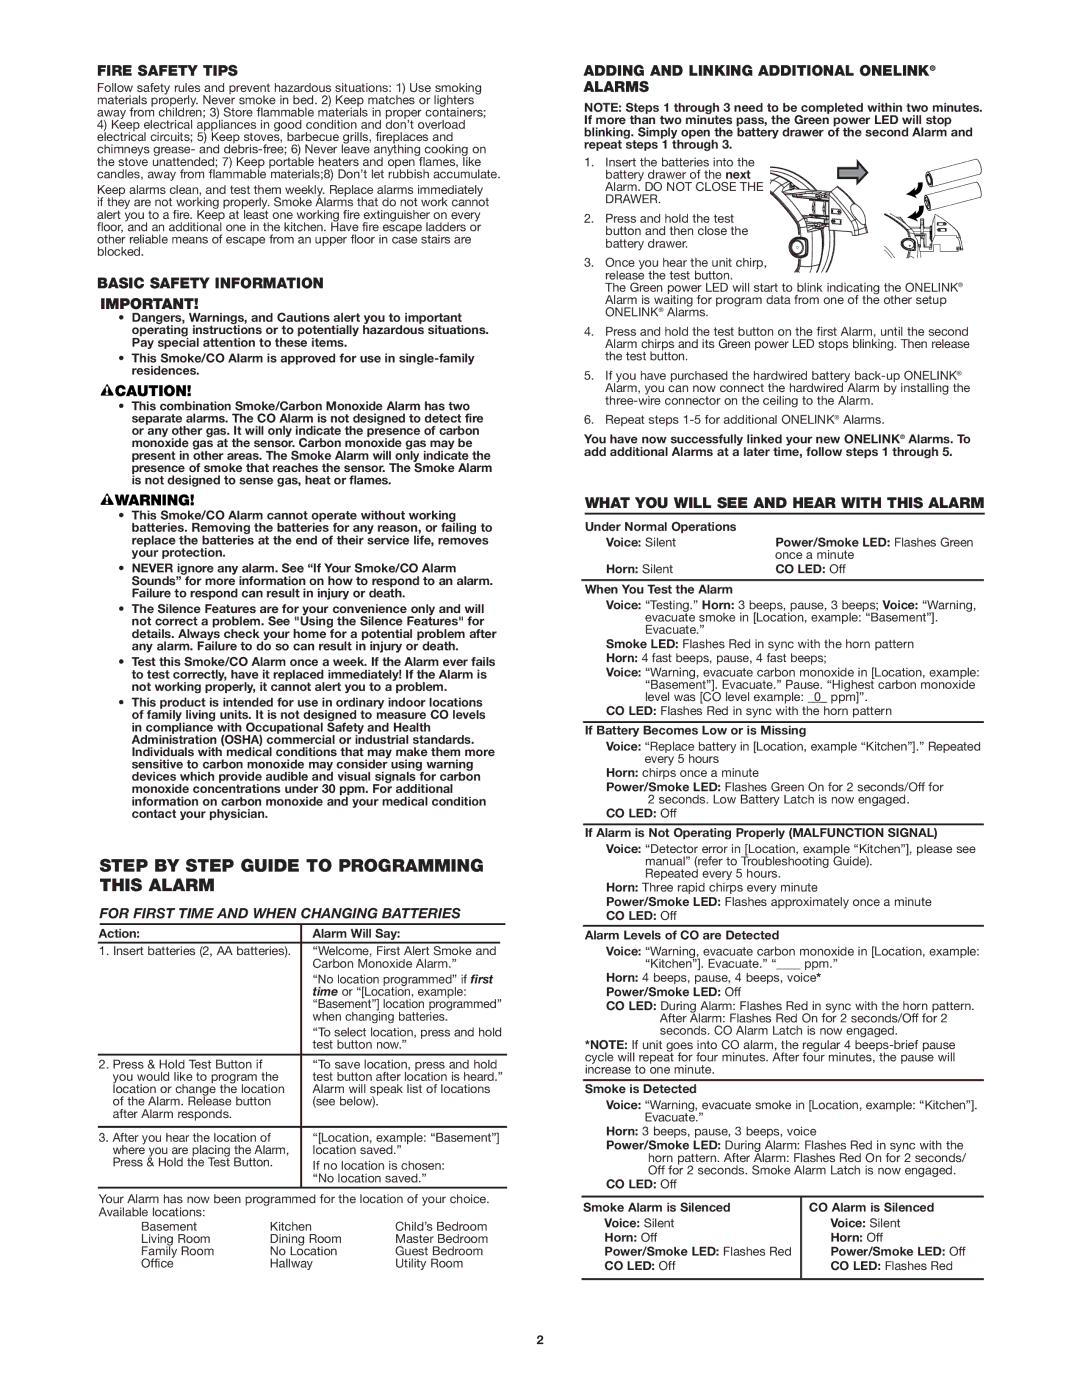
NOTE: Steps 1 through 3 need to be completed within two minutes. If more than two minutes pass, the Green power LED will stop blinking. Simply open the battery drawer of the second Alarm and repeat steps 1 through 3.
1. Insert the batteries into the battery drawer of the next
Alarm. DO NOT CLOSE THE ![]()
![]()
![]()
![]()
![]()
![]()
![]()
DRAWER.
2. Press and hold the test button and then close the battery drawer.
3. Once you hear the unit chirp, release the test button.
The Green power LED will start to blink indicating the ONELINK® Alarm is waiting for program data from one of the other setup ONELINK® Alarms.
4.Press and hold the test button on the first Alarm, until the second Alarm chirps and its Green power LED stops blinking. Then release the test button.
5.If you have purchased the hardwired battery
6.Repeat steps
You have now successfully linked your new ONELINK® Alarms. To add additional Alarms at a later time, follow steps 1 through 5.
WHAT YOU WILL SEE AND HEAR WITH THIS ALARM
Under Normal Operations |
|
Voice: Silent | Power/Smoke LED: Flashes Green |
| once a minute |
Horn: Silent | CO LED: Off |
When You Test the Alarm
Voice: “Testing.” Horn: 3 beeps, pause, 3 beeps; Voice: “Warning,
evacuate smoke in [Location, example: “Basement”]. Evacuate.”
Smoke LED: Flashes Red in sync with the horn pattern
Horn: 4 fast beeps, pause, 4 fast beeps;
Voice: “Warning, evacuate carbon monoxide in [Location, example: “Basement”]. Evacuate.” Pause. “Highest carbon monoxide level was [CO level example: _0_ ppm]”.
CO LED: Flashes Red in sync with the horn pattern
If Battery Becomes Low or is Missing
Voice: “Replace battery in [Location, example “Kitchen”].” Repeated every 5 hours
Horn: chirps once a minute
Power/Smoke LED: Flashes Green On for 2 seconds/Off for 2 seconds. Low Battery Latch is now engaged.
CO LED: Off
If Alarm is Not Operating Properly (MALFUNCTION SIGNAL)
Voice: “Detector error in [Location, example “Kitchen”], please see manual” (refer to Troubleshooting Guide).
Repeated every 5 hours. Horn: Three rapid chirps every minute
Power/Smoke LED: Flashes approximately once a minute
CO LED: Off
Alarm Levels of CO are Detected
Voice: “Warning, evacuate carbon monoxide in [Location, example: “Kitchen”]. Evacuate.” “____ ppm.”
Horn: 4 beeps, pause, 4 beeps, voice*
Power/Smoke LED: Off
CO LED: During Alarm: Flashes Red in sync with the horn pattern. After Alarm: Flashes Red On for 2 seconds/Off for 2 seconds. CO Alarm Latch is now engaged.
*NOTE: If unit goes into CO alarm, the regular 4
Smoke is Detected
Voice: “Warning, evacuate smoke in [Location, example: “Kitchen”]. Evacuate.”
Horn: 3 beeps, pause, 3 beeps, voice
Power/Smoke LED: During Alarm: Flashes Red in sync with the horn pattern. After Alarm: Flashes Red On for 2 seconds/ Off for 2 seconds. Smoke Alarm Latch is now engaged.
CO LED: Off
Smoke Alarm is Silenced | CO Alarm is Silenced |
Voice: Silent | Voice: Silent |
Horn: Off | Horn: Off |
Power/Smoke LED: Flashes Red | Power/Smoke LED: Off |
CO LED: Off | CO LED: Flashes Red |
|
|
2