(1,1)
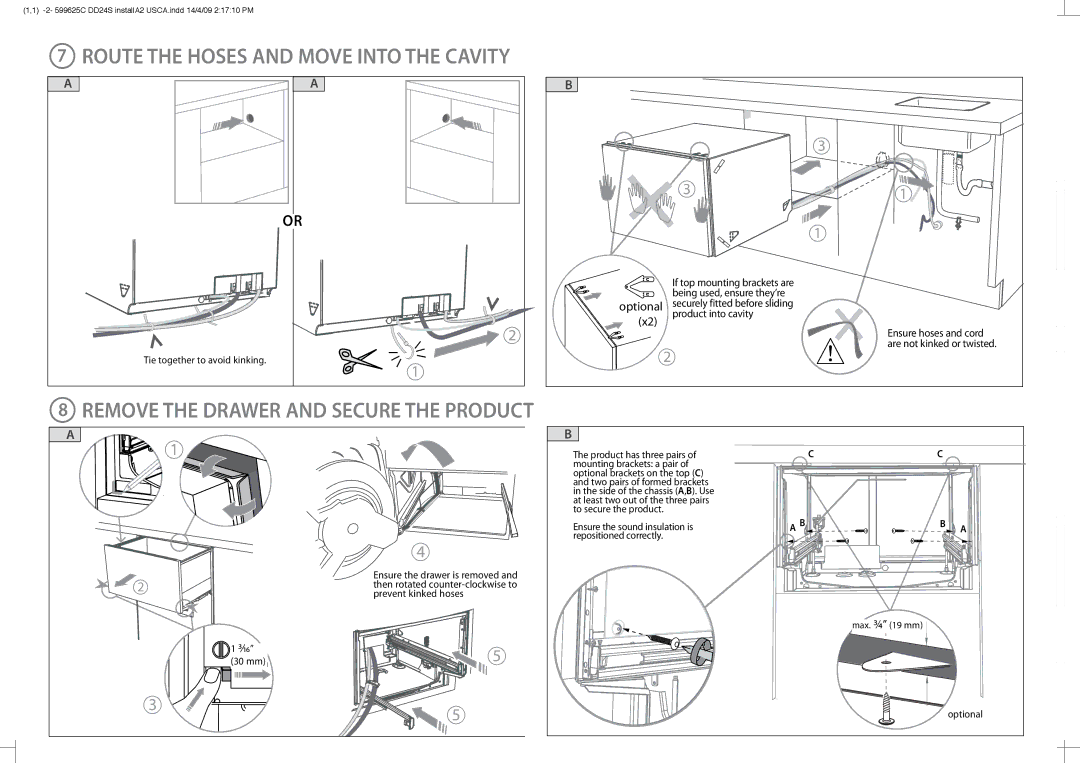
7ROUTE THE HOSES AND MOVE INTO THE CAVITY
A |
|
|
|
|
| A |
|
|
|
|
|
|
|
|
|
|
|
|
|
|
| ||
|
|
|
|
|
|
|
|
|
|
|
|
|
|
|
|
|
|
|
|
|
|
|
|
|
|
|
|
|
|
|
|
|
|
|
|
|
|
|
|
|
|
|
|
|
|
|
|
OR
2
Tie together to avoid kinking.
1
B
3
3 | 1 |
|
1
| If top mounting brackets are |
| being used, ensure they’re |
optional | securely fitted before sliding |
(x2) | product into cavity |
|
Ensure hoses and cord are not kinked or twisted.
2
8REMOVE THE DRAWER AND SECURE THE PRODUCT
A
1
B
The product has three pairs of mounting brackets: a pair of optional brackets on the top (C) and two pairs of formed brackets in the side of the chassis (A,B). Use at least two out of the three pairs to secure the product.
CC
2
1 3⁄16”
(30mm) mm
3
4
Ensure the drawer is removed and then rotated
5
5
Ensure the sound insulation is repositioned correctly.
A B![]()
![]()
![]()
![]()
![]()
![]()

![]()
![]()
![]()
![]()
![]()
![]()
![]()
![]()
![]()
![]()
![]() B
B![]()
![]() A
A
max. ¾” (19 mm)
optional