SET UP
CAUTWARNINGON
KEEP HAIR, FINGERS, LOOSE CLOTHING, PETS, AND CHILDREN AWAY FROM HINGES
AND OTHER MOVING PARTS TO AVOID SERIOUS INJURY. ALSO, TO AVOID SERIOUS
INJURY, BE SURE TO HAVE THE HEIGHT ADJUSTMENT “C” PIN AND HITCH PINS AT
BASE OF RAILS LOCKED IN PLACE BEFORE GETTING ON YOUR TOTAL GYM 1000.
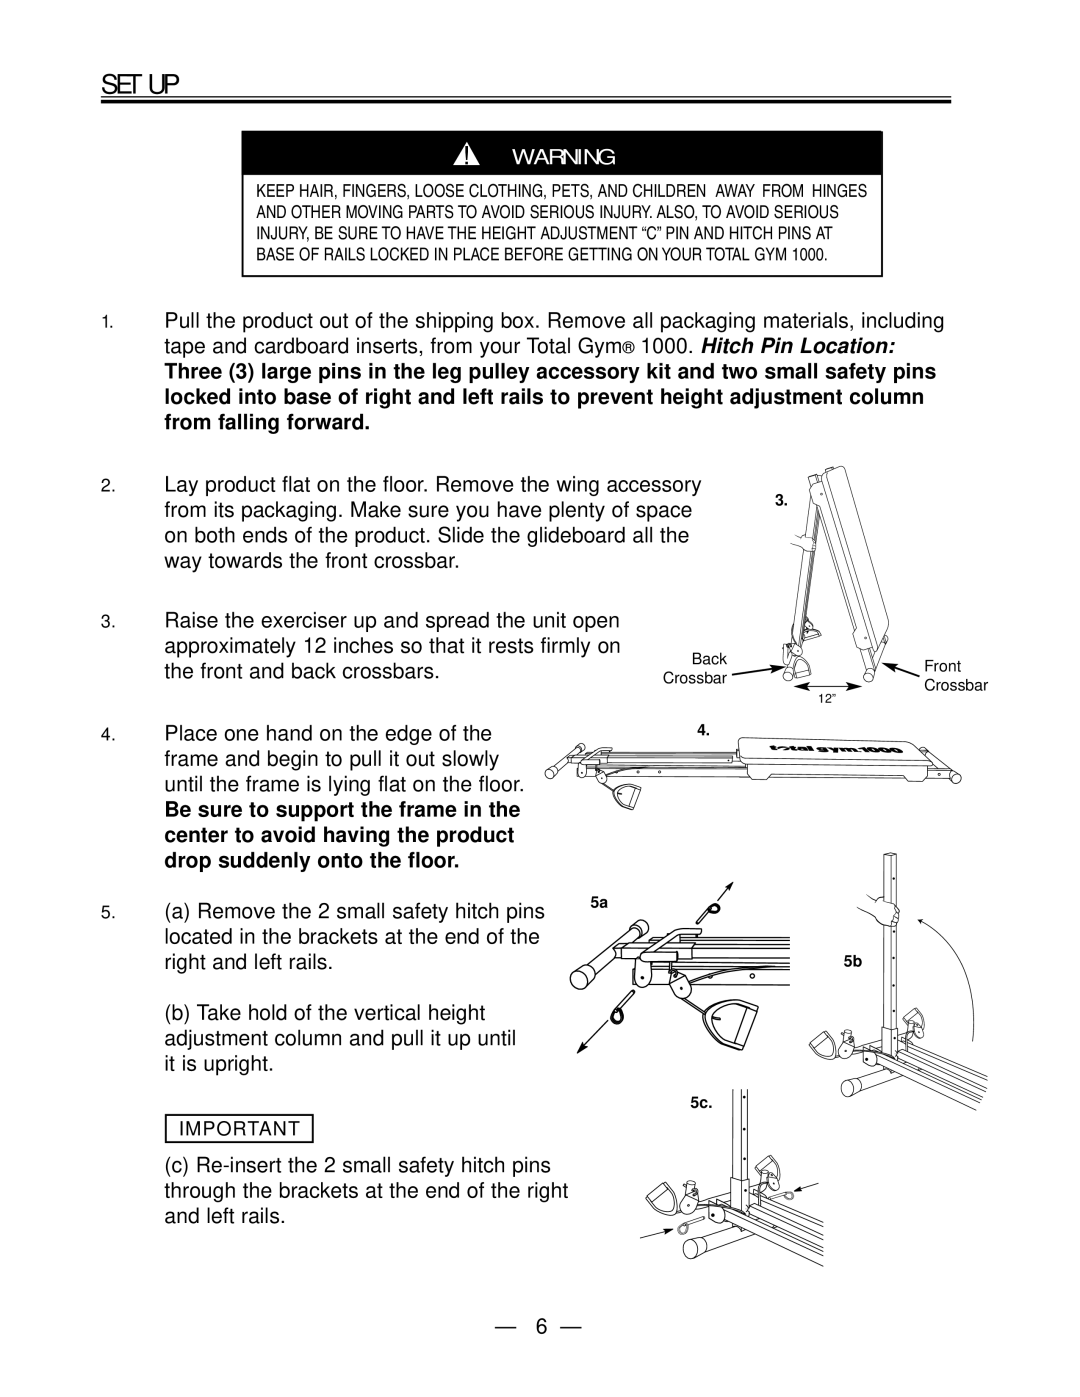
1.Pull the product out of the shipping box. Remove all packaging materials, including tape and cardboard inserts, from your Total Gym® 1000. Hitch Pin Location:
Three (3) large pins in the leg pulley accessory kit and two small safety pins locked into base of right and left rails to prevent height adjustment column from falling forward.
2.Lay product flat on the floor. Remove the wing accessory
| from its packaging. Make sure you have plenty of space | 3. | ||
|
| |||
| on both ends of the product. Slide the glideboard all the |
| ||
| way towards the front crossbar. |
|
|
|
3. | Raise the exerciser up and spread the unit open |
|
| |
| approximately 12 inches so that it rests firmly on | Back |
| |
| the front and back crossbars. |
|
| |
|
| Crossbar |
| |
|
|
|
| 12” |
4. | Place one hand on the edge of the |
| 4. |
|
| frame and begin to pull it out slowly |
|
|
|
| until the frame is lying flat on the floor. |
|
|
|
| Be sure to support the frame in the |
|
|
|
| center to avoid having the product |
|
|
|
| drop suddenly onto the floor. |
|
|
|
5. | (a) Remove the 2 small safety hitch pins | 5a |
|
|
|
|
| ||
| located in the brackets at the end of the |
|
|
|
| right and left rails. |
|
| 5b |
(b) Take hold of the vertical height adjustment column and pull it up until it is upright.
5c.
IMPORTANT
(c)
![]() Front Crossbar
Front Crossbar
— 6 —