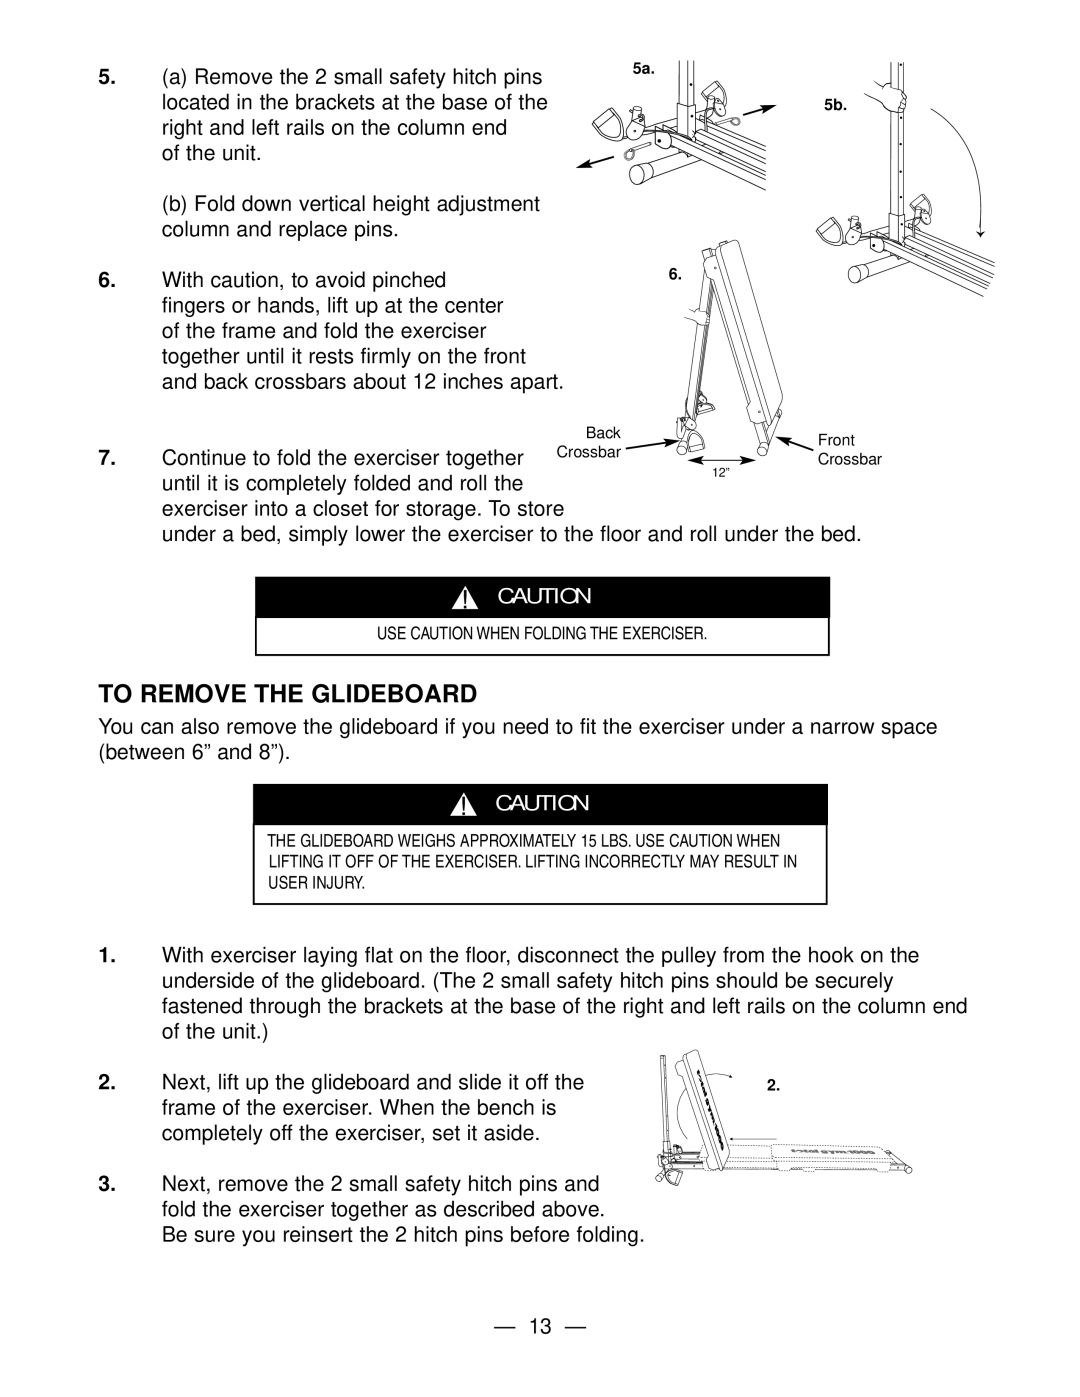
5. | (a) Remove the 2 small safety hitch pins | 5a. | |
| |||
| located in the brackets at the base of the | 5b. | |
| right and left rails on the column end |
| |
| of the unit. |
| |
| (b) Fold down vertical height adjustment |
| |
| column and replace pins. |
| |
6. | With caution, to avoid pinched | 6. | |
| fingers or hands, lift up at the center |
| |
| of the frame and fold the exerciser |
| |
| together until it rests firmly on the front |
| |
| and back crossbars about 12 inches apart. |
| |
| Back | Front | |
7. | Continue to fold the exerciser together Crossbar | ||
Crossbar | |||
| until it is completely folded and roll the | 12” | |
|
|
exerciser into a closet for storage. To store
under a bed, simply lower the exerciser to the floor and roll under the bed.
→
CAUTION
USE CAUTION WHEN FOLDING THE EXERCISER.
TO REMOVE THE GLIDEBOARD
You can also remove the glideboard if you need to fit the exerciser under a narrow space (between 6” and 8”).
CAUTION
THE GLIDEBOARD WEIGHS APPROXIMATELY 15 LBS. USE CAUTION WHEN
LIFTING IT OFF OF THE EXERCISER. LIFTING INCORRECTLY MAY RESULT IN
USER INJURY.
1.With exerciser laying flat on the floor, disconnect the pulley from the hook on the underside of the glideboard. (The 2 small safety hitch pins should be securely fastened through the brackets at the base of the right and left rails on the column end of the unit.)
2. Next, lift up the glideboard and slide it off the ![]()
![]()
![]() 2.
2.
frame of the exerciser. When the bench is completely off the exerciser, set it aside.
3. Next, remove the 2 small safety hitch pins and fold the exerciser together as described above.
Be sure you reinsert the 2 hitch pins before folding.
— 13 —
