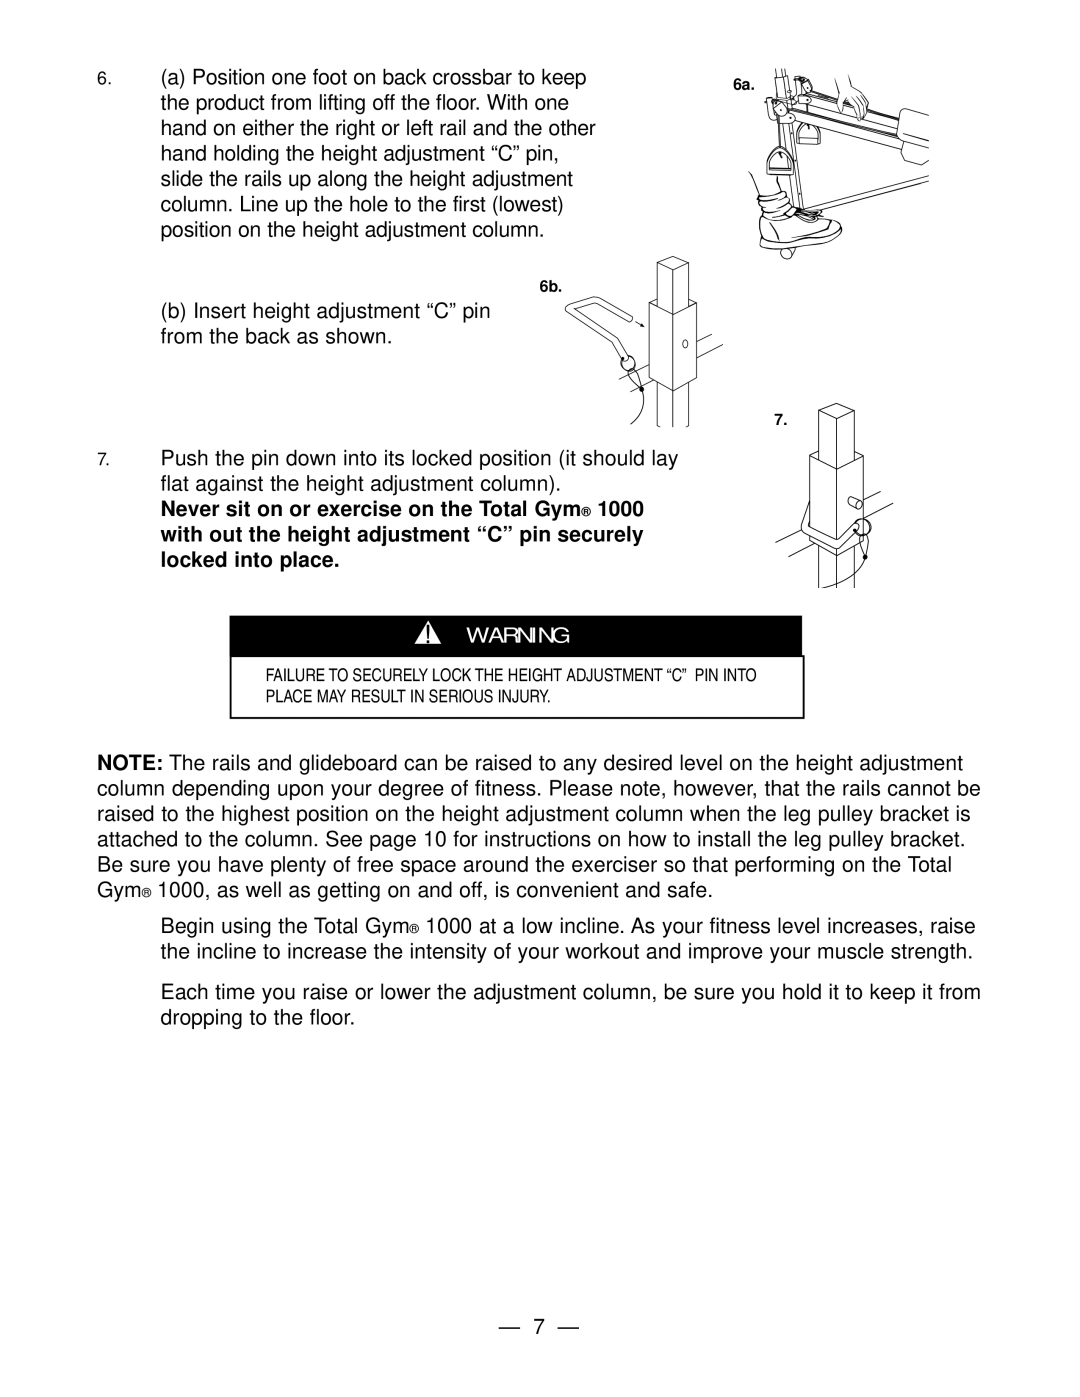
6.(a) Position one foot on back crossbar to keep the product from lifting off the floor. With one hand on either the right or left rail and the other hand holding the height adjustment “C” pin, slide the rails up along the height adjustment column. Line up the hole to the first (lowest) position on the height adjustment column.
6b.
(b)Insert height adjustment “C” pin from the back as shown.
6a.
7.
7. Push the pin down into its locked position (it should lay flat against the height adjustment column).
Never sit on or exercise on the Total Gym® 1000 with out the height adjustment “C” pin securely locked into place.
WARNING
FAILURE TO SECURELY LOCK THE HEIGHT ADJUSTMENT “C” PIN INTO
PLACE MAY RESULT IN SERIOUS INJURY.
NOTE: The rails and glideboard can be raised to any desired level on the height adjustment column depending upon your degree of fitness. Please note, however, that the rails cannot be raised to the highest position on the height adjustment column when the leg pulley bracket is attached to the column. See page 10 for instructions on how to install the leg pulley bracket. Be sure you have plenty of free space around the exerciser so that performing on the Total Gym® 1000, as well as getting on and off, is convenient and safe.
Begin using the Total Gym® 1000 at a low incline. As your fitness level increases, raise the incline to increase the intensity of your workout and improve your muscle strength.
Each time you raise or lower the adjustment column, be sure you hold it to keep it from dropping to the floor.
— 7 —