Assembly
IMPORTANT! Before each use or assembly, inspect this product for damaged hardware, loose joints, missing parts or sharp edges. DO NOT use if any parts are missing or broken. Contact
Never substitute parts.
#8 x 3/4" Pointed Screw - 2
SHOWN ACTUAL SIZE
|
| Lower Leg Long Portion |
| Cup | Elbow Foot |
1 | Side |
|
Down |
|
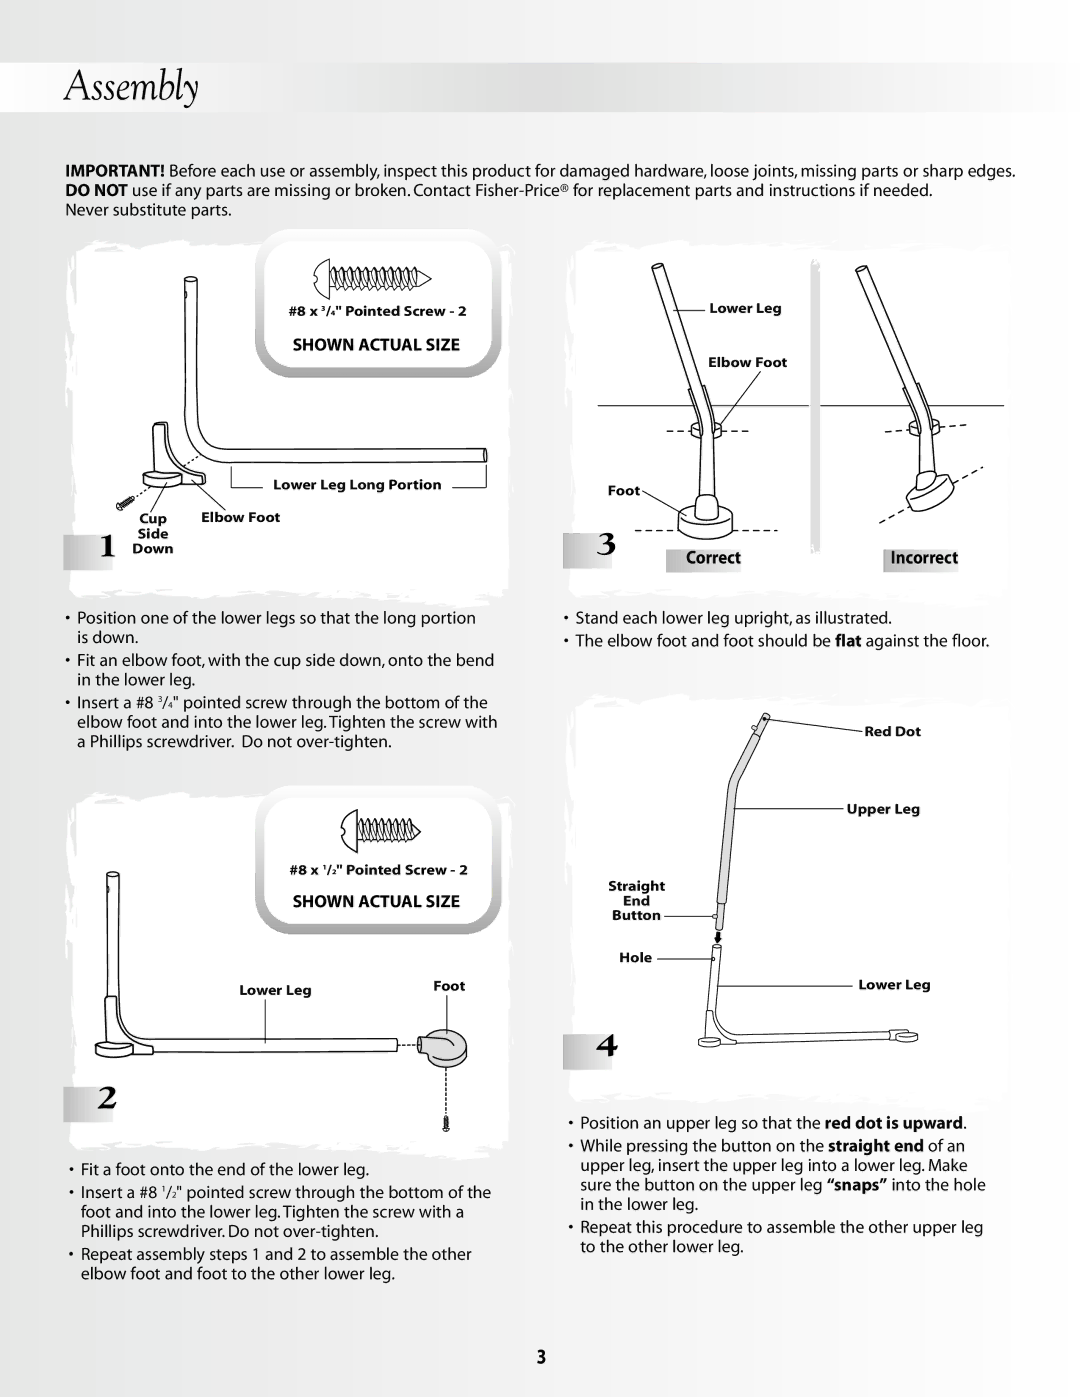
•Position one of the lower legs so that the long portion is down.
•Fit an elbow foot, with the cup side down, onto the bend in the lower leg.
•Insert a #8 3/4" pointed screw through the bottom of the elbow foot and into the lower leg. Tighten the screw with a Phillips screwdriver. Do not
#8 x 1/2" Pointed Screw - 2
SHOWN ACTUAL SIZE
Lower Leg | Foot |
|
![]()
![]()
![]()
![]()
![]()
![]()
![]()
![]()
![]()
![]()
![]()
![]()
![]()
![]()
![]()
![]()
![]()
![]()
![]()
![]()
![]()
![]()
![]()
![]()
![]()
![]() 2
2![]()
![]()
![]()
•Fit a foot onto the end of the lower leg.
•Insert a #8 1/2" pointed screw through the bottom of the foot and into the lower leg. Tighten the screw with a Phillips screwdriver. Do not
•Repeat assembly steps 1 and 2 to assemble the other elbow foot and foot to the other lower leg.
Lower Leg
Elbow Foot
Foot
3 | Correct | Incorrect |
|
•Stand each lower leg upright, as illustrated.
•The elbow foot and foot should be flat against the floor.
![]()
![]() Red Dot
Red Dot
Upper Leg
Straight
End
Button
Hole
Lower Leg
![]()
![]()
![]()
![]()
![]()
![]()
![]()
![]()
![]()
![]()
![]()
![]()
![]()
![]()
![]()
![]()
![]()
![]()
![]()
![]()
![]()
![]()
![]()
![]()
![]()
![]() 4
4![]()
![]()
![]()
•Position an upper leg so that the red dot is upward.
•While pressing the button on the straight end of an upper leg, insert the upper leg into a lower leg. Make sure the button on the upper leg “snaps” into the hole in the lower leg.
•Repeat this procedure to assemble the other upper leg to the other lower leg.
3
