Manuals
/
Fisher-Price
/
Baby
/
Riding Toy
Fisher-Price
M7332
manual
Label Decoration, Attaching the Seat, One-time assembly is now complete
Models:
M7332
1
7
8
8
Download
8 pages
59.13 Kb
1
2
3
4
5
6
7
8
Cap Nut Cap Nut Assembly Tool
Page 7
Image 7
Page 6
Page 8
Page 7
Image 7
Page 6
Page 8
Contents
M7332
To avoid serious injury
Consumer Information
Front Wheel 4 Pedal Hubs
Parts
Cap Nut Cap Nut Assembly Tool
Handlebar Cap Fork 2 Fork Covers Frame 2 Pedals Pedal Axle
Assembly
Pedal Hubs Pedal Axle Front Wheel Hole
Pedal Pedal Axle Front Wheel Assembly
Pedal Hub
Pedal Axle Tab Slot Pedal Hub
Hint You may need to rotate the handlebar to align the holes
Place a fork cover over the pedal axle on one fork arm
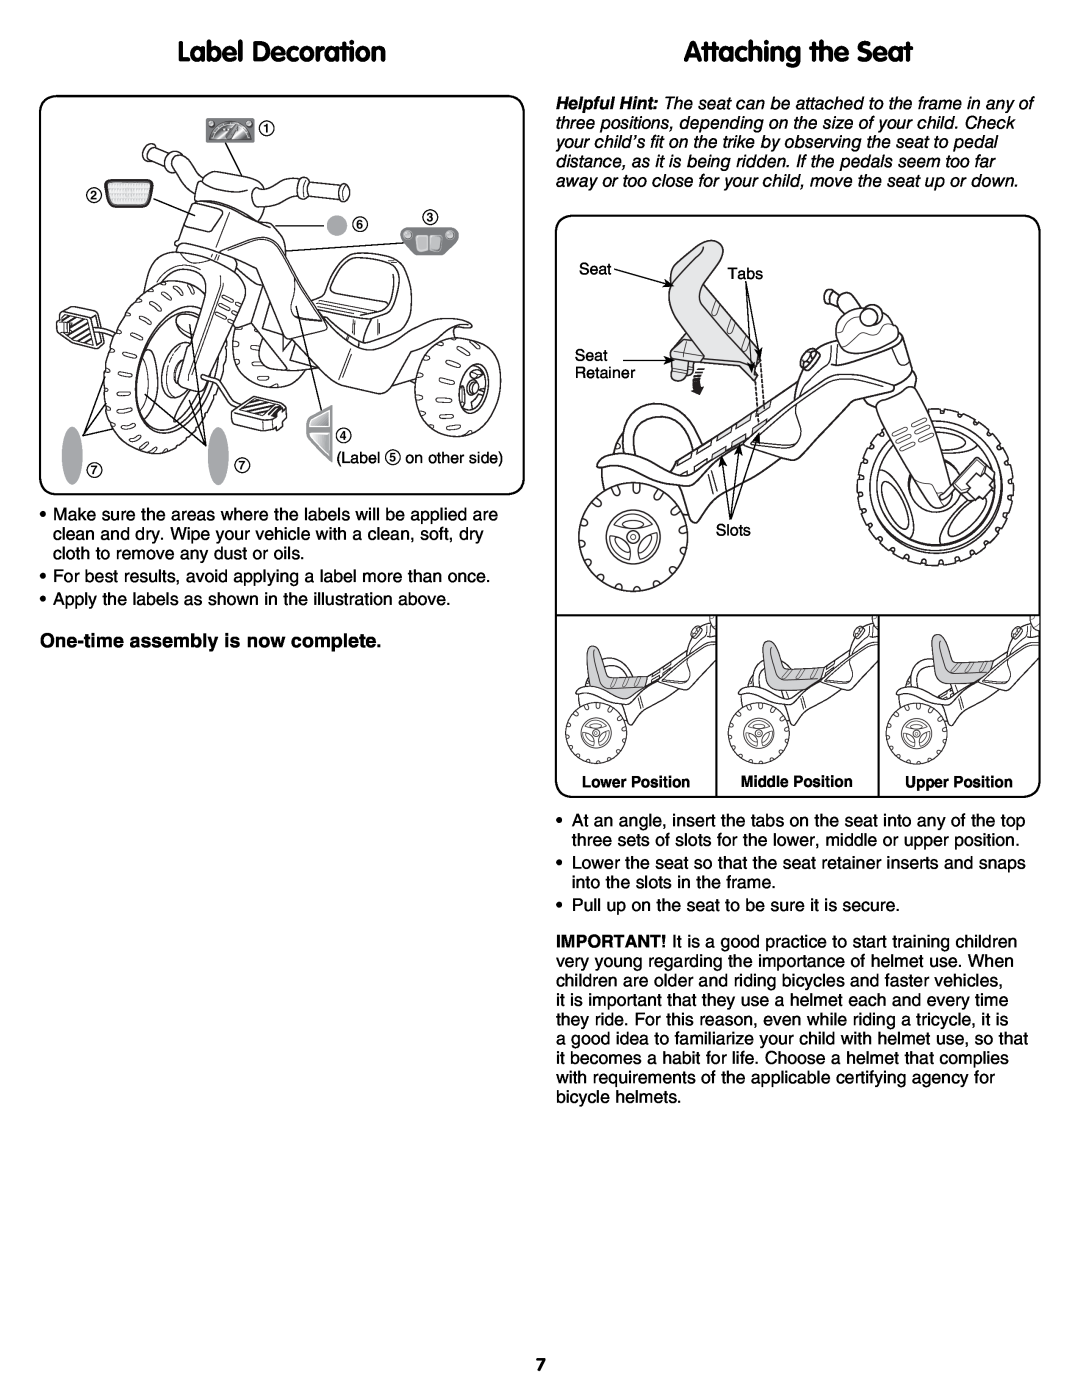
Attaching the Seat
Label Decoration
One-time assembly is now complete
Care
Removing the Seat
Top
Page
Image
Contents