ASSEMBLY
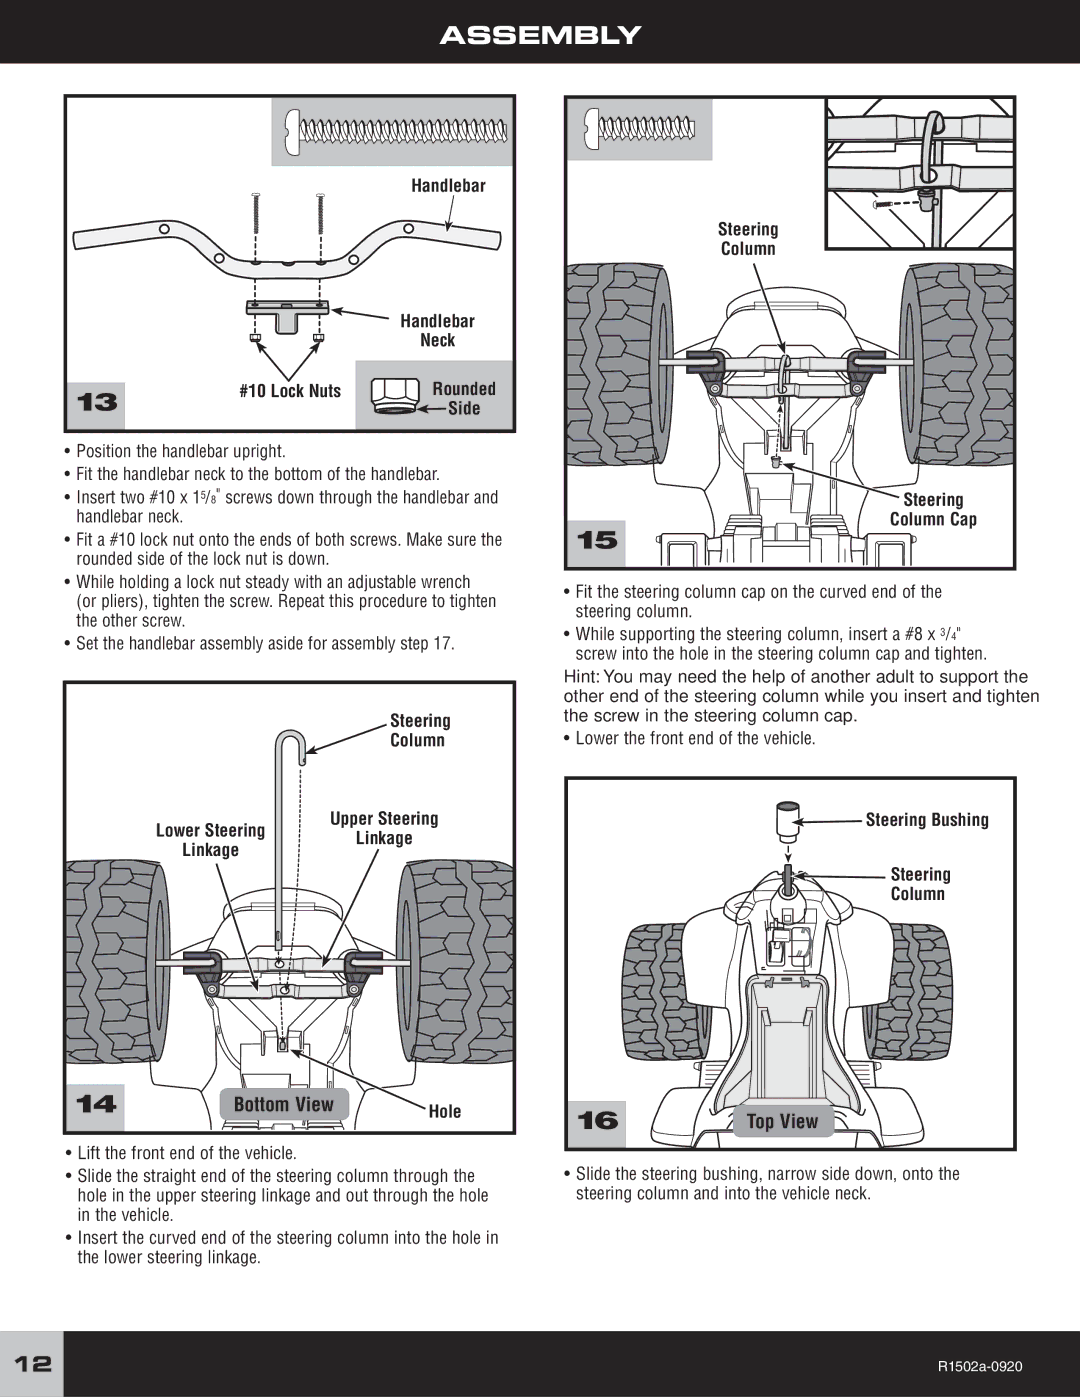
Handlebar
|
| Handlebar |
|
| Neck |
13 | #10 Lock Nuts | Rounded |
| Side |
•Position the handlebar upright.
•Fit the handlebar neck to the bottom of the handlebar.
•Insert two #10 x 15/8" screws down through the handlebar and handlebar neck.
•Fit a #10 lock nut onto the ends of both screws. Make sure the rounded side of the lock nut is down.
•While holding a lock nut steady with an adjustable wrench (or pliers), tighten the screw. Repeat this procedure to tighten the other screw.
•Set the handlebar assembly aside for assembly step 17.
Steering
Column
Upper Steering
Lower SteeringLinkage
Linkage
14 | Bottom View | Hole |
•Lift the front end of the vehicle.
•Slide the straight end of the steering column through the hole in the upper steering linkage and out through the hole in the vehicle.
•Insert the curved end of the steering column into the hole in the lower steering linkage.
Steering
Column
Steering
Column Cap
15
•Fit the steering column cap on the curved end of the steering column.
•While supporting the steering column, insert a #8 x 3/4" screw into the hole in the steering column cap and tighten.
Hint: You may need the help of another adult to support the other end of the steering column while you insert and tighten the screw in the steering column cap.
• Lower the front end of the vehicle.

 Steering Bushing
![]()
![]() Steering
Steering
Column
16 | Top View |
•Slide the steering bushing, narrow side down, onto the steering column and into the vehicle neck.
12 |