Infrared Thermometer
Operating the Thermometer
| 132 mm @ |
| |
| 1500 mm | S | |
75 mm @ |
| ||
900 mm |
|
| |
38 mm @ |
|
|
|
300 mm |
|
|
|
| 3 " @ | 5.3 " @ |
|
| 60 " |
| |
1.5 " @ | 36 " |
| |
|
| ||
12 " |
|
|
|
|
| D |
|
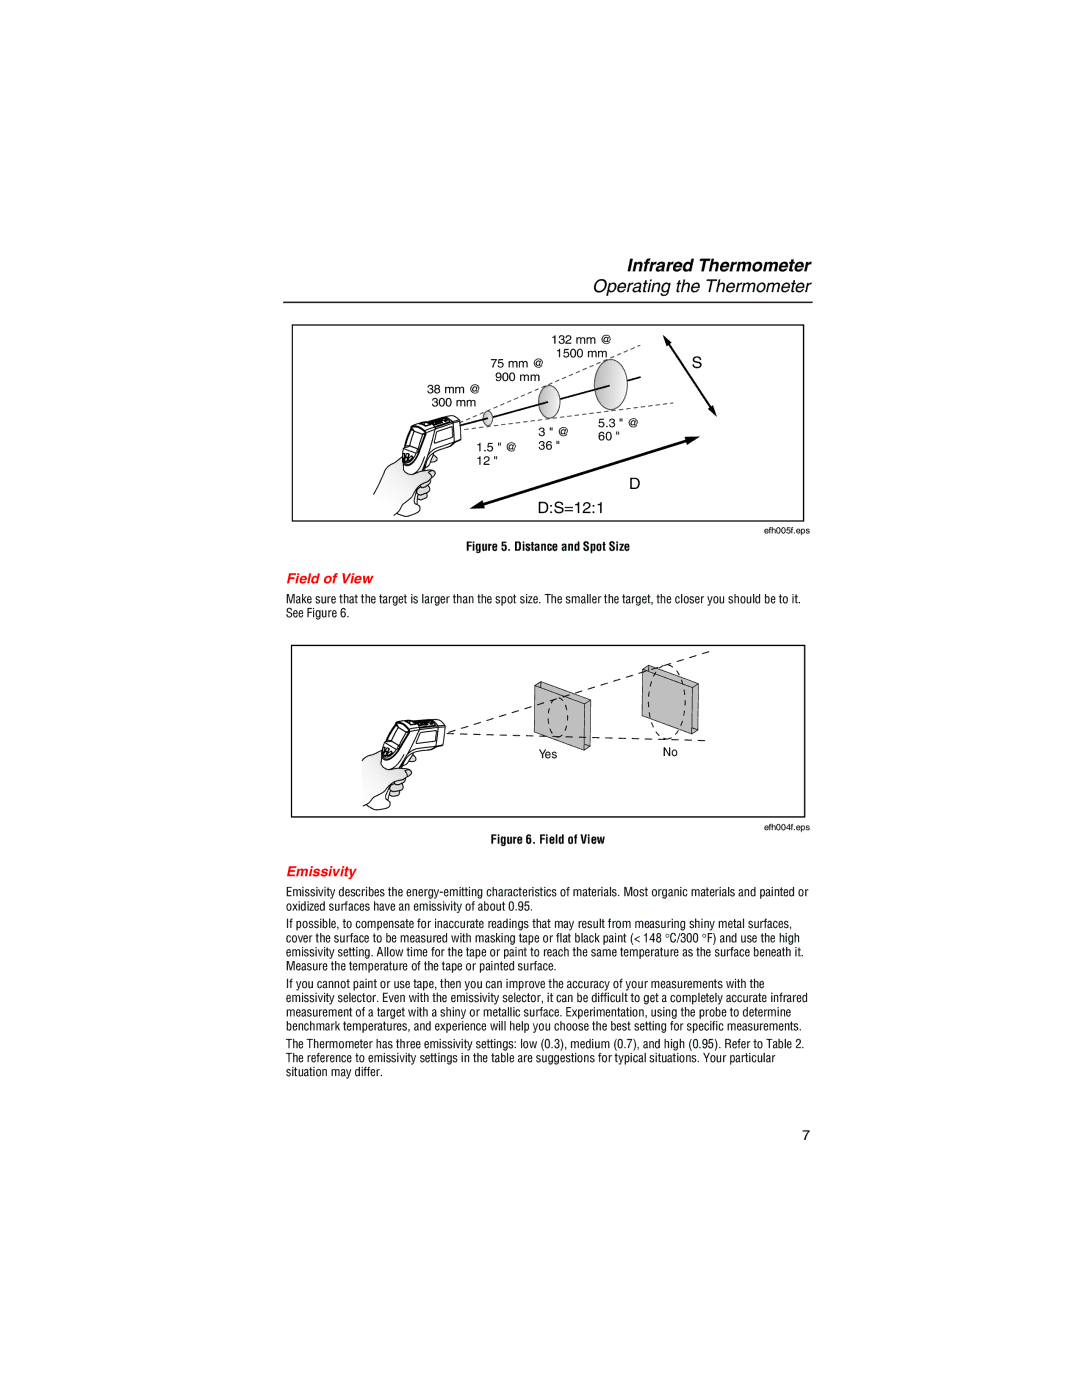
| D:S=12:1 |
| |
|
|
| efh005f.eps |
Figure 5. Distance and Spot Size
Field of View
Make sure that the target is larger than the spot size. The smaller the target, the closer you should be to it. See Figure 6.
Yes | No |
| efh004f.eps |
Figure 6. Field of View
Emissivity
Emissivity describes the
If possible, to compensate for inaccurate readings that may result from measuring shiny metal surfaces, cover the surface to be measured with masking tape or flat black paint (< 148 °C/300 °F) and use the high emissivity setting. Allow time for the tape or paint to reach the same temperature as the surface beneath it. Measure the temperature of the tape or painted surface.
If you cannot paint or use tape, then you can improve the accuracy of your measurements with the emissivity selector. Even with the emissivity selector, it can be difficult to get a completely accurate infrared measurement of a target with a shiny or metallic surface. Experimentation, using the probe to determine benchmark temperatures, and experience will help you choose the best setting for specific measurements.
The Thermometer has three emissivity settings: low (0.3), medium (0.7), and high (0.95). Refer to Table 2. The reference to emissivity settings in the table are suggestions for typical situations. Your particular situation may differ.
7
