6
Fitting the wall bracket
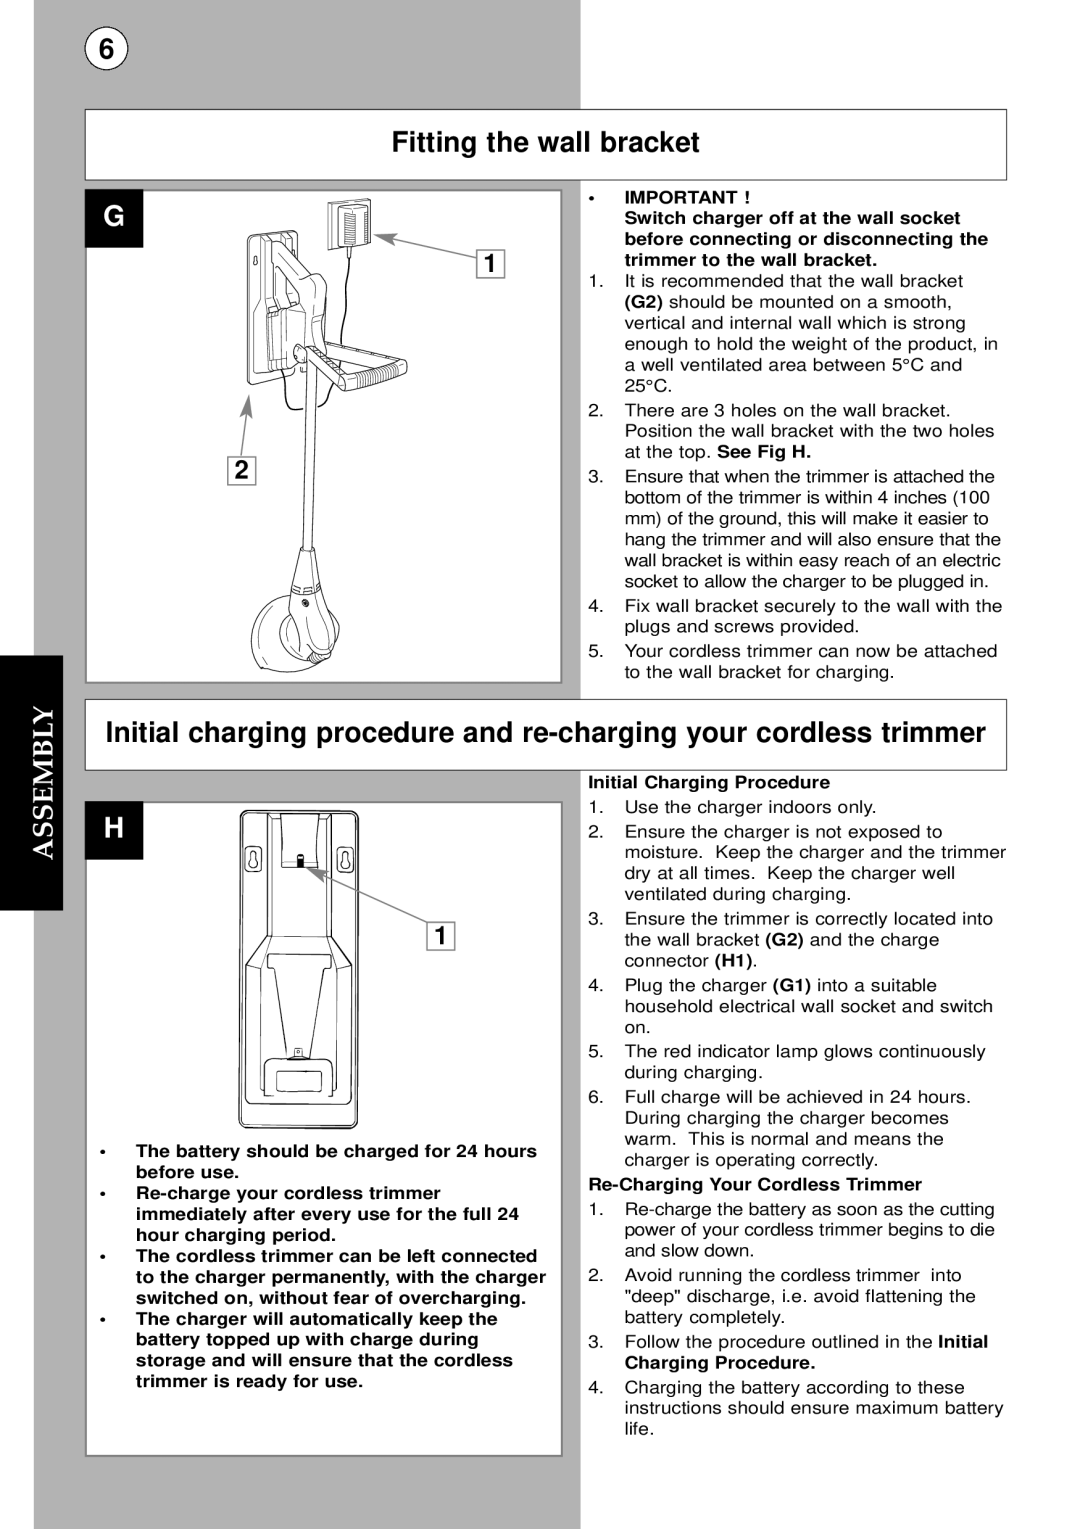
G |
1 |
2 |
•IMPORTANT !
Switch charger off at the wall socket
before connecting or disconnecting the trimmer to the wall bracket.
1.It is recommended that the wall bracket (G2) should be mounted on a smooth, vertical and internal wall which is strong enough to hold the weight of the product, in a well ventilated area between 5°C and 25°C.
2.There are 3 holes on the wall bracket. Position the wall bracket with the two holes at the top. See Fig H.
3.Ensure that when the trimmer is attached the bottom of the trimmer is within 4 inches (100 mm) of the ground, this will make it easier to hang the trimmer and will also ensure that the wall bracket is within easy reach of an electric socket to allow the charger to be plugged in.
4.Fix wall bracket securely to the wall with the plugs and screws provided.
5.Your cordless trimmer can now be attached to the wall bracket for charging.
Initial charging procedure and
ASSEMBLY
H
1
•The battery should be charged for 24 hours before use.
•
•The cordless trimmer can be left connected to the charger permanently, with the charger switched on, without fear of overcharging.
•The charger will automatically keep the battery topped up with charge during storage and will ensure that the cordless trimmer is ready for use.
Initial Charging Procedure
1.Use the charger indoors only.
2.Ensure the charger is not exposed to moisture. Keep the charger and the trimmer dry at all times. Keep the charger well ventilated during charging.
3.Ensure the trimmer is correctly located into the wall bracket (G2) and the charge connector (H1).
4.Plug the charger (G1) into a suitable household electrical wall socket and switch on.
5.The red indicator lamp glows continuously during charging.
6.Full charge will be achieved in 24 hours. During charging the charger becomes warm. This is normal and means the charger is operating correctly.
Re-Charging Your Cordless Trimmer
1.
2.Avoid running the cordless trimmer into "deep" discharge, i.e. avoid flattening the battery completely.
3.Follow the procedure outlined in the Initial
Charging Procedure.
4.Charging the battery according to these instructions should ensure maximum battery life.