
Turbo Compact specifications
The Flymo Turbo Compact is a prominent name in the realm of garden maintenance, specifically designed to make lawn care easier and more efficient. Its innovative design combines functionality with user-friendly features, making it an ideal choice for homeowners with smaller to medium-sized gardens.One of the standout features of the Flymo Turbo Compact is its lightweight design. Weighing just around 10 kg, it allows for easy maneuverability, ensuring that users can navigate their gardens effortlessly. This aspect is particularly advantageous for those who may struggle with heavier lawn mowers, allowing for a more enjoyable mowing experience.
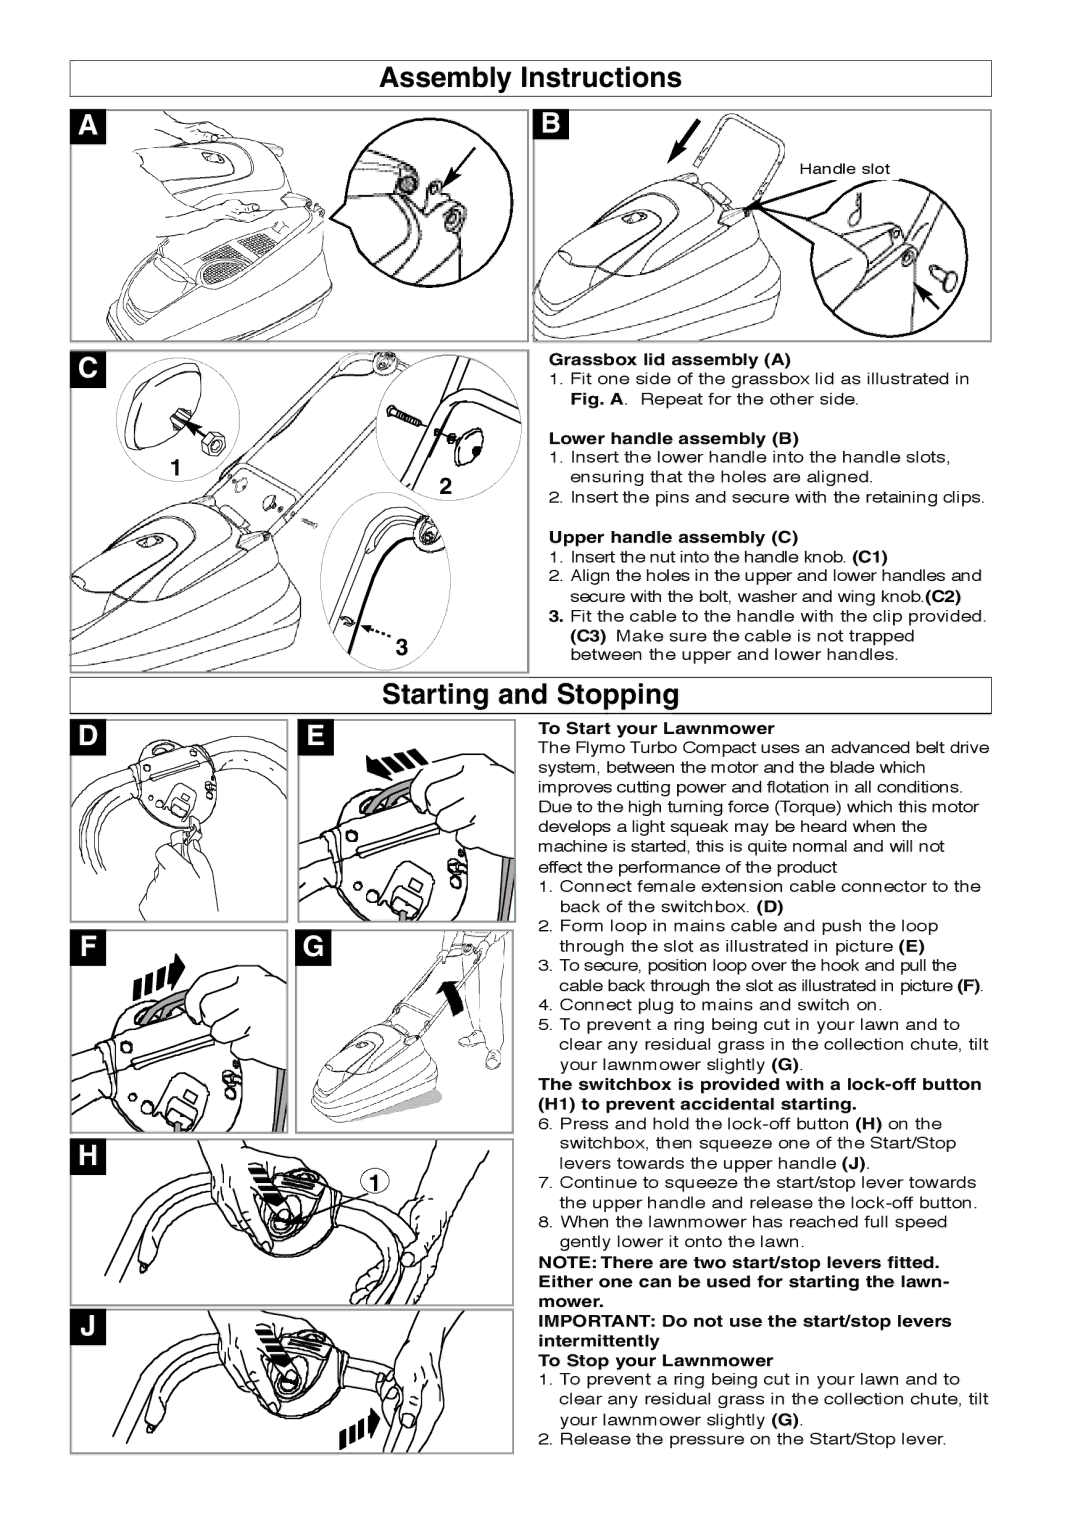
Equipped with a powerful 1500 watt electric motor, the Turbo Compact provides a consistent and robust performance. This motor enables the mower to tackle various types of grass and terrain, ensuring that it can handle overgrown patches and tougher mowing jobs without compromising on efficiency. Additionally, the mower boasts a cutting width of 32 cm, which strikes a balance between agility and coverage, allowing users to efficiently trim their grass without being overly bulky.
The Turbo Compact features a unique hover function, which utilizes air under the mower to allow it to glide over the lawn. This hovering technology not only makes the mower highly maneuverable but also reduces the strain on the user during operation. Moreover, it ensures a precise cut, resulting in a neatly maintained lawn.
Another noteworthy characteristic of the Flymo Turbo Compact is its adjustable cutting height, which can be set between 20 mm to 60 mm. This versatility allows users to customize the grass length to their preference, catering to various grass types and seasonal demands.
The mower also includes a 29-liter grass collection box, which minimizes the need for frequent emptying during use. This larger capacity allows for longer mowing sessions, enhancing productivity and providing convenience for users seeking effective garden maintenance solutions.
Overall, the Flymo Turbo Compact is designed with the modern user in mind, combining efficient technology with ease of use. Its lightweight, powerful motor, innovative hover feature, adjustable cutting heights, and ample grass collection capacity make it a standout choice for those looking to maintain their outdoor spaces with minimal effort and maximum results. As garden care continues to evolve, the Flymo Turbo Compact remains a reliable partner for homeowners dedicated to achieving a well-manicured lawn.