
V1505, GameSaver Pro specifications
The FoodSaver GameSaver Pro V1505 is an innovative vacuum sealing machine designed to meet the needs of outdoor enthusiasts, hunters, and anyone who wants to preserve food efficiently. This advanced unit is built to handle the demands of sealing meats, fish, game, and other foods while ensuring optimal freshness and longevity.One of the standout features of the GameSaver Pro V1505 is its powerful suction capability, which allows for high-quality vacuum sealing. This ensures that air is effectively removed from the bags, creating an airtight seal that prevents freezer burn and spoilage. The machine requires minimal effort to operate, making it user-friendly and accessible for both seasoned chefs and novices alike.
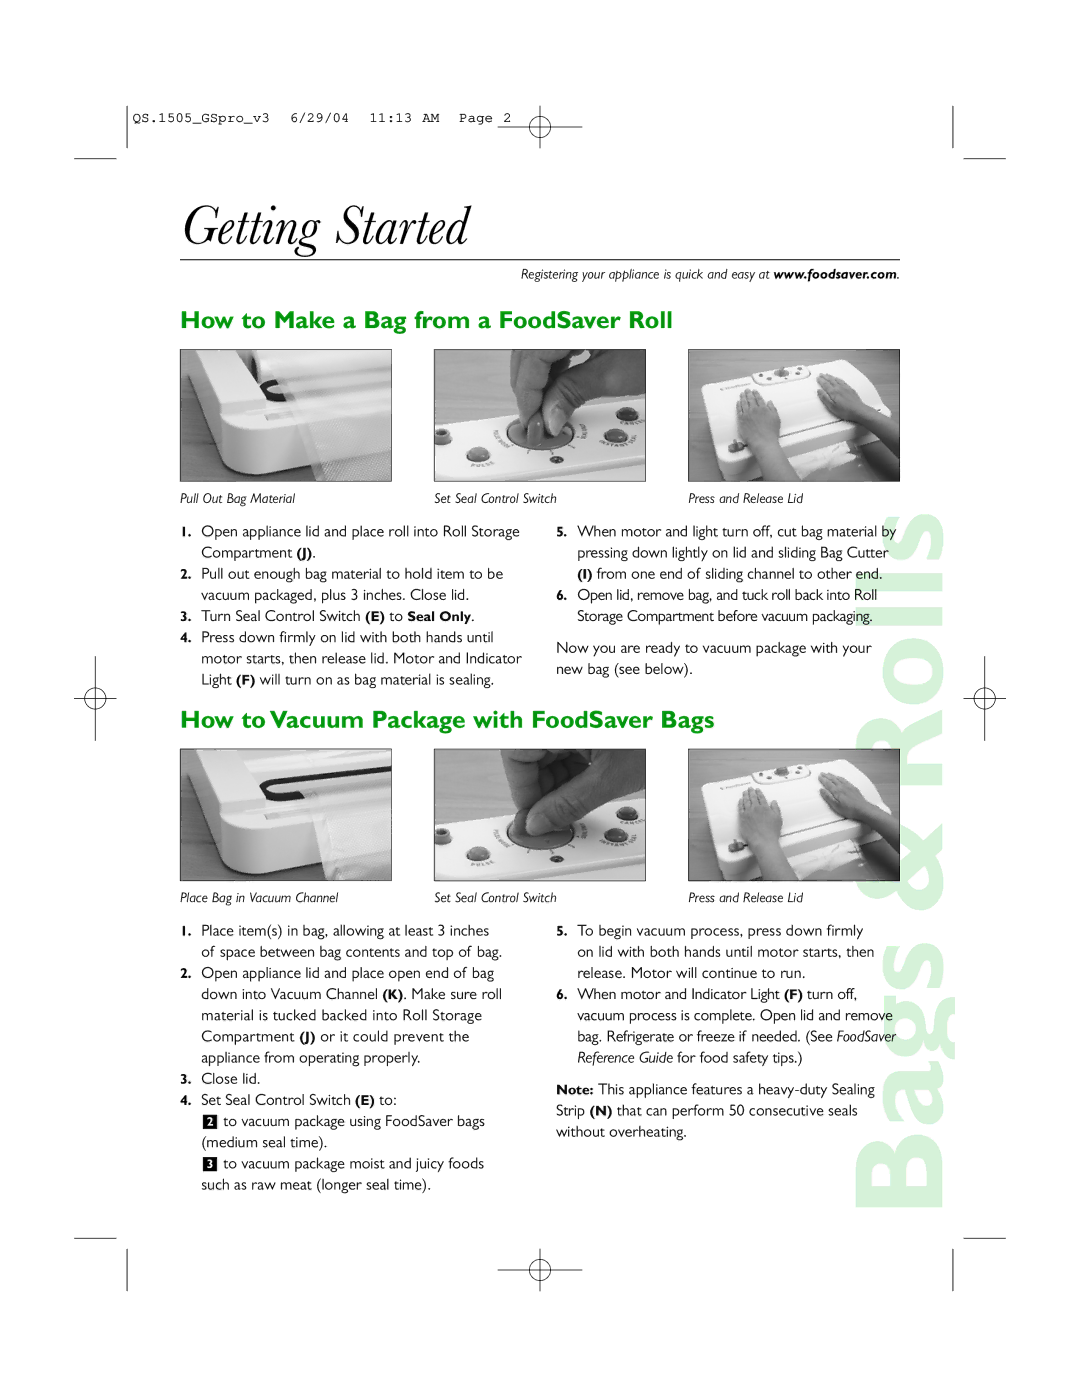
The V1505 model accommodates both regular and custom-sized bags, with the added convenience of being compatible with a variety of FoodSaver vacuum-sealing bags and rolls. This flexibility allows users to seal a wide range of items, from large cuts of meat to smaller quantities of herbs and spices, catering to different storage needs.
Equipped with an integrated bag cutter and built-in roll storage, the GameSaver Pro V1505 streamlines the sealing process. Users can easily create custom-sized bags from rolls without the need for scissors, promoting efficiency in food preparation. This feature is particularly helpful when dealing with larger or irregularly shaped items, as it minimizes waste and maximizes storage options.
The GameSaver Pro V1505 also incorporates advanced sealing technology that ensures reliable seals every time. With adjustable vacuum settings, users can choose the right level of suction for various types of food, including delicate items like bread and soft fruits. This versatility prevents crushing and maintains the texture and flavor of sealed items.
Additionally, the GameSaver is designed with an easy-clean drip tray that captures any overflow during the sealing process, making cleanup a breeze. Its compact, lightweight design allows for easy portability, which is ideal for outdoor activities such as camping or hunting trips. The machine is also built for durability and long-lasting performance, ensuring that it will be a reliable partner in food preservation for years to come.
In summary, the FoodSaver GameSaver Pro V1505 is a robust vacuum sealing solution that combines advanced features, ease of use, and practical design. Its powerful suction, compatibility with a variety of bags, and user-friendly operation make it an essential tool for preserving food, reducing waste, and enjoying the freshness of your favorite ingredients. Whether at home or during outdoor adventures, the GameSaver Pro V1505 is an invaluable companion for food storage and preservation.