Field Memory Recorder Model FR-2
Page
Safety Instructions
Table of contents
About recording system Recording analog audio
Setting cue points
Audio input/output connection
PC/Keyboard connection
Physical dimensions
Menu mode outline Cue menu
Setup menu
Connecting the FR-2 to a PC
About this manual
Precautions on installation
Manual organization
Menu mode
Manual conventions
Specifications
Exporting audio files to a PC
Memo
Product overview
Overview
FR-2 Carring belt
What is in the box
Memo
Table of contents
Please read this chapter before using
Operating on batteries
About power supply
Inserting batteries
Ni-HM
Reducing the battery power consumption
Insert eight AA-type batteries
Fit the compartment cover as it was before
Turning on the power
Connecting the AC adaptor
Operating the FR-2 on the AC adaptor
About power supply voltage
Press the Enter key to fix the contrast value
Setting the display backlight/contrast
Adjusting the display contrast
Turning the backlight on or off
Setting the realtime clock
Inserting/removing a memory card
About memory card
Insert a memory card to card slot
When loading a used FAT32 formatted card
When loading a card which is not FAT32 formatted
Inserting a card
While YES is highlighted, press the Enter key
While the recorder is stopped, press the Card Release key
Removing a card
Use the Menu dial to select YES and press the Enter key
Not Mounted
While the warning message is shown, press the Enter key
Volume label
Default volume label examples ATA PCM000 CFC CFC000
Initial format of a memory card
Memo
Details about screens
Names and functions
SP/HP Monitor control
HOME/HOLD Reset key
Menu mode
Phones jack
REC Stby Record Standby key
Access indicator
Peak indicators
MENU/ENTER knob
Light Contrast key
Top panel
Card Release key
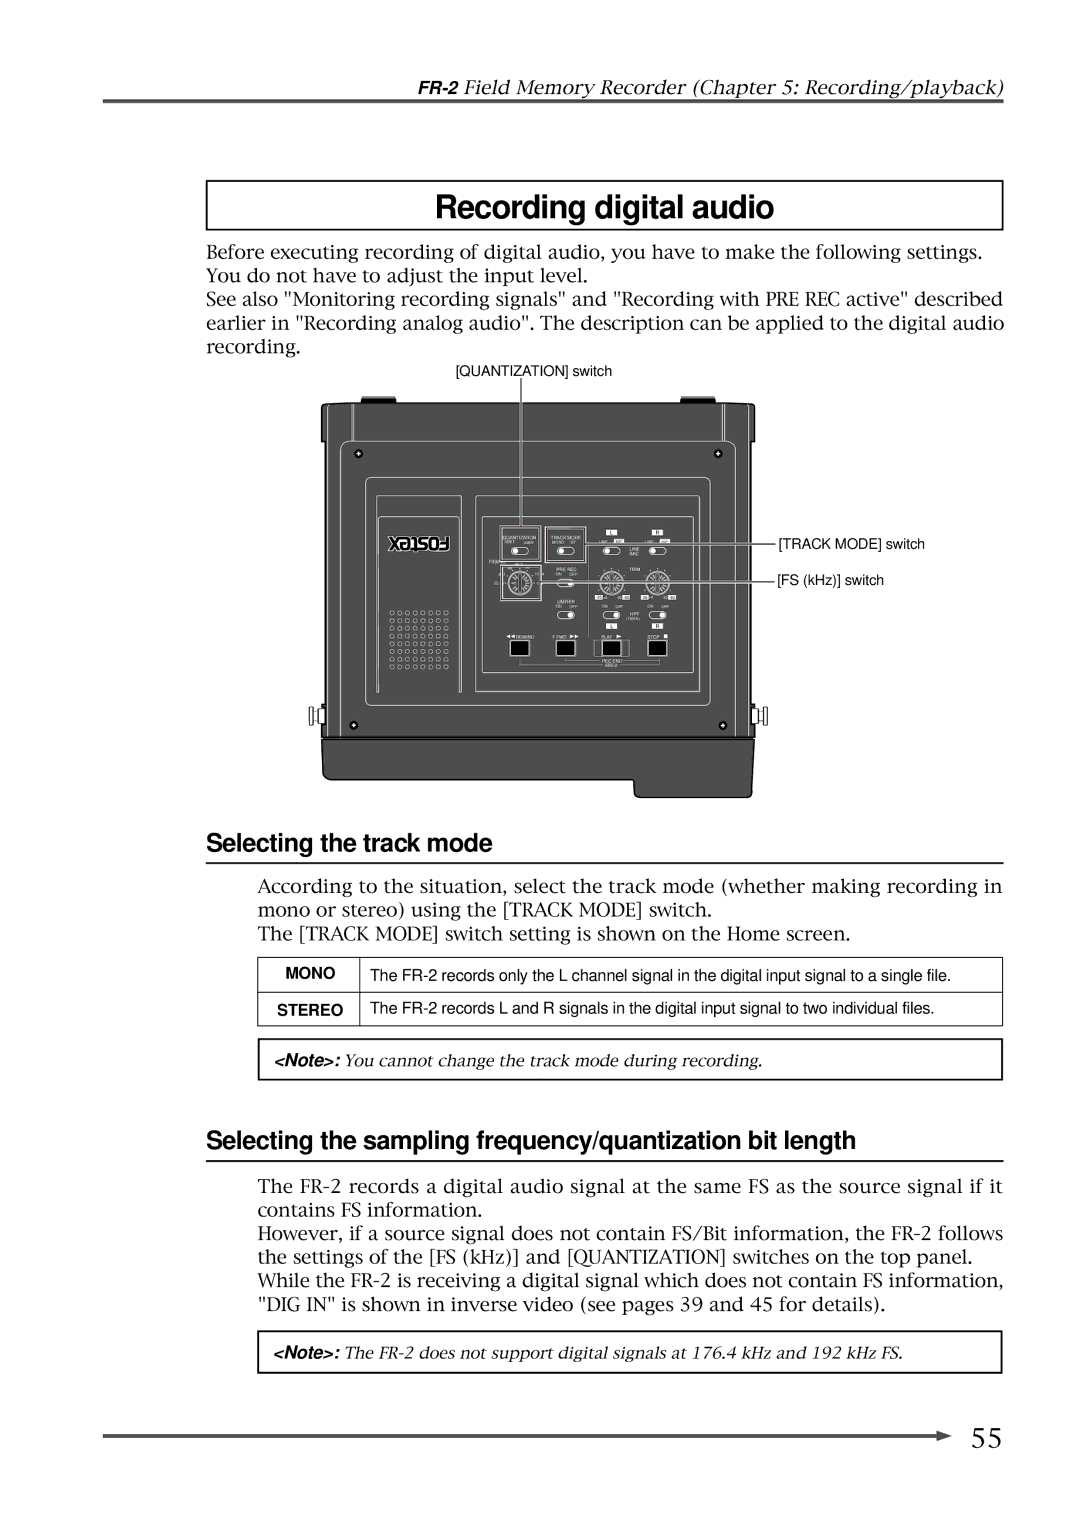
Track Mode switch
FS kHz switch
Quantization switch
PRE REC switch
Transport keys Play key
LINE/MIC switches
HPF switches
Trim controls
Right side panel
Left side panel
Bottom panel
Details about screens
When no memory card is set
Home screen
When a virgin memory card is set
Menu mode screens
When a recorded memory card is set
FR-2Field Memory Recorder Names and functions
FR-2Field Memory Recorder Names and functions
PC/keyboard connection
Audio input/output connection
Analog audio inputs
Audio input/output connection
Analog audio outputs
Digital audio input
Digital audio output
Connecting the FR-2 to a USB keyboard
Connecting the FR-2 to a PC
PC/keyboard Connection
Skip/locate functions
Recording/playback
Recording time in stereo Recording time in mono
About recording system
High-pass Filter
Adjusting the input gain
Recording analog audio
Selecting the input source
Selecting the sampling frequency/quantization bit length
Limiter
Adjusting the recording level
Selecting the track mode
Screen example during input monitor Level controls
Checking the remain for recording
Monitoring recording signals
To stop recording, press the REC Stby key
Making recording
About overloading
Recording with PRE REC active
Recording digital audio
Quantization switch
Setting a cue point on-the-fly
Setting cue points
About default cue name
00/08
Viewing cue point information
Deleting a cue point in real-time
About cue point information
Normal audio playback
Playback in the CUE mode Cueing playback
Selecting using the CUE / keys
Playback
Skip/locate functions
Memo
Menu mode
Menu Description Menu items
Menu mode outline
Locating to a cue point Locate
Cue menu
Use the Menu dial to select Rename and press the Enter key
Renaming a cue point Rename
Enter the desired cue name
Press the Home key to exit the Menu mode
Use the Menu dial to select Edit and press the Enter key
Editing time data of a cue point Edit
Use the Menu dial to select Delete and press the Enter key
Deleting a cue point Delete
Use the Menu dial to select Select and press the Enter key
File menu
Selecting an audio file to be played back Select
Use the Menu dial to select File and press the Enter key
Enter the desired file name
Renaming an audio file Rename
Character keys
Deleting an audio file Delete
Press the Enter key to delete the file
Use the Menu dial to select Protect and press the Enter key
Audio file protection on/off Protect
Use the Menu dial to select Restore and press the Enter key
Restoring an audio file Restore
Off
Disk menu
Selecting the current drive Select
Use the Menu dial to select Disk and press the Enter key
Press the Enter key
Optimizing a memory card Optimize
Use the Menu dial to select Format and press the Enter key
Formatting a memory card Format
Enter the desired volume label
Editing a volume label of a memory card Volume Label
Moves the volume label cursor right and left
To dismiss the information, press the Enter key
Viewing information of a memory card Disk Info
Setup menu
Take
Selecting default file name type File Name Mode
Use the Menu dial to select Setup and press the Enter key
Date
Setting the default file name Default File Name
Select Rename and press the Enter key
Selecting Take number
Renaming the scene name
Select Take No. and press the Enter key
Select Select and press the Enter key
Resetting the scene name to the initial name
Select Reset and press the Enter key
Enabling the selected scene name
Use the Menu dial to enter the desired time data
Adjusting the real time clock Adjust Real Time
Plugged
Speaker mute function on/off Speaker Mute
After entering a desired time value, press the Enter key
Unplugged
When selecting Input Clip
Setting error tone output condition Error Tone
When selecting Batt Warning
When selecting Disk Remain
Press the Home key to exit the Menu mode
88.2kHz/96kHz
Selecting the remain display mode Remain Display
22.05kHz
44.1kHz/48kHz
DIF
Setting the digital output signal format Digi Out Type
Selecting the battery type Battery
Selecting the USB keyboard type Keyboard
Viewing the ROM version Version
To executing initializing, press the Enter key
Initializing settings of the Setup menu Init Setup
FR-2Field Memory Recorder Menu mode/Setup menu
Exporting audio files to a PC
Connecting the FR-2 to a PC
Display shows the first layer of the Menu mode screen
100
Exporting audio data to a computer application example