Changing Oven Light


Be sure the range is unplugged and all parts are COOL before


(some models)

replacing the oven light. Wear a leather-faced glove for protection against


possible broken glass.

To Change the Oven Light (some models)

On some models, the oven light automatically turns on when the door is opened. Some models have a switch located on the control panel to turn on the light. The oven light is located at the rear of the oven and is covered with a glass shield held by a wire holder. The glass shield must be in place whenever the oven is in use.

To replace the oven light:

1.Turn electrical power off at the main source or unplug the range.

2.Press wire holder to one side to release the glass shield.

3.Replace bulb with a new 40 watt appliance bulb.

4.Replace glass shield over bulb and snap wire holder into place.

5. Turn power back on again at the main source (or plug the range back in).

6. The clock(if equipped) will then need to be reset. To reset, see Setting the Clock and Minute Timer in this Owner's Guide.

Adjusting Oven

Temperature

Note: The adjustments made will not change the self-cleaning temperature.

The temperature in the oven has been set at the factory. When first using the oven, be sure to follow recipe times and temperatures. If you think the oven is too hot or too cool, the temperature in the oven can be adjusted. Before adjusting, test a recipe by using a temperature setting that is higher or lower than the recommended temperature. The baking results should help you to decide how much of an adjustment is needed.

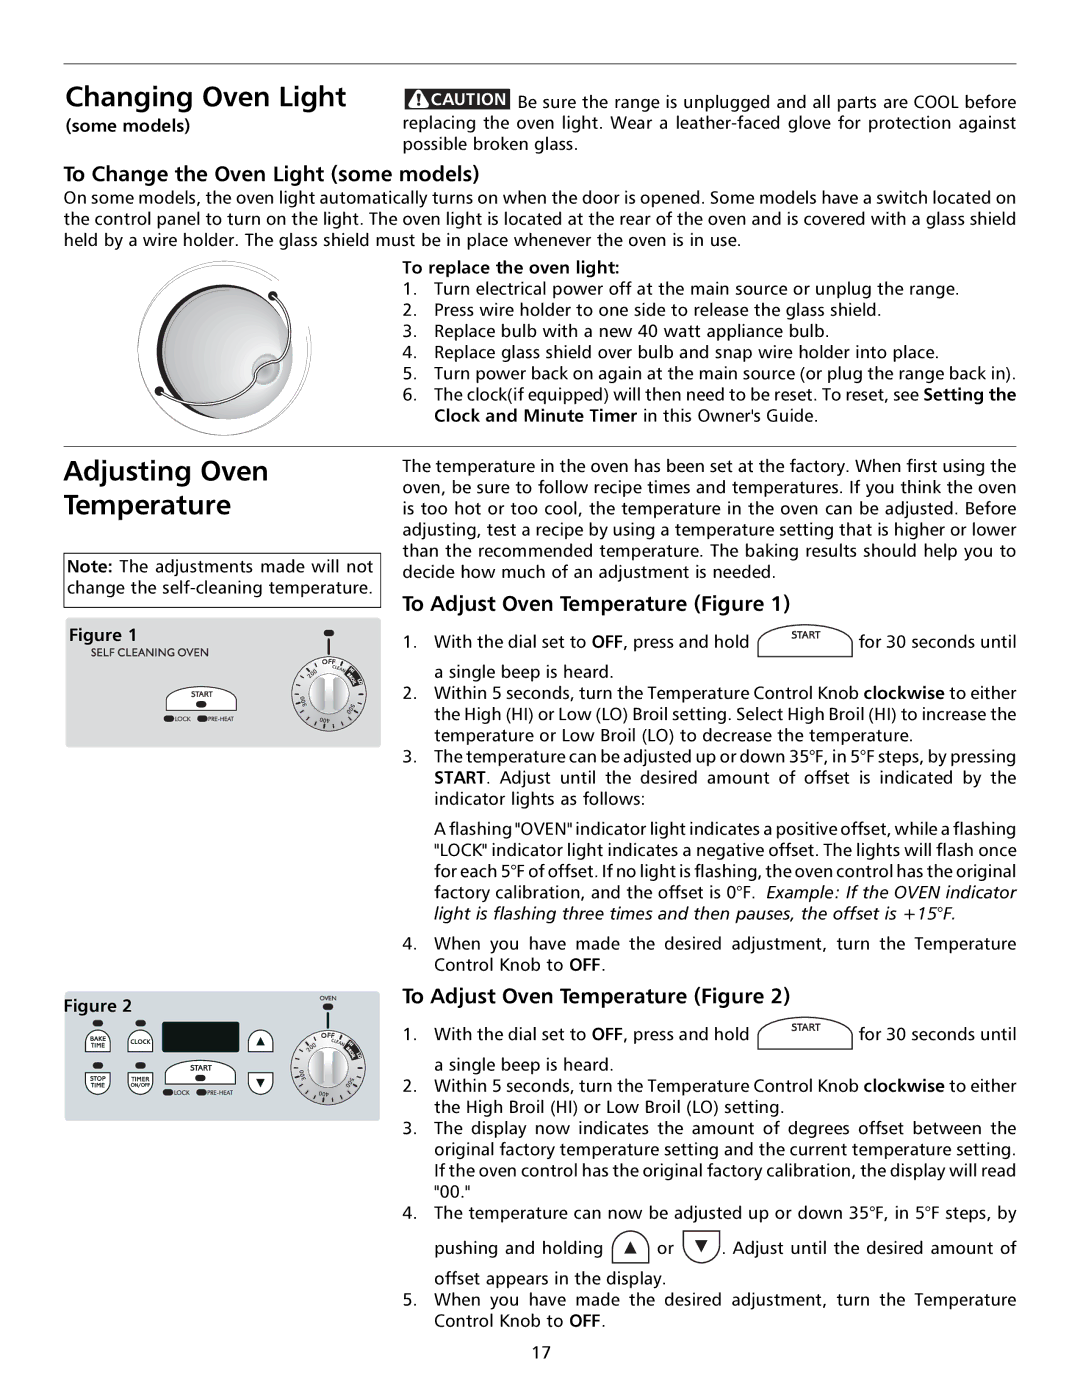
To Adjust Oven Temperature (Figure 1)

Figure 1

1.With the dial set to OFF, press and hold for 30 seconds until a single beep is heard.

2.Within 5 seconds, turn the Temperature Control Knob clockwise to either the High (HI) or Low (LO) Broil setting. Select High Broil (HI) to increase the temperature or Low Broil (LO) to decrease the temperature.

3.The temperature can be adjusted up or down 35°F, in 5°F steps, by pressing START. Adjust until the desired amount of offset is indicated by the indicator lights as follows:

A flashing "OVEN" indicator light indicates a positive offset, while a flashing "LOCK" indicator light indicates a negative offset. The lights will flash once for each 5°F of offset. If no light is flashing, the oven control has the original factory calibration, and the offset is 0°F. Example: If the OVEN indicator light is flashing three times and then pauses, the offset is +15°F.

4.When you have made the desired adjustment, turn the Temperature Control Knob to OFF.

Figure 2

To Adjust Oven Temperature (Figure 2)


1. With the dial set to OFF, press and hold for 30 seconds until

a single beep is heard.

2. Within 5 seconds, turn the Temperature Control Knob clockwise to either the High Broil (HI) or Low Broil (LO) setting.

3.The display now indicates the amount of degrees offset between the original factory temperature setting and the current temperature setting. If the oven control has the original factory calibration, the display will read "00."

4.The temperature can now be adjusted up or down 35°F, in 5°F steps, by

pushing and holding or . Adjust until the desired amount of offset appears in the display.

5.When you have made the desired adjustment, turn the Temperature Control Knob to OFF.

17

Page 17
Image 17
Frigidaire 316000653 Changing Oven Light, Adjusting Oven Temperature, To Change the Oven Light some models

316000653 specifications

The Frigidaire 316000653 is a highly regarded replacement oven burner element that has become a popular choice for both homeowners and professionals. As part of Frigidaire's commitment to quality, this product showcases an impressive blend of performance, reliability, and advanced technology, making it a valuable addition to any kitchen.

One of the standout features of the 316000653 is its robust construction. Designed with high-quality materials, this burner element can withstand the rigors of daily cooking while providing consistent heat output. Its durable design ensures longevity, which makes it a smart investment for anyone looking to replace an older, malfunctioning burner.

The 316000653 offers powerful heating capabilities, boasting a quick response time that allows for greater cooking efficiency. Whether you're boiling water, sautéing vegetables, or simmering sauces, this burner can reach the desired temperatures rapidly, making it ideal for a variety of cooking techniques. The element cooks evenly, reducing hot spots and ensuring that every dish is prepared to perfection.

Installation of the 316000653 is straightforward, making it accessible for those who choose to handle repairs themselves. With its precise fit and compatibility with multiple Frigidaire models, users can rest assured that the element will seamlessly integrate into their existing setups. This ease of installation reduces downtime and allows for quicker cooking readiness.

In terms of safety, the Frigidaire 316000653 incorporates several design elements that prioritize user protection. It is built to minimize the risk of electrical hazards, ensuring that you can focus on your culinary endeavors with peace of mind. Additionally, the surface of the element is designed for easy cleaning, allowing for maintenance that keeps your kitchen looking pristine.

The versatility of the Frigidaire 316000653 makes it suitable for various cooking styles, from stovetop frying to baking and broiling. Its ability to deliver consistent performance across a wide range of dishes ensures that it meets the needs of both amateur cooks and seasoned chefs alike.

In summary, the Frigidaire 316000653 is a top-tier oven burner element that combines durability, efficiency, and safety. With its powerful heating capabilities, easy installation, and compatibility with numerous Frigidaire models, it stands out as an essential component for any kitchen. Whether you’re upgrading an old part or performing routine maintenance, the 316000653 promises to enhance your cooking experience.