GAS COOKTOP INSTALLATION INSTRUCTIONS
4.Connection to gas
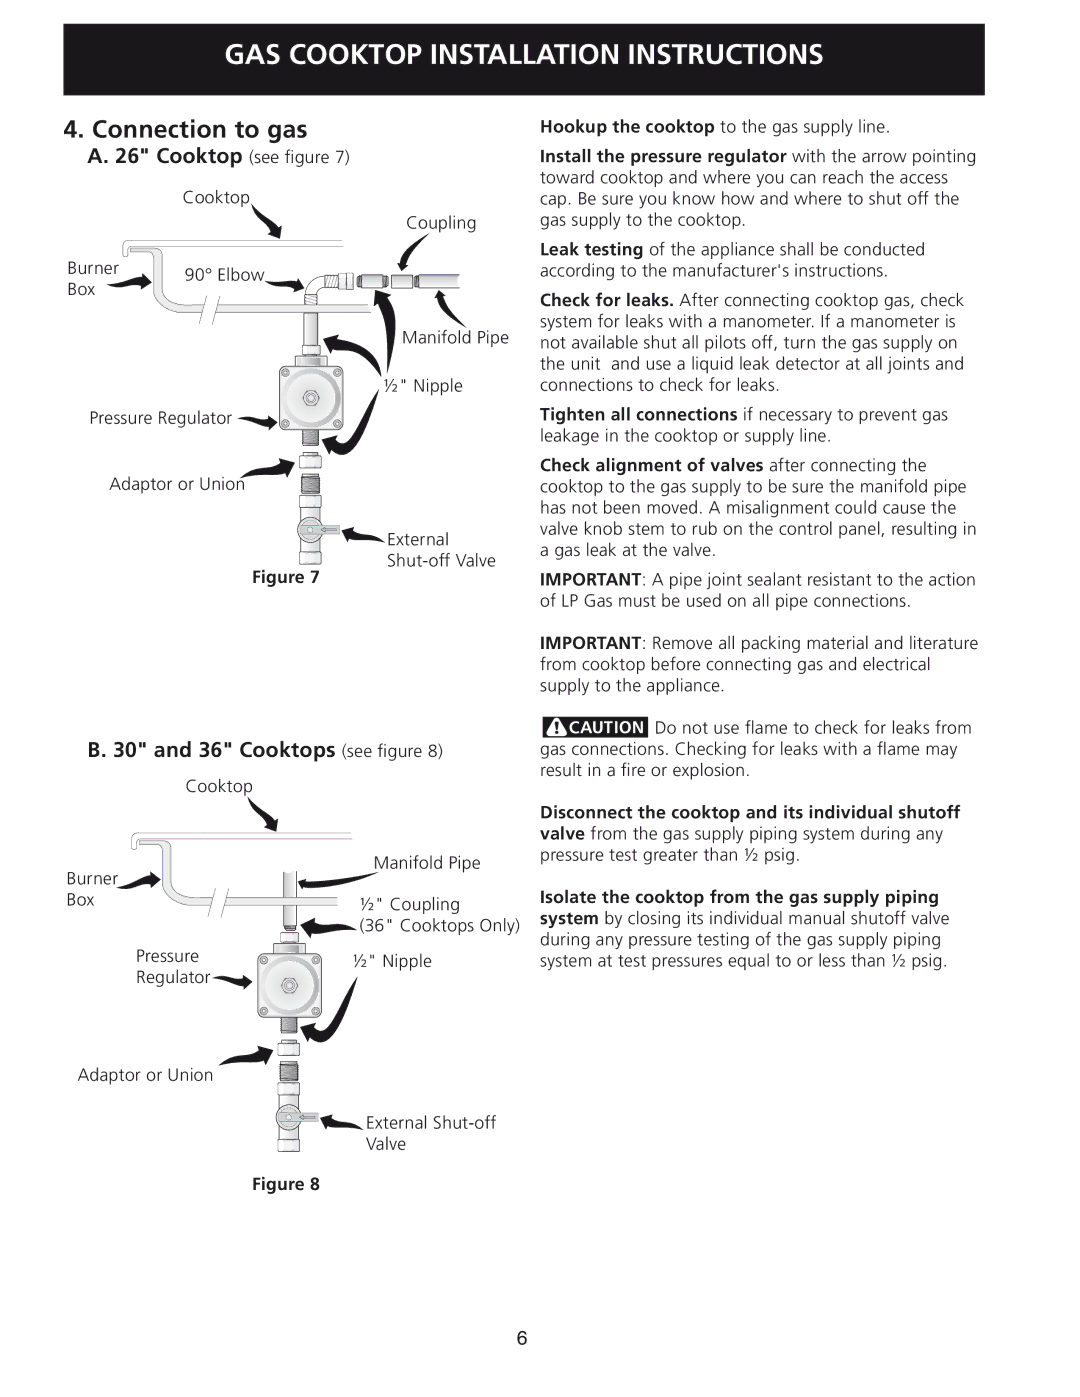
A.26" Cooktop (see figure 7)
Cooktop
| Coupling | |
Burner | 90° Elbow | |
Box | ||
|
Manifold Pipe
½" Nipple
Pressure Regulator ![]()
![]()
![]()
![]()
![]()
![]()
![]()
![]()
![]()
![]()
Hookup the cooktop to the gas supply line.
Install the pressure regulator with the arrow pointing toward cooktop and where you can reach the access cap. Be sure you know how and where to shut off the gas supply to the cooktop.
Leak testing of the appliance shall be conducted according to the manufacturer's instructions.
Check for leaks. After connecting cooktop gas, check system for leaks with a manometer. If a manometer is not available shut all pilots off, turn the gas supply on the unit and use a liquid leak detector at all joints and connections to check for leaks.
Tighten all connections if necessary to prevent gas leakage in the cooktop or supply line.
Adaptor or Union
Figure 7
![]()
![]() External
External
Check alignment of valves after connecting the cooktop to the gas supply to be sure the manifold pipe has not been moved. A misalignment could cause the valve knob stem to rub on the control panel, resulting in a gas leak at the valve.
IMPORTANT: A pipe joint sealant resistant to the action of LP Gas must be used on all pipe connections.
IMPORTANT: Remove all packing material and literature from cooktop before connecting gas and electrical supply to the appliance.
B. 30" and 36" Cooktops (see figure 8)
Cooktop |
|
Burner | Manifold Pipe |
| |
Box | ½" Coupling |
| (36" Cooktops Only) |
Pressure | ½" Nipple |
Regulator |
|
![]() Do not use flame to check for leaks from gas connections. Checking for leaks with a flame may result in a fire or explosion.
Do not use flame to check for leaks from gas connections. Checking for leaks with a flame may result in a fire or explosion.
Disconnect the cooktop and its individual shutoff valve from the gas supply piping system during any pressure test greater than ½ psig.
Isolate the cooktop from the gas supply piping system by closing its individual manual shutoff valve during any pressure testing of the gas supply piping system at test pressures equal to or less than ½ psig.
Adaptor or Union
External
Valve
Figure 8
6