4. USING THE PRINTER DRIVER
7.Image processing setting
Click the [Image processing setting] tab in the [FUJIFILM PICTROGRAPHY3500 Properties] dialog box. These setting can be viewed but not modified.
4.1.6ICM
1.Color matching by ICM
ICM is a Windows color management function. ICM allows close matches between the colors displayed on a computer monitor and those output from printers.
To print with ICM color matching, check and enable [ICM] on the [Image processing setting] dialog box.
*ICM is supported only by Windows 98 (Windows 98 with Service Pack 1 and Windows 98 Second Edition), Windows
2000 and Windows XP.
If you use the OS Windows 98, you must install the Service Pack 1 before using ICM.
2.Choosing an ICC profile
Before printing with ICM color matching, you must specify an ICC profile.
Specify [Pictrography3500
ICC profiles for the PICTROGRAPHY 3500 are automatically installed in the default location when the PICTROGRAPHY 3500 printer driver is first installed.
*When you choose the "Source Profile (Monitor Profile)",
3.Choosing color matching method
You can specify an execution method (Rendering Intent) for color matching.
For more information, see “4.1.2 Print setup and printing”.
4.Color matching and network printing
To implement ICM color matching for network printing, client computers must also support ICM.
ICM
4.2Macintosh (Mac OS 9 or earlier)
This subsection describes printing with Macintosh computers running Mac OS 9 or earlier.
4.2.1Work flow through printing
1.Starting the Macintosh
After verifying that your computer and the PICTROGRAPHY 3500 are connected, first switch on the PICTROGRAPHY 3500, then switch on the computer.
2.Setting up file sharing (for network printing)
To enable network printing, you must mount the server's [PictroGraphy] folder on clients. For instructions on doing this, see “3.6.2.2 Installing to client computers”.
3.Launching an application (preparing print data)
Start the application software and create data to be printed. If you have already created a data file, open that file.
4.2.2Print setup and printing
The specific steps involved in printing vary with applications. For more information, see the instruction manual for the application. The procedure described below uses Adobe Photoshop 5.0 as an example.
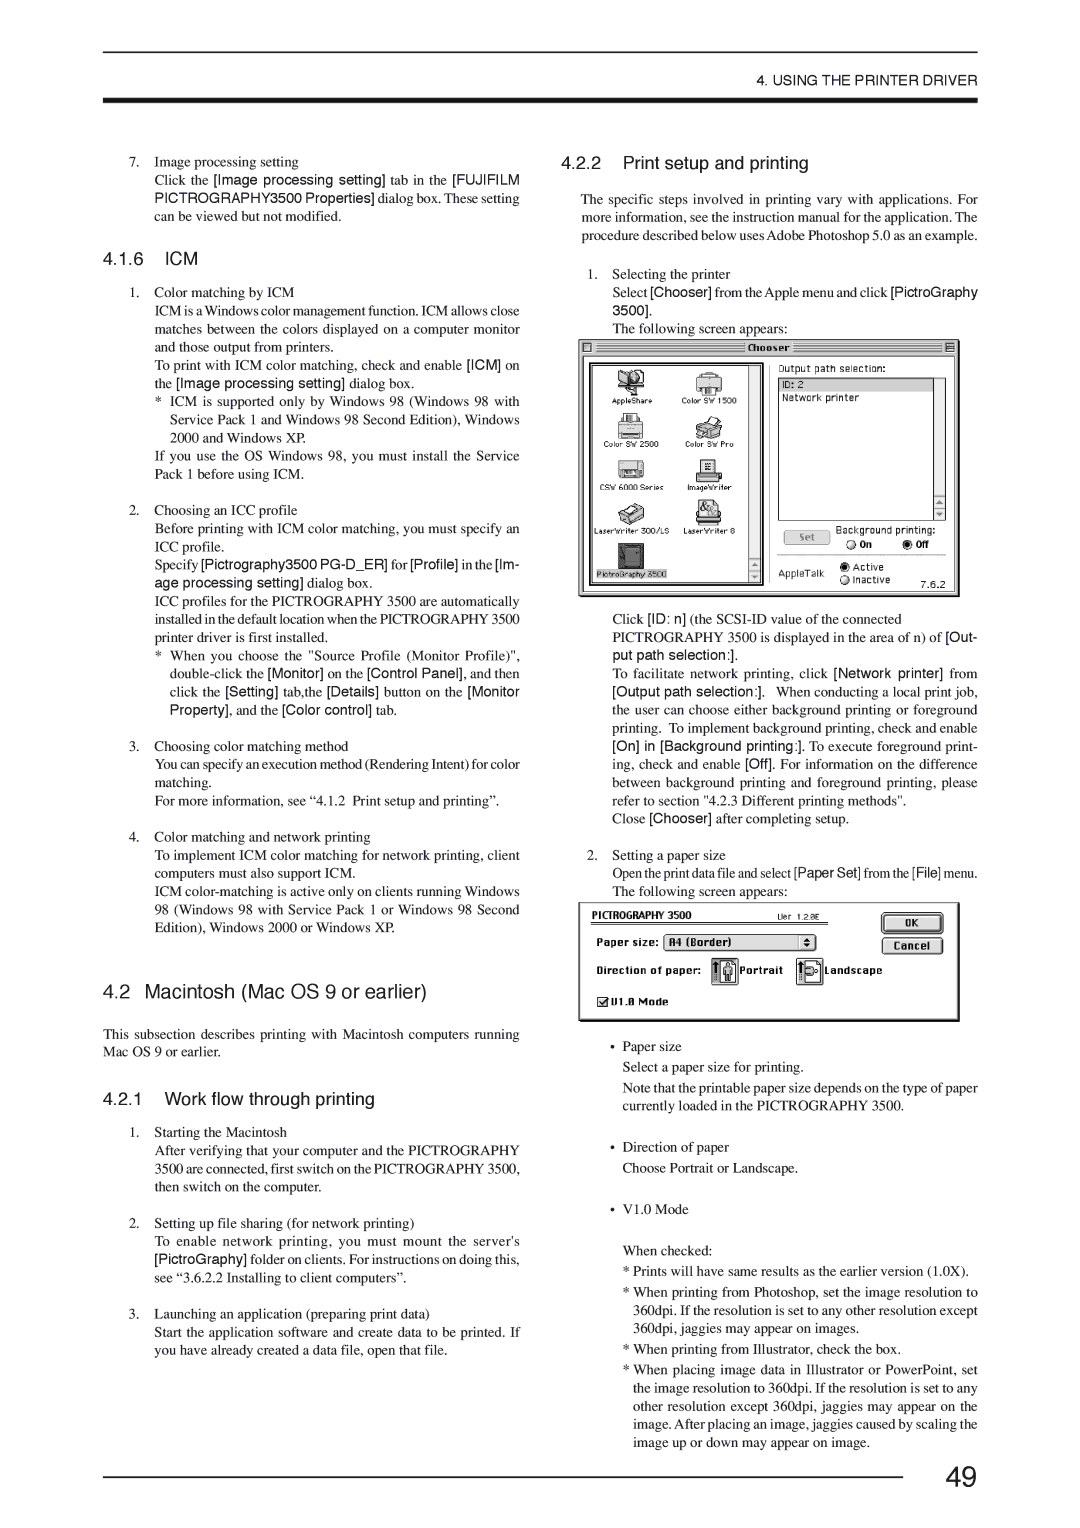
1.Selecting the printer
Select [Chooser] from the Apple menu and click [PictroGraphy 3500].
The following screen appears:
Click [ID: n] (the
To facilitate network printing, click [Network printer] from [Output path selection:]. When conducting a local print job, the user can choose either background printing or foreground printing. To implement background printing, check and enable [On] in [Background printing:]. To execute foreground print- ing, check and enable [Off]. For information on the difference between background printing and foreground printing, please refer to section "4.2.3 Different printing methods".
Close [Chooser] after completing setup.
2.Setting a paper size
Open the print data file and select [Paper Set] from the [File] menu. The following screen appears:
•Paper size
Select a paper size for printing.
Note that the printable paper size depends on the type of paper currently loaded in the PICTROGRAPHY 3500.
•Direction of paper
Choose Portrait or Landscape.
•V1.0 Mode
When checked:
*Prints will have same results as the earlier version (1.0X).
*When printing from Photoshop, set the image resolution to 360dpi. If the resolution is set to any other resolution except 360dpi, jaggies may appear on images.
*When printing from Illustrator, check the box.
*When placing image data in Illustrator or PowerPoint, set the image resolution to 360dpi. If the resolution is set to any other resolution except 360dpi, jaggies may appear on the image. After placing an image, jaggies caused by scaling the image up or down may appear on image.
49