
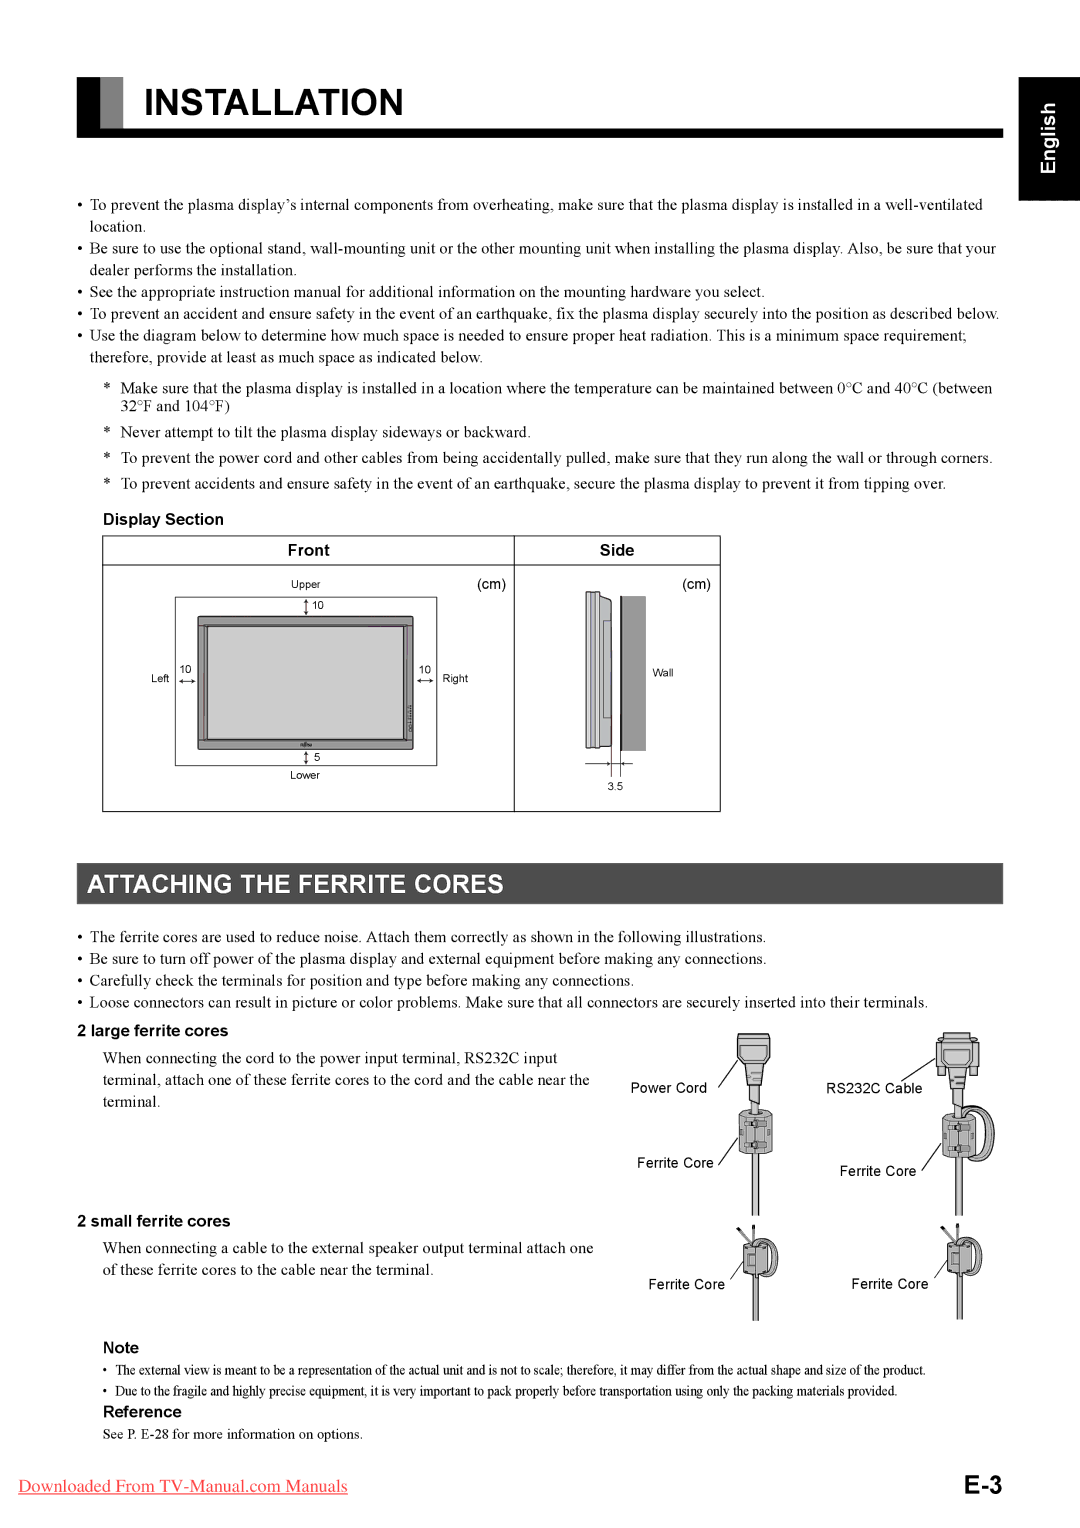
P42XHA58E, P50XHA58E specifications
Fujitsu, a leading name in the electronics industry, has long been synonymous with high-quality displays. Among their acclaimed offerings are the P50XHA58E and P42XHA58E plasma screens. These models stand out not only for their superior image quality but also for their cutting-edge technologies and user-centric designs.The P50XHA58E is a 50-inch plasma display, while the P42XHA58E measures 42 inches. Both screens utilize Fujitsu's advanced plasma technology, which excels in color accuracy and contrast, delivering deep blacks and vivid colors. This is achieved through a high contrast ratio that enhances image clarity, making both models ideal for various environments, be it commercial or home use.
One of the standout features of these models is their extensive connectivity options. They come equipped with multiple HDMI and DVI inputs, allowing seamless integration with a variety of devices such as DVD players, gaming consoles, and PCs. This versatility ensures that users can easily switch between different sources without compromising on picture quality.
Additionally, both the P50XHA58E and P42XHA58E boast enhanced image processing capabilities. The advanced digital signal processing (DSP) enhances the quality of the source video, resulting in smooth motion and clear details. This is particularly beneficial for fast-paced content, such as sports or action movies, where motion blur can be a concern.
Fujitsu has also prioritized energy efficiency in these models. The displays feature energy-saving modes that help reduce power consumption without sacrificing performance. This is an important consideration for environmentally conscious consumers and businesses aiming to minimize operational costs.
Another characteristic that makes these plasma displays stand out is their thin design and lightweight build. This allows for easy wall mounting or placement in various settings without taking up excessive space. The sleek aesthetics complement modern interior designs, enhancing visual appeal in any space.
In terms of durability, both models are built to last, with robust panels that can withstand the rigors of extensive use, making them perfect for public installations. With high reliability, users can depend on the P50XHA58E and P42XHA58E for consistent performance.
In conclusion, the Fujitsu P50XHA58E and P42XHA58E are exceptional plasma displays that combine advanced technology, energy efficiency, and user-friendly features. They are perfect for anyone seeking high-quality visuals, whether for personal entertainment or commercial applications.