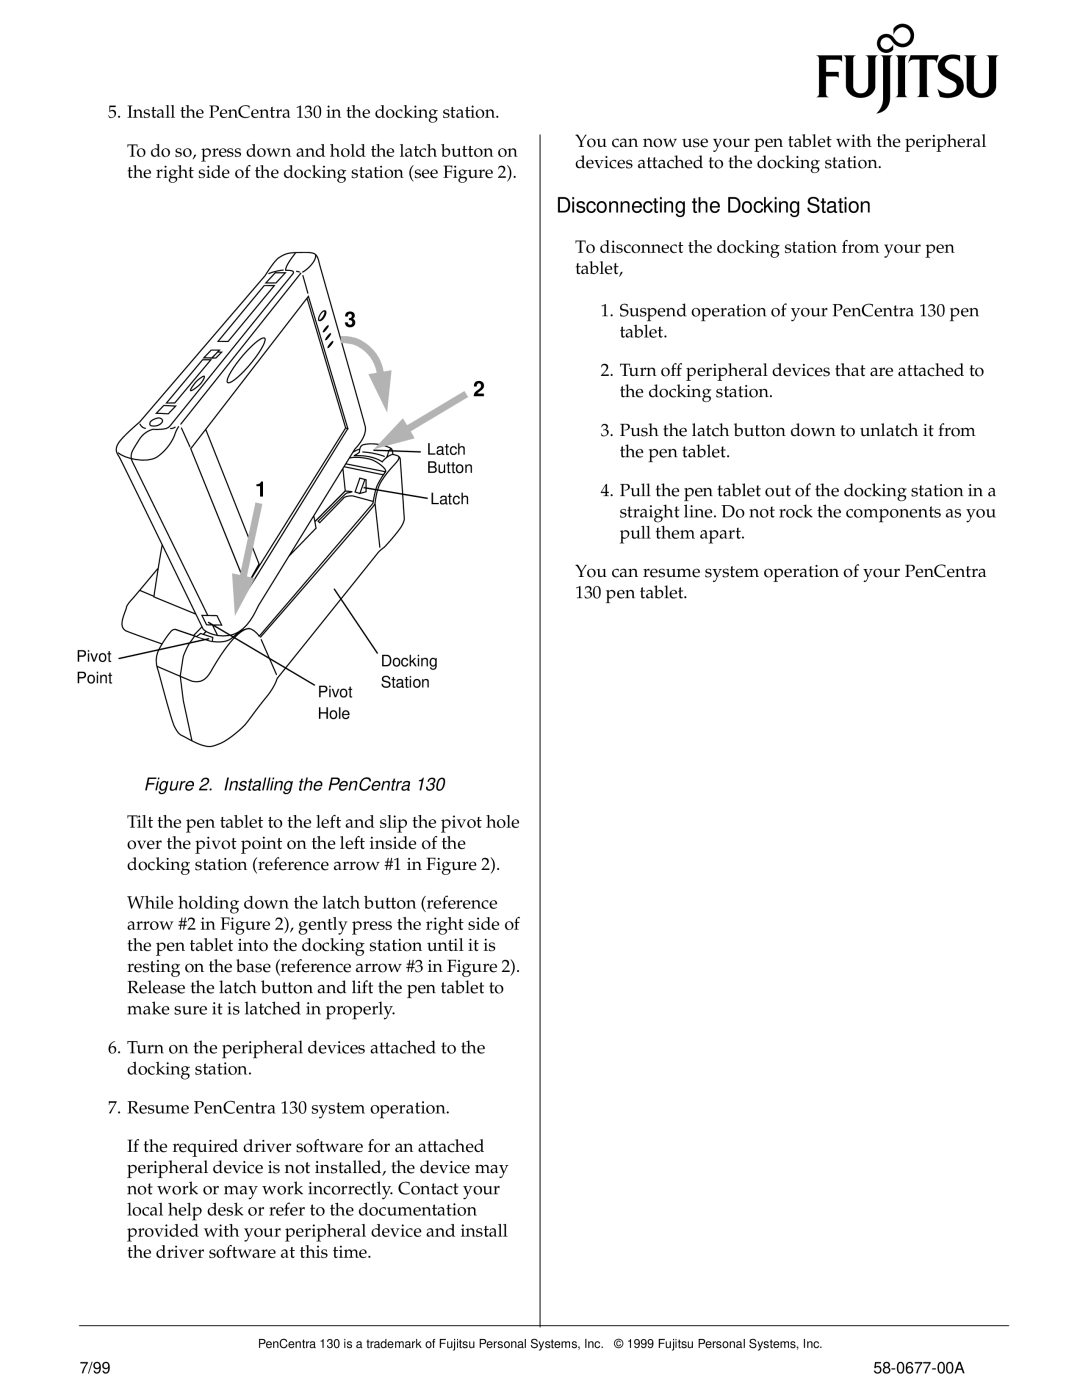
5.Install the PenCentra 130 in the docking station.
To do so, press down and hold the latch button on the right side of the docking station (see Figure 2).
3
![]() 2
2
 Latch
Latch
Button
1![]() Latch
Latch
Pivot |
| Docking |
Point | Pivot | Station |
|
| |
| Hole |
|
Figure 2. Installing the PenCentra 130
Tilt the pen tablet to the left and slip the pivot hole over the pivot point on the left inside of the docking station (reference arrow #1 in Figure 2).
While holding down the latch button (reference arrow #2 in Figure 2), gently press the right side of the pen tablet into the docking station until it is resting on the base (reference arrow #3 in Figure 2). Release the latch button and lift the pen tablet to make sure it is latched in properly.
6.Turn on the peripheral devices attached to the docking station.
7.Resume PenCentra 130 system operation.
If the required driver software for an attached peripheral device is not installed, the device may not work or may work incorrectly. Contact your local help desk or refer to the documentation provided with your peripheral device and install the driver software at this time.
You can now use your pen tablet with the peripheral devices attached to the docking station.
Disconnecting the Docking Station
To disconnect the docking station from your pen tablet,
1.Suspend operation of your PenCentra 130 pen tablet.
2.Turn off peripheral devices that are attached to the docking station.
3.Push the latch button down to unlatch it from the pen tablet.
4.Pull the pen tablet out of the docking station in a straight line. Do not rock the components as you pull them apart.
You can resume system operation of your PenCentra 130 pen tablet.
PenCentra 130 is a trademark of Fujitsu Personal Systems, Inc. © 1999 Fujitsu Personal Systems, Inc.
7/99 |