3.3. Assembly Instructions for Pressure Sprayer Art. No. 875 / 879 / 880
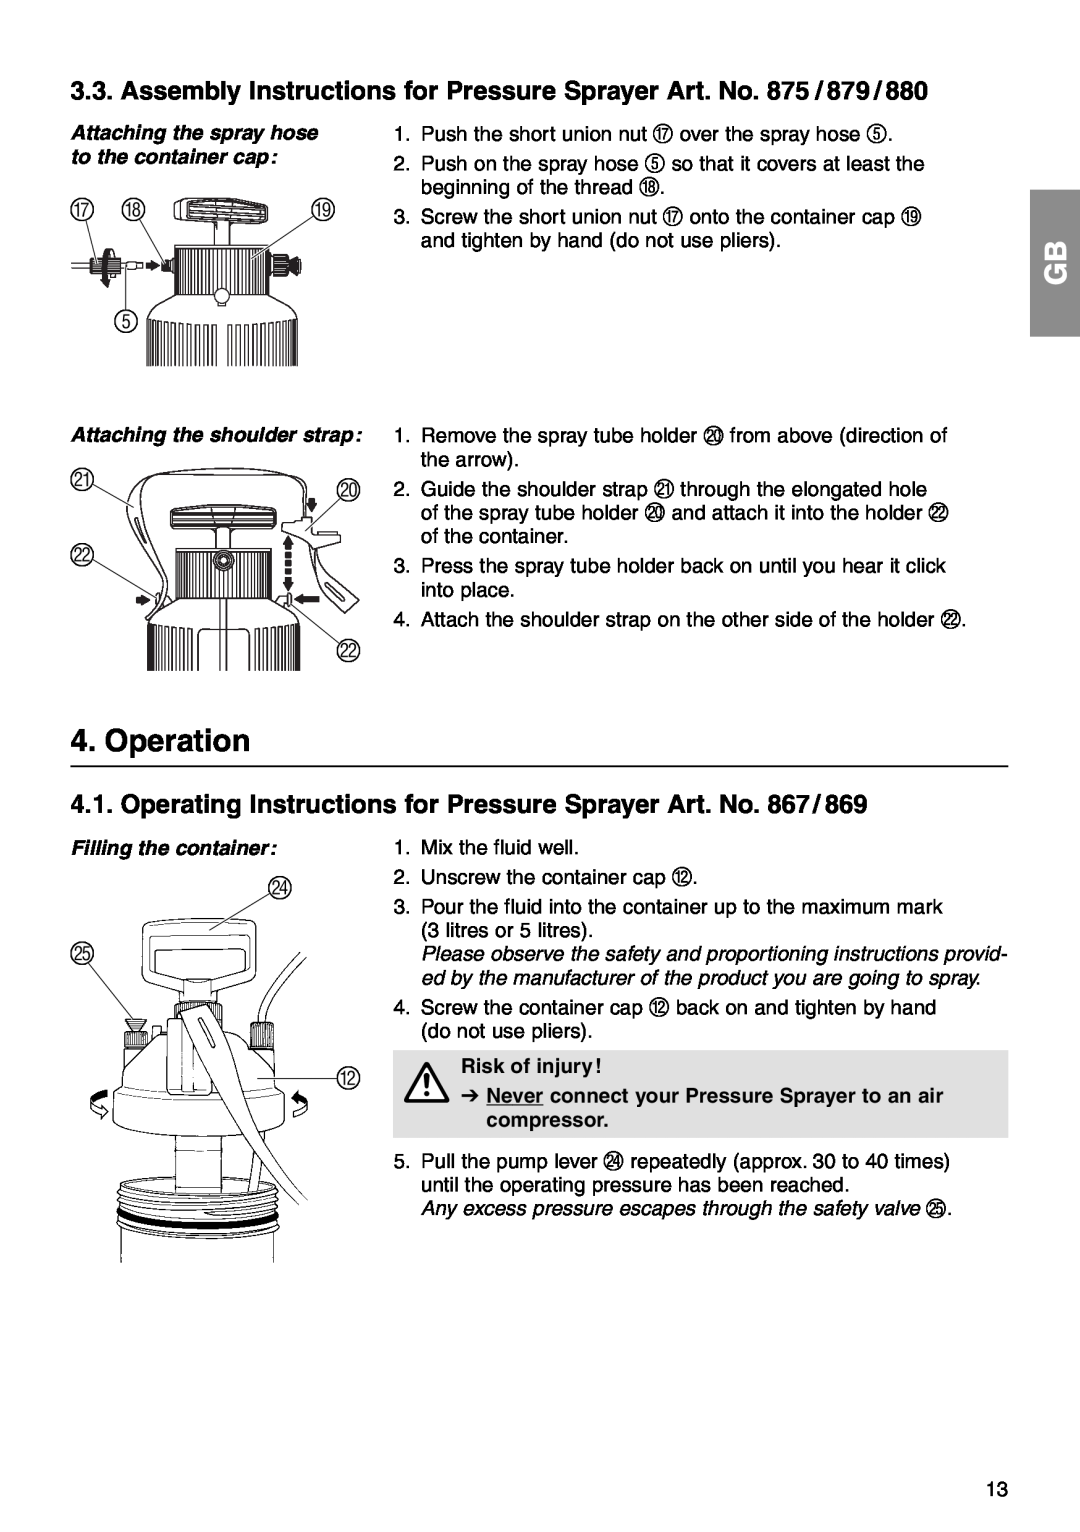
Attaching the spray hose 1. Push the short union nut G over the spray hose 5.
to the container cap:2. Push on the spray hose 5 so that it covers at least the beginning of the thread H.
G H | I | 3. Screw the short union nut G onto the container cap I |
|
| |
|
| and tighten by hand (do not use pliers). |
5
GB
Attaching the shoulder strap:
K | J |
|
L |
L |
1.Remove the spray tube holder J from above (direction of the arrow).
2.Guide the shoulder strap K through the elongated hole of the spray tube holder J and attach it into the holder L of the container.
3.Press the spray tube holder back on until you hear it click into place.
4.Attach the shoulder strap on the other side of the holder L.
4. Operation
4.1. Operating Instructions for Pressure Sprayer Art. No. 867/ 869
Filling the container:
N |
O
1.Mix the fluid well.
2.Unscrew the container cap B.
3.Pour the fluid into the container up to the maximum mark (3 litres or 5 litres).
Please observe the safety and proportioning instructions provid- ed by the manufacturer of the product you are going to spray.
4.Screw the container cap B back on and tighten by hand (do not use pliers).
| Risk of injury! |
B | AV Never connect your Pressure Sprayer to an air |
| compressor. |
| 5. Pull the pump lever N repeatedly (approx. 30 to 40 times) |
| until the operating pressure has been reached. |
| Any excess pressure escapes through the safety valve O. |
13