
C 1030 plus Art. 1862 specifications
The Gardena C 1030 plus Art. 1862 is a sophisticated irrigation controller designed for homeowners and garden enthusiasts who seek an efficient and user-friendly solution for managing garden watering schedules. This versatile product embodies the latest advancements in irrigation technology, optimizing water usage while ensuring plants receive the right amount of moisture.One of the standout features of the Gardena C 1030 plus is its intuitive programming interface. Users can easily set individual watering schedules for different gardens or zones, allowing for customized care based on specific plant needs, soil types, and sun exposure. The controller boasts a clear display that simplifies the setup process, making it accessible for users of all skill levels.
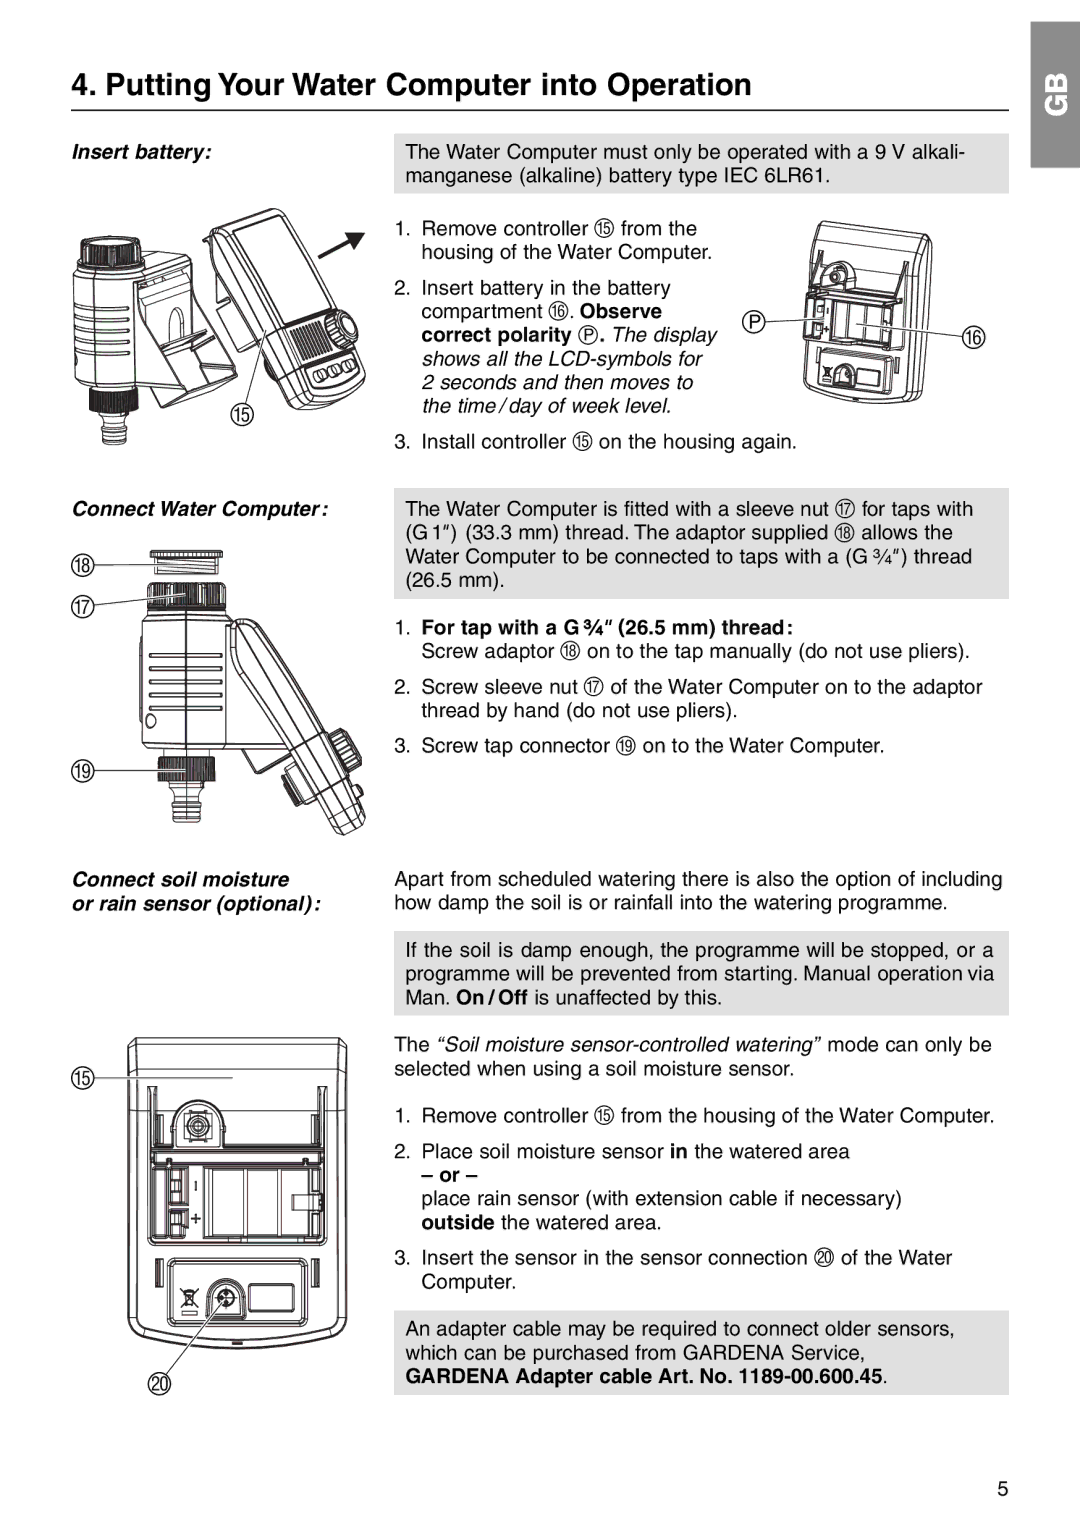
The C 1030 plus operates on a robust scheduling system, which includes options for both automatic and manual watering. With a total of five programmable irrigation start times per day, gardeners have the flexibility to create the most efficient watering plan possible. This feature is particularly advantageous for those with multiple plant types that require varying watering frequencies.
In addition to its scheduling capabilities, the Gardena C 1030 plus Art. 1862 is equipped with advanced weather sensing technology. This innovative feature allows the controller to adjust watering schedules based on real-time weather conditions and soil moisture levels. For instance, if rainfall is detected, the system can automatically skip scheduled watering sessions, helping to conserve water and prevent overwatering.
Another characteristic that sets the C 1030 plus apart is its compatibility with Gardena’s extensive range of irrigation products, from classic hose systems to modern drip irrigation setups. This seamless integration ensures that users can easily expand or customize their irrigation systems as garden needs grow or change.
Additionally, the unit is designed with durability in mind. Constructed for outdoor use, the Gardena C 1030 plus can withstand varying weather conditions without compromising performance. Its user-friendly design and reliable technology make it an ideal choice for anyone looking to enhance their gardening experience while promoting sustainable water practices.
In conclusion, the Gardena C 1030 plus Art. 1862 elevates garden watering management through its user-friendly interface, advanced scheduling options, weather-responsive technology, and compatibility with a wide range of irrigation systems. It represents a significant step towards more sustainable and efficient gardening practices.