ASSEMBLY INSTRUCTIONS Continued
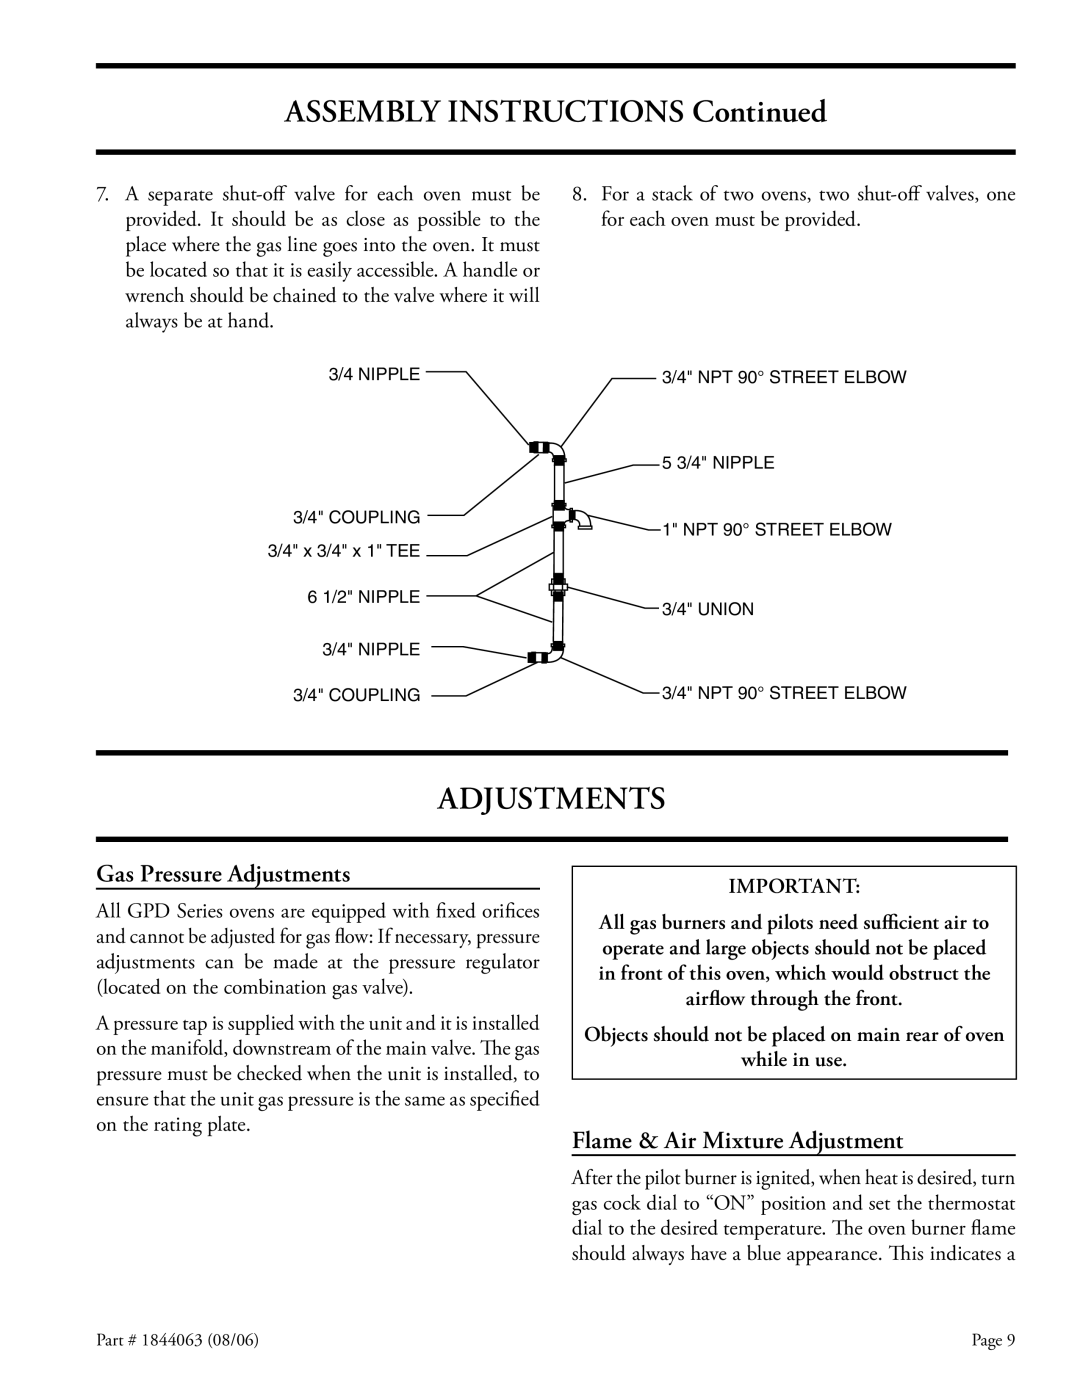
7. A separate | 8. For a stack of two ovens, two |
provided. It should be as close as possible to the | for each oven must be provided. |
place where the gas line goes into the oven. It must |
|
be located so that it is easily accessible. A handle or |
|
wrench should be chained to the valve where it will |
|
always be at hand. |
|
3/4 NIPPLE
3/4" COUPLING 3/4" x 3/4" x 1" TEE
6 1/2" NIPPLE
3/4" NIPPLE
3/4" COUPLING
3/4" NPT 90° STREET ELBOW
5 3/4" NIPPLE
1" NPT 90° STREET ELBOW
3/4" UNION
3/4" NPT 90° STREET ELBOW
ADJUSTMENTS
Gas Pressure Adjustments
All GPD Series ovens are equipped with fixed orifices and cannot be adjusted for gas flow: If necessary, pressure adjustments can be made at the pressure regulator (located on the combination gas valve).
A pressure tap is supplied with the unit and it is installed on the manifold, downstream of the main valve. The gas pressure must be checked when the unit is installed, to ensure that the unit gas pressure is the same as specified on the rating plate.
IMPORTANT:
All gas burners and pilots need sufficient air to operate and large objects should not be placed in front of this oven, which would obstruct the airflow through the front.
Objects should not be placed on main rear of oven
while in use.
Flame & Air Mixture Adjustment
After the pilot burner is ignited, when heat is desired, turn gas cock dial to “ON” position and set the thermostat dial to the desired temperature. The oven burner flame should always have a blue appearance. This indicates a
Part # 1844063 (08/06) | Page 9 |