Cylinder Kit
ITEM | PART NO. | QTY | NAME |
31 | 1 | Rod Eye, | |
33 | 1 | Hex Jam Nut | |
34 | 1 | Cylinder | |
35 | 2 | Fitting, Straight 1/8 NPT X 1/4 | |
36 | 1 | Zinc Anode (Replaceable) | |
37 | 1 | Washer, Flat, Nylon 1/4 ID X .03 | |
38 | 2 | Bushing 1/4 ID X 5/16 OD X 1/4”L | |
40 | 1 | Cylinder Tail Bushing |
35 ![]() 40
40
38 | 34 |
|
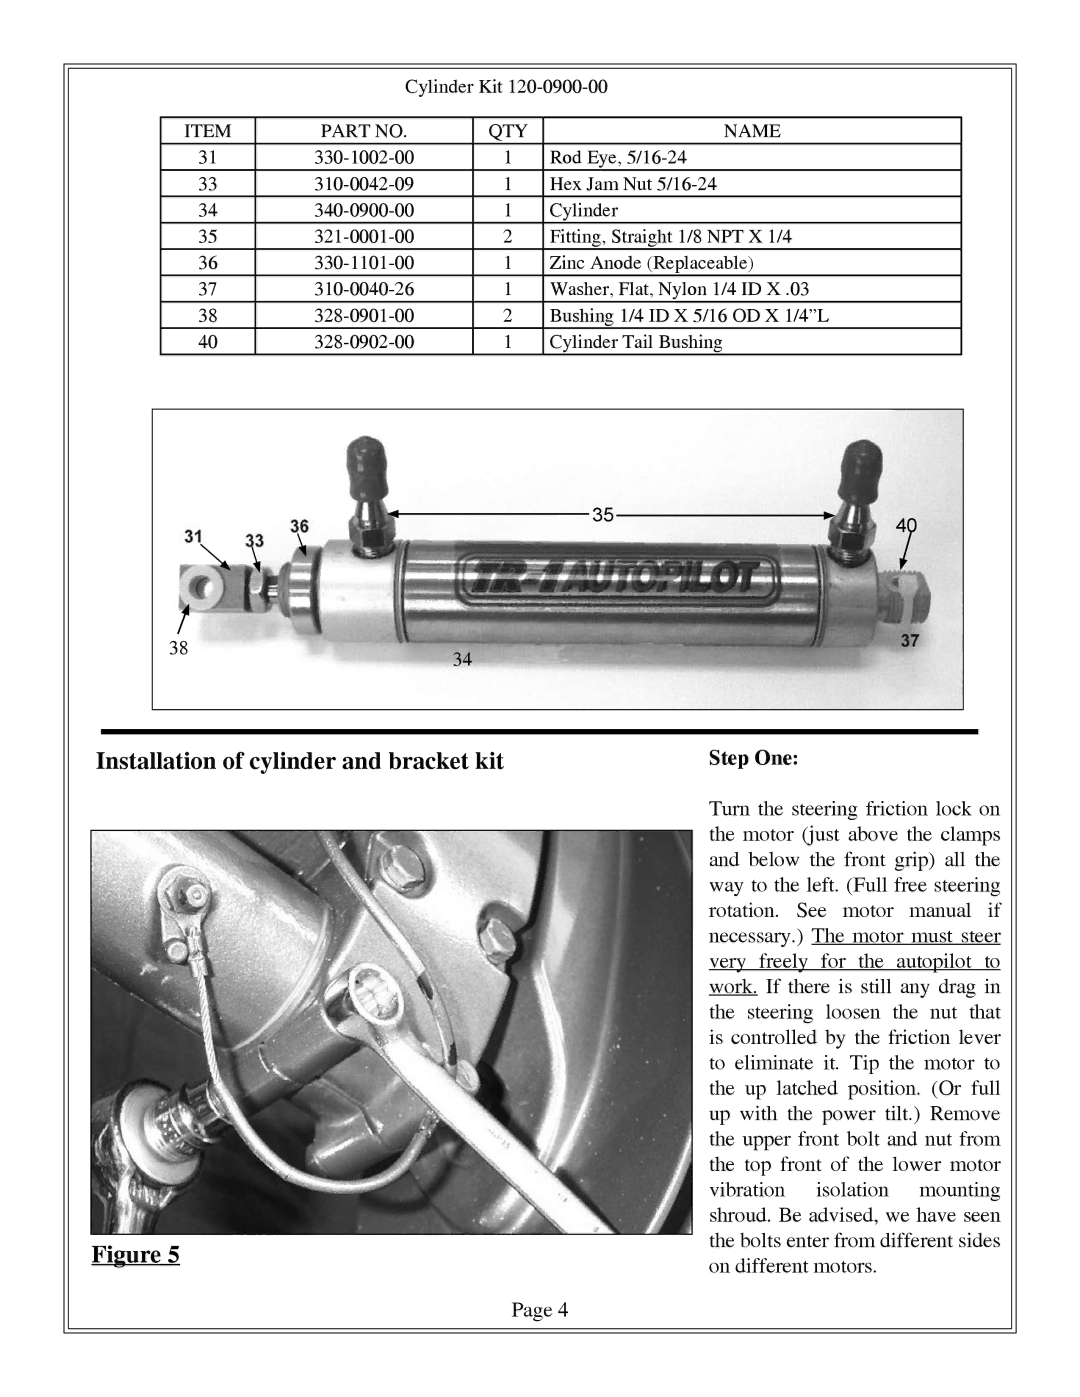
Installation of cylinder and bracket kit
Figure 5
Page 4
Step One:
Turn the steering friction lock on the motor (just above the clamps and below the front grip) all the way to the left. (Full free steering rotation. See motor manual if necessary.) The motor must steer very freely for the autopilot to work. If there is still any drag in the steering loosen the nut that is controlled by the friction lever to eliminate it. Tip the motor to the up latched position. (Or full up with the power tilt.) Remove the upper front bolt and nut from the top front of the lower motor vibration isolation mounting shroud. Be advised, we have seen the bolts enter from different sides on different motors.