Manuals
/
GE
/
Communications
/
Cordless Telephone
GE
2-9751, 2-9752, 2-9753
manual
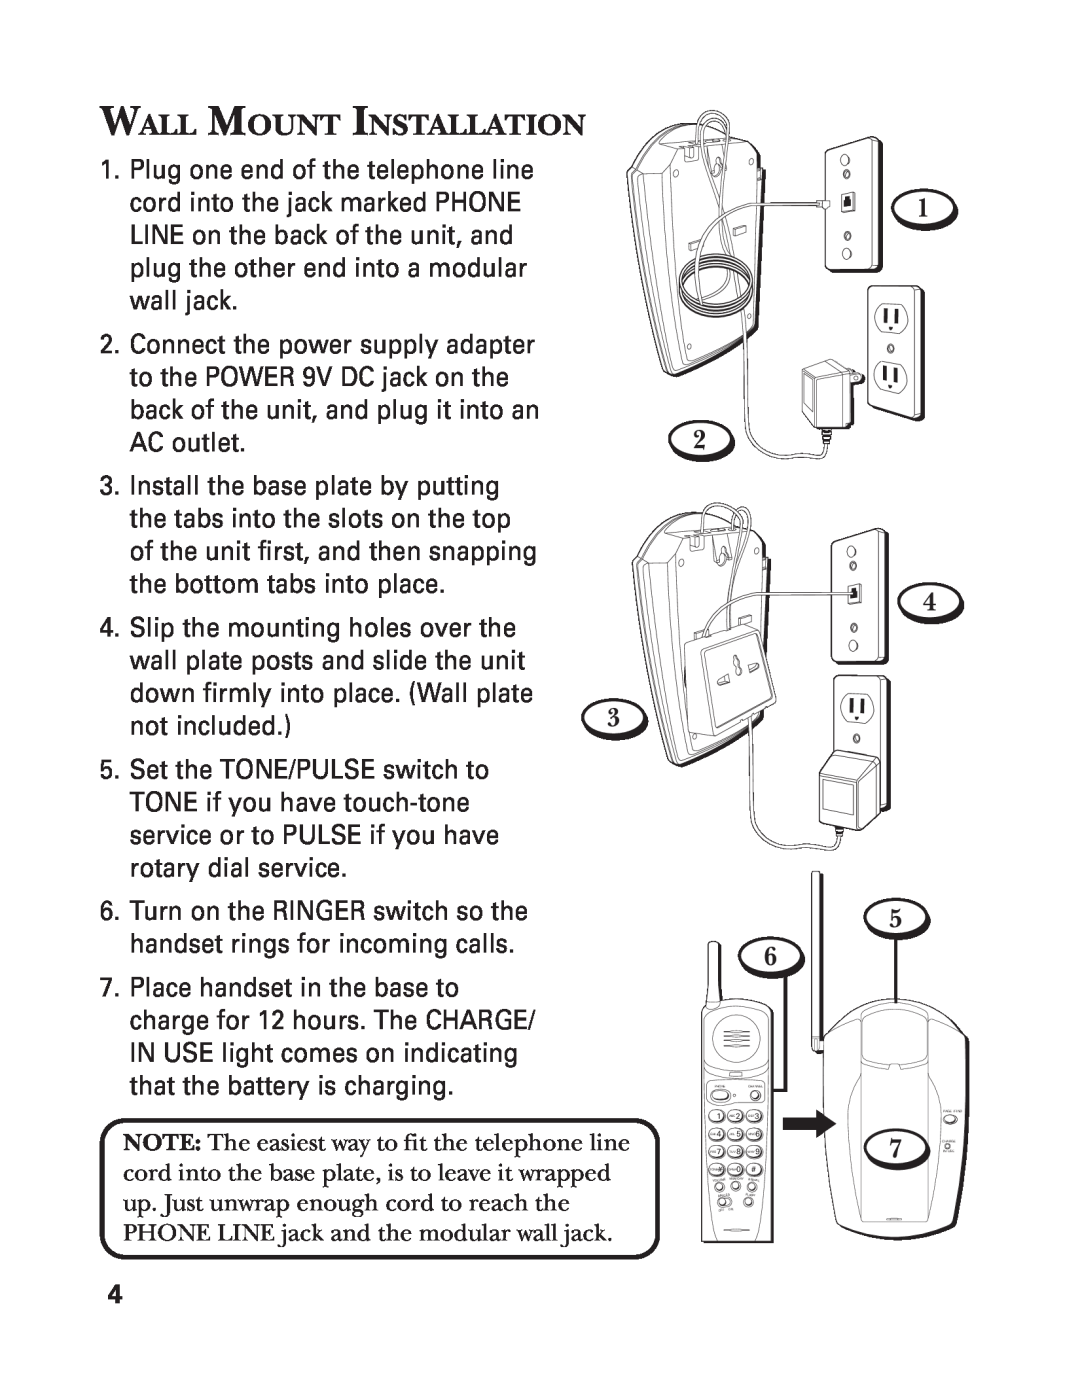
Wall Mount Installation
Models:
2-9751
1
6
20
20
Download
20 pages
24.92 Kb
3
4
5
6
7
8
9
10
Troubleshooting
Install
Warranty
Accessory Order Form
Changing The Battery
Volume Button
Service
Advanced Features
Page 6
Image 6
Page 5
Page 7
Page 6
Image 6
Page 5
Page 7
Contents
2-9751/2-9752/2-9753
We bring good things to life
HEARING AID COMPATIBILITY
FCC REGISTRATION INFORMATION
INTERFERENCE INFORMATION
1 Notification to the Local Telephone Company
TABLE OF CONTENTS
INTRODUCTION
GETTING STARTED
BEFORE YOU BEGIN
INSTALLATION
DESKTOP
WALL MOUNT INSTALLATION
ANYROOM RECHARGE CRADLE
CORDLESS PHONE BASICS
MAKING A CALL
RECEIVING A CALL
FLASH BUTTON
VOLUME BUTTON
RINGER SWITCH
PAGING THE HANDSET
ADVANCED FEATURES
THE MEMORY FEATURE
CHANNEL BUTTON
TEMPORARY TONE
CHANGING THE BATTERY
CHARGE/IN USE light fails to light
GENERAL PRODUCT CARE
Battery is low Page signal Signals an incoming call
HANDSET SOUND SIGNALS
TROUBLESHOOTING GUIDE
channel, or the base might not be receiving power
Clean charging contacts on handset and base with a
Reset the security code by placing the handset in the
security code. If that doesn’t work, charge battery for
Did you program the memory location keys correctly?
SERVICE
CAUSES OF POOR RECEPTION
$14.95
ACCESSORY ORDER FORM
BT-12
5-2412
To fulfill your communicating needs and enhance your life-style, a wide range of GE extension phones, main phones, cordless phones and answering systems is available
INDEX
LIMITED WARRANTY
Top
Page
Image
Contents