
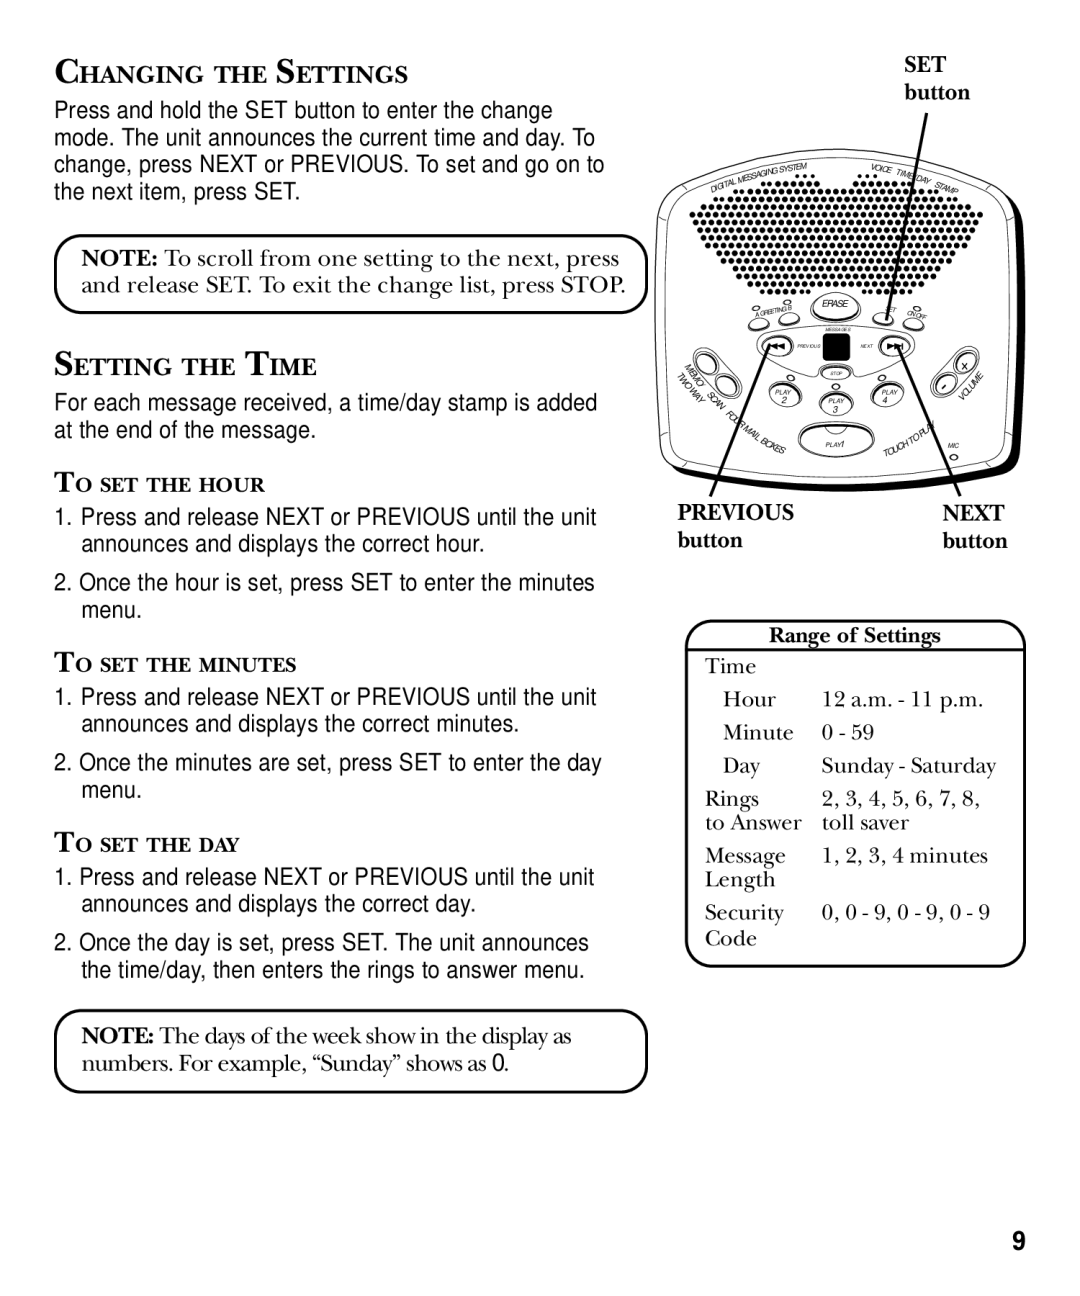
29869 Series specifications
The GE 29869 Series is a notable line of devices specifically designed to enhance the convenience and efficiency of modern communication systems. By integrating advanced technologies with user-friendly features, the GE 29869 Series stands out in the crowded market of electronic devices.One of the main features of the GE 29869 Series is its robust connectivity options. The devices are designed to support multiple communication protocols, ensuring seamless interaction between various devices. This versatility not only simplifies the user experience but also enhances compatibility with other systems. Users can easily connect their phones, computers, or other devices, facilitating a smooth and efficient workflow.
In terms of technology, the GE 29869 Series incorporates cutting-edge innovations such as Bluetooth 5.0 and advanced audio processing capabilities. Bluetooth 5.0 allows for faster data transfer rates and a more extended range, providing users with the freedom to connect without being tethered to fixed locations. This is particularly beneficial in environments where mobility is essential, such as offices or homes with multiple users.
The audio quality of the GE 29869 Series is another highlight. Featuring high-definition audio processing, the devices deliver clear sound quality that enhances communication during calls. Noise-cancellation technology minimizes background interference, allowing users to focus on conversations without distractions. This feature is particularly useful in busy environments, where background noise can disrupt communication.
Durability and design are also essential characteristics of the GE 29869 Series. The devices are built with high-quality materials that ensure longevity and reliability. The sleek, modern design makes them an attractive addition to any home or office setup. Not only do they perform well, but they also blend seamlessly with contemporary aesthetics.
User-friendly interfaces further enhance the appeal of the GE 29869 Series. Intuitive controls and clear displays simplify operation, making it easy for users of all skill levels to navigate the device's functions. This focus on usability ensures that users can fully exploit the device’s capabilities without a steep learning curve.
Overall, the GE 29869 Series represents a significant advancement in communication technology. Through its combination of connectivity options, audio quality, durability, and user-friendly design, it delivers an exceptional user experience that meets the demands of both personal and professional use. Whether for casual conversations or important business discussions, the GE 29869 Series proves to be a reliable and efficient choice.