GENERAL SAFETY INFORMATION

(Continued)

fuel burning equipment to prevent back drafting. Follow the heating equipment manufacturer’s guideline and safety standards such as those published by the National Fire Protection Association (NFPA) and the American Society for Heating, Refrigeration, and Air Conditioning Engineers (ASHRAE), and the local code authorities.

CAUTION: FOR GENERAL VENTILATING USE ONLY. DO NOT USE TO EXHAUST HAZARDOUS OR EXPLOSIVE MATERIALS AND VAPORS.

6.When cutting or drilling into wall or ceiling, do not damage electrical wiring and other hidden utilities.

7.Ducted fans must always be vented to the outdoors.

8.This unit must be grounded.

9.To avoid motor bearing damage and noisy and/or unbalanced impellers, keep drywall spray, construction dust, etc. off power unit.

WARNING: TO REDUCE THE RISK OF FIRE, ELECTRIC SHOCK, DO NOT USE THIS FAN WITH ANY SOLID-STATE SPEED CONTROL DEVICE.

WARNING: DO NOT INSTALL OVER A TUB OR MOUNT IN A SHOWER STALL ENCLOSURE.

10.Do not install into a ceiling thermally insulated to a value greater than R-40.

11.NEVER place a switch where it can be reached from a tub or shower.

WARNING: DO NOT USE IN KITCHENS

WARNING: THIS UNIT IS DESIGNED AND TESTED TO BE A SUPPLEMENTAL HEATER FOR USE WITH A TIMER OR A SWITCH. IT IS NOT INTENDED TO BE USED AS THE PRIMARY SOURCE OF HEAT AND CONTROLLED BY A THERMOSTAT.

INSTALLATION INSTRUCTIONS

CAUTION: MAKE SURE POWER IS SWITCHED OFF AT SERVICE PANEL BEFORE STARTING INSTALLATION.

SECTION 1

Preparing the Unit

1.Unpack fan from the carton and confirm that all pieces are present. In addition to the unit you should have:

1 - Grill with Light Lens

4 - Mounting Rails

1 - Instruction/Safety Sheet

2.Remove the two machine screws holding the light reflector in place. Keep the reflector and screws in the carton until needed so they do not get damaged or lost. (Figure 1).

Screws

Figure 1

3.Remove the wire compartment cover by loosening the two screws holding the cover in place (Figure 2)

Screws

Wire


Compartment


Cover

Figure 2


WARNING: DO NOT INSTALL OVER A TUB OR MOUNT IN A SHOWER STALL ENCLOSURE.

4.Choose the location for your unit. To ensure the best air and sound performance, it is recommended that the length of ducting and the number of elbows be kept to a minimum, and that insulated hard ducting be used. Larger duct sizes will reduce noise and airflow restrictions. This fan will require at least 7" of clearance in the ceiling, and will mount through drywall up to 3/4" thick. The fan can be mounted directly to the joist using the mounting tabs on the side of the housing or between

16" on center joists using the 4 provided mounting rails.

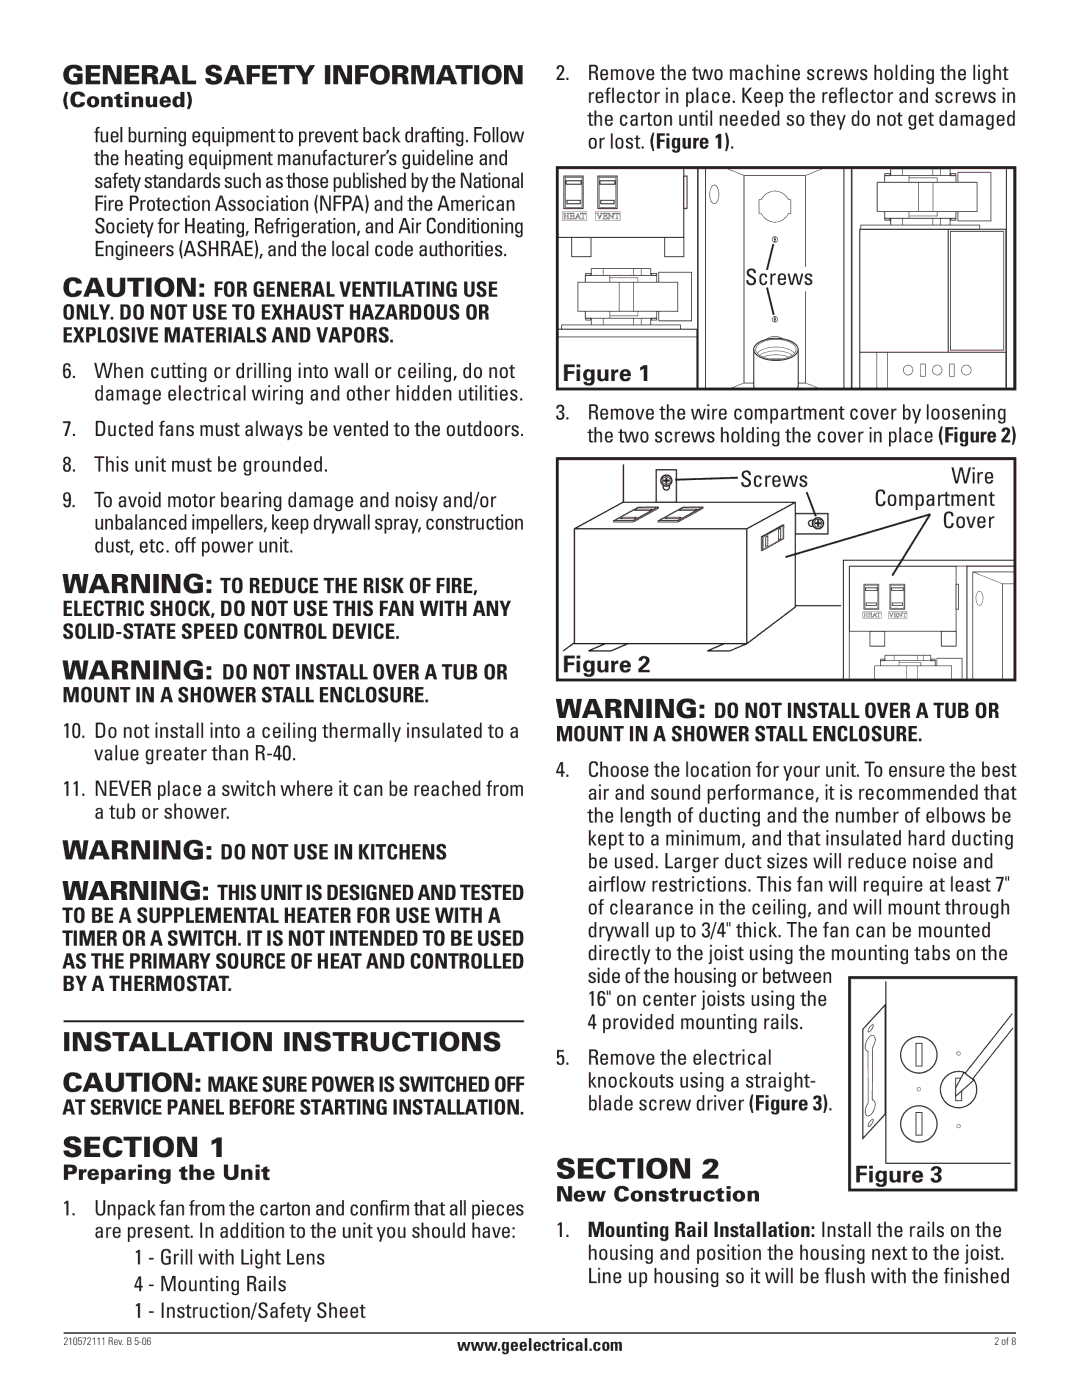
5. Remove the electrical knockouts using a straight- blade screw driver (Figure 3).

SECTION 2

Figure 3

New Construction


1.Mounting Rail Installation: Install the rails on the housing and position the housing next to the joist. Line up housing so it will be flush with the finished

210572111 Rev. B 5-06

www.geelectrical.com

2 of 8


Page 2
Image 2
GE BFLH85L, BFLH70L manual Section, Screws Wire, Cover, Preparing the Unit, New Construction

BFLH70L, BFLH85L specifications

The GE BFLH85L and BFLH70L are innovative refrigeration solutions designed to provide efficient food storage while offering user-friendly features and advanced technology. Both models excel in blending functionality with modern design, making them attractive additions to any kitchen.

One of the defining characteristics of both the BFLH85L and BFLH70L is their energy efficiency. Equipped with advanced cooling systems, these refrigerators are designed to minimize energy consumption while maintaining optimal temperature levels. This results in significant savings on utility bills while being environmentally friendly.

The BFLH85L boasts an impressive storage capacity, making it ideal for families or individuals who require ample space. It includes a variety of adjustable shelving options, allowing users to customize the interior layout to suit their storage needs. The model also features high-efficiency LED lighting, which illuminates the interior and provides enhanced visibility without generating excess heat.

On the other hand, the BFLH70L is slightly more compact, making it suitable for smaller kitchens or homes. Despite its smaller size, it incorporates similarly thoughtful design elements, such as flexible storage solutions and high LED lighting. Both models feature humidity-controlled crisper drawers, which help to prolong the freshness of fruits and vegetables by regulating moisture levels.

In terms of technology, the GE BFLH85L and BFLH70L come equipped with innovative temperature management systems. Such systems ensure consistent cooling throughout the refrigerator, preventing hot spots and maintaining uniformity. The smart controls enable users to monitor and adjust settings easily.

Another standout feature is the noiseless operation. Both models utilize special compressor designs that reduce noise levels, creating a more pleasant kitchen environment. Additionally, the appliances feature a sleek exterior design that integrates seamlessly with modern home aesthetics.

Safety is also prioritized in both BFLH85L and BFLH70L models. Child locks and secure shelving provide peace of mind for families. Digital temperature displays offer real-time feedback, so users can monitor internal conditions at a glance.

In conclusion, the GE BFLH85L and BFLH70L refrigerators showcase an impressive balance of size, efficiency, and modern technology. With their thoughtful design and advanced features, they meet the diverse needs of today's consumers while providing reliable and stylish food storage solutions.